A few weeks ago, I bought a broken switch lite from a game shop for 20$ and I’ve been trying to get it running with no luck; it has no power and no charge.
When I bought it, someone at the shop had very briefly looked it over, but nothing past just looking at the inside to see if it was water damaged or anything. The console was also very beat up. There was a note on it that said “Bad screen?” and the battery was missing. I found a ton of shorts all over the board (marked with red in the pictures below) and the usbc port was very mangled so I installed a new one without any problems. I did double check that the shorts were the same with the original usbc, with the port removed, and after installing the new one to make sure I didn’t cause any new issues myself.
After changing the port I partially reassembled it and tried to turn it on with a known good battery, but It did nothing, so I checked that the battery was connected properly, and there was the proper voltage at the test point for the connector. I also tested it on a usb tester and it took no charge at all.
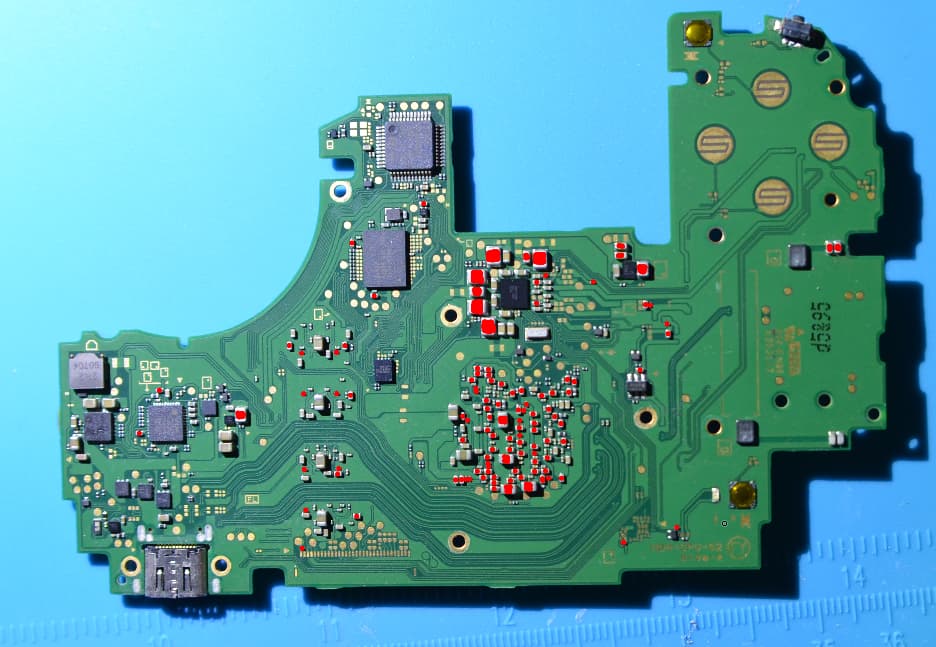
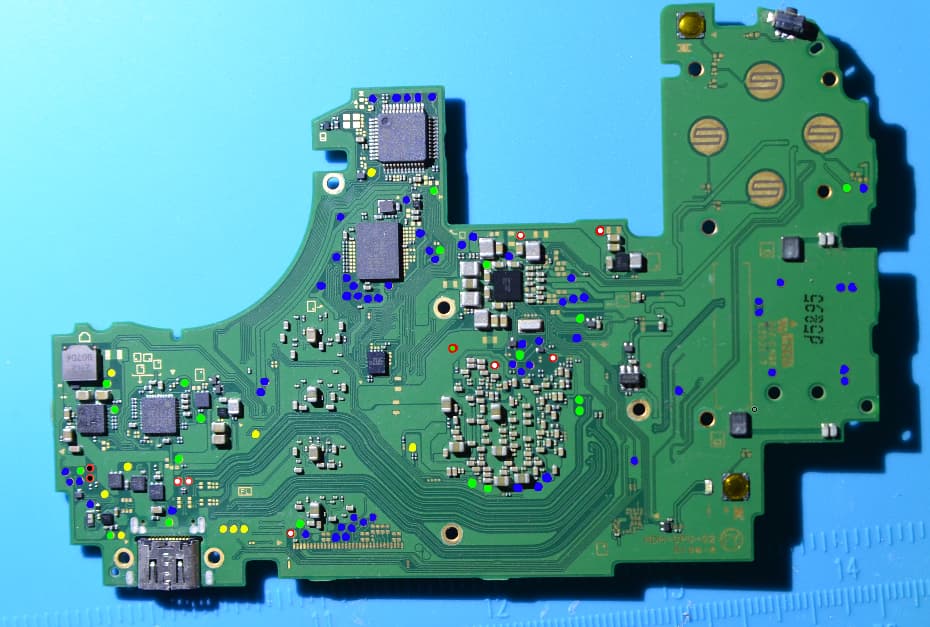
everything marked as a short is what showed continuity on my multimeter that I thought shouldn’t, some stuff may be shorting that is not marked because I couldn’t get to it with my multimeter if it was in a very tight place, but I at least tried to get a read on every cap pictured. Since marking the image I’ve also learned that some of the capacitors below the APU can have false positives due to low resistance to its worth noting that was not taken into account.
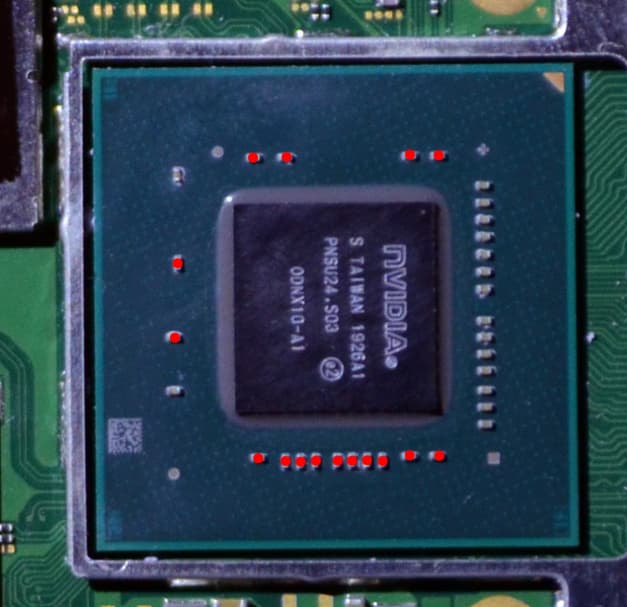
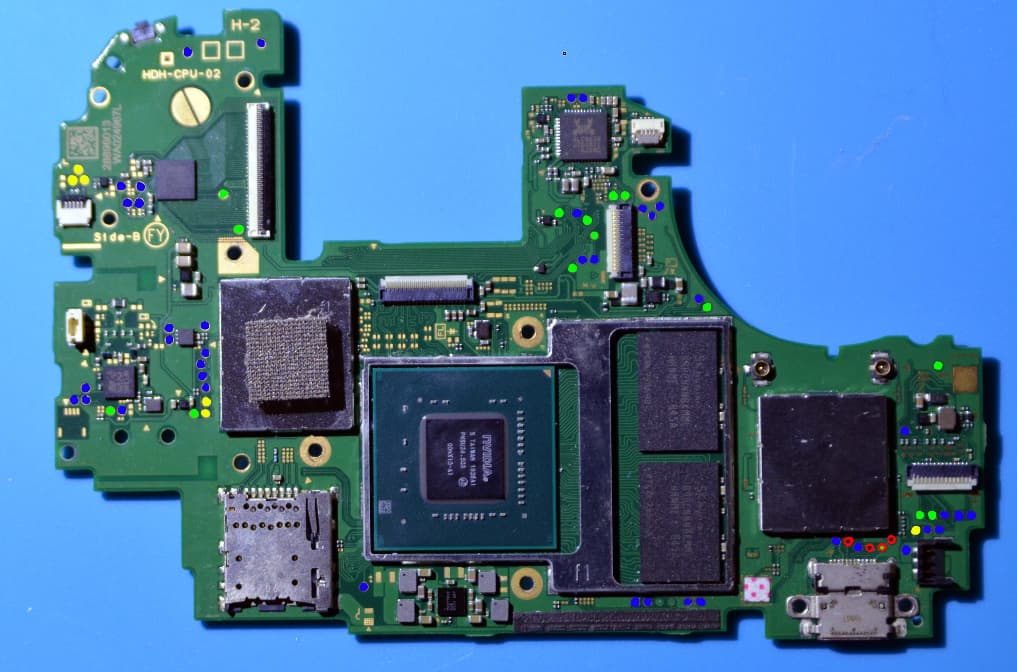
So far, in addition to what’s mentioned above, I’ve removed the m92 to verify that wasn’t the cause and replaced it with a new one just to be safe, and I’ve removed the capacitor next to the m92 that I’ve been told is linked to the APU to verify it was being shorted and was not the short itself. I also followed a guide showing the correct voltage drops that should be present at all the standard test points on the board and marked my findings in the images below.
A blue dot represents a near perfect measurement, about +/-0.025v
A green dot represents a good measurement but not perfect, about +/-0.05v
A yellow dot represents a measurement that was off enough to possibly indicate an issue but could still be ok
And a red dot indicates an issue, with a green mark in the center meaning too high of a voltage drop, a blue mark in the center meaning too low, a white mark in the center means its just a short to ground (measuring a voltage drop of/near 0) and a black mark indicating it read nothing at all (just an OL on the multimeter)
At this point I’m running out of ideas. I’m aware its probably not worth saving but I got it as a project to learn some more advanced electronics repair skills on so if there is still stuff to try, I wanna try it. Even if I cant fix it I just wanna know what’s actually wrong with it lol.
My only suspects at this point are the max77 or maybe the emmc given what all is affected, but I’m pretty new to this stuff so I really don’t have much of an idea. Thanks for reading, all help is appreciated!