Hi, i’m new here and I’m from Italy. My passion/hobby is to buy broken devices and try to fix it (when possible). Now that’s the point, i bought a Nintendo switch lite a few days ago, the only description was: not turning on.
So ok, i opened it to check what’s wrong and this is what I found…
[ I can’t upload the image. The site give me an error, sorry]
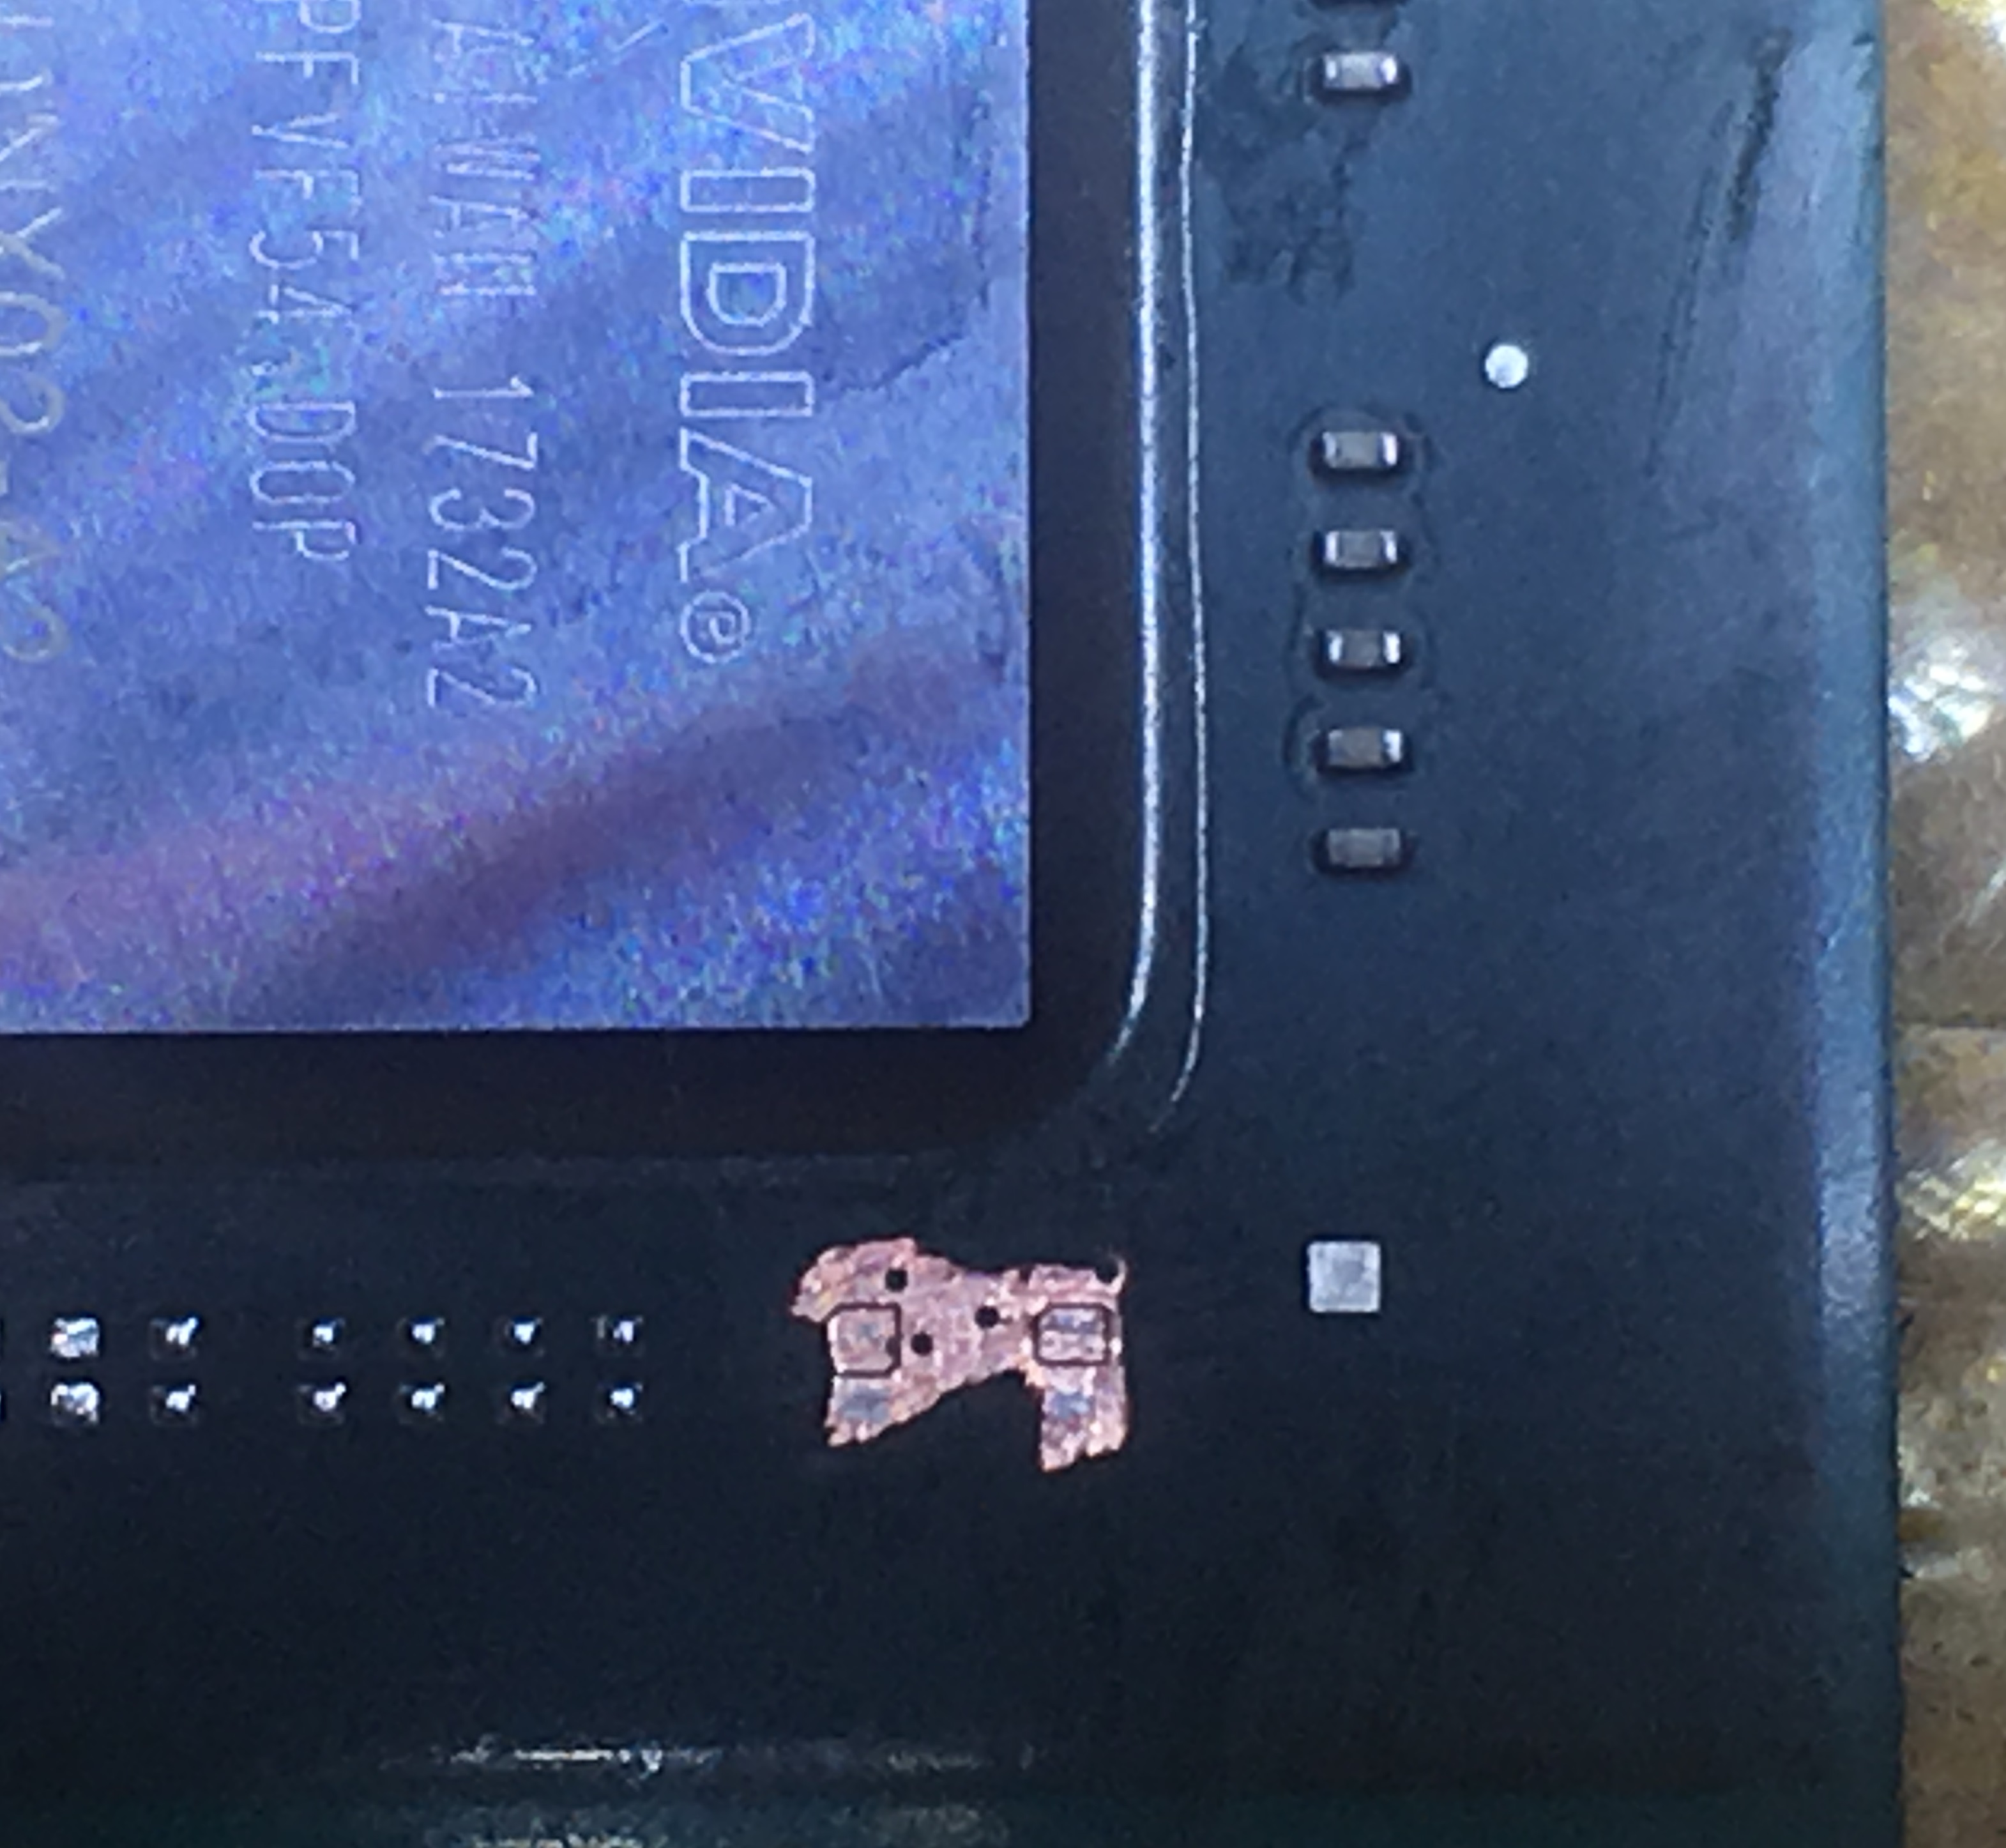
It came without the plate and with 3 missing caps on the APU!
Now my first question is: WHY!?
And the second is if this board can revive again without these ripped caps.
So, can i spend time on it or i have my board for spares?
Thank you for your answers.
If we are talking about the caps directly on the SoC wafer, agree with jkyoho, probably failed modchip install and/or he was installing it for diagnosis support.
They are just bypass caps though and the console (assuming no other issues) will still boot without them… though - they’re there for a reason, so replace if you can.
Hello guys,nice to meet you.
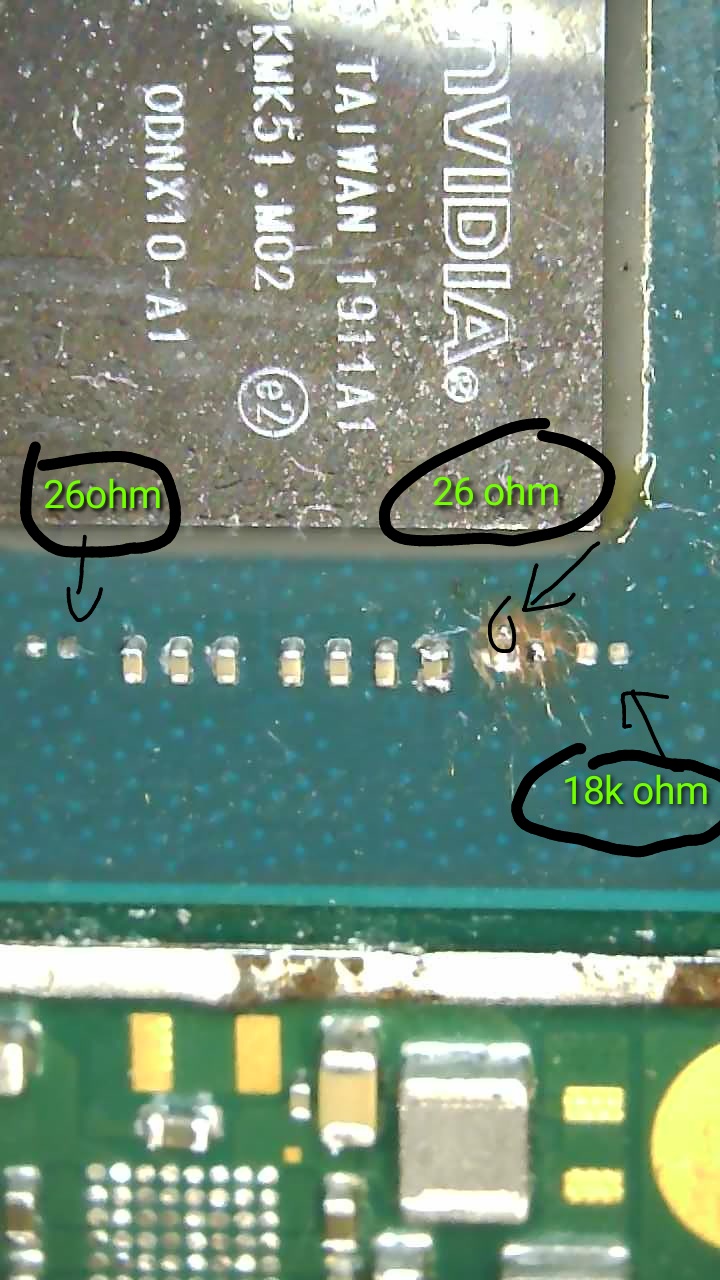
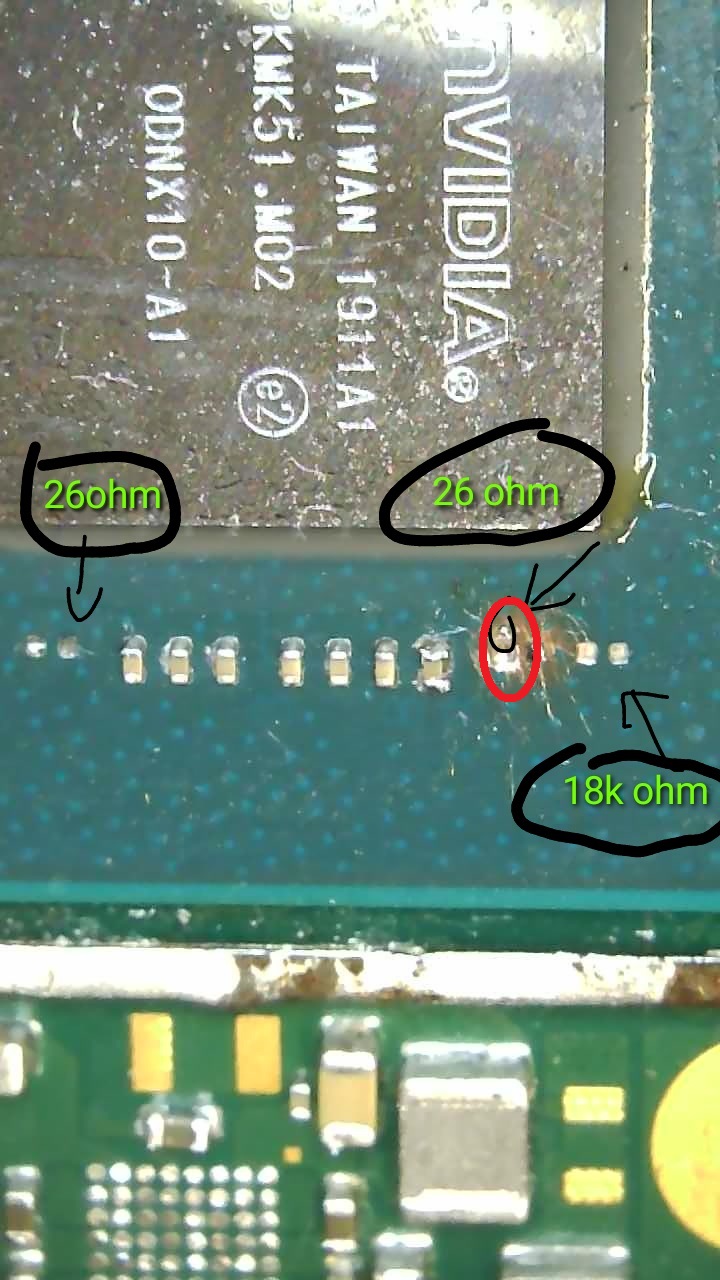
Yes I did some research in meantime and the first bottom one on the left and two others on the right are the missing ones. I found some other soldering bridges with ripped pads near the lcd connector that aren’t from the switch. Ok so there was a mod chip there! I think that the switch has other issues or 1 other issue beyond the missing caps. Do you know the value of this caps please?
I’ll get the values tomow when I get a min for the cap far left and right (though i guess they’ll be 100nf), the other one is a lost cause, you’ll likely have to scratch back the wafer to remove a potential bridge there of which I’ll dig out an image I provided for someone else to demonstrate what I mean.
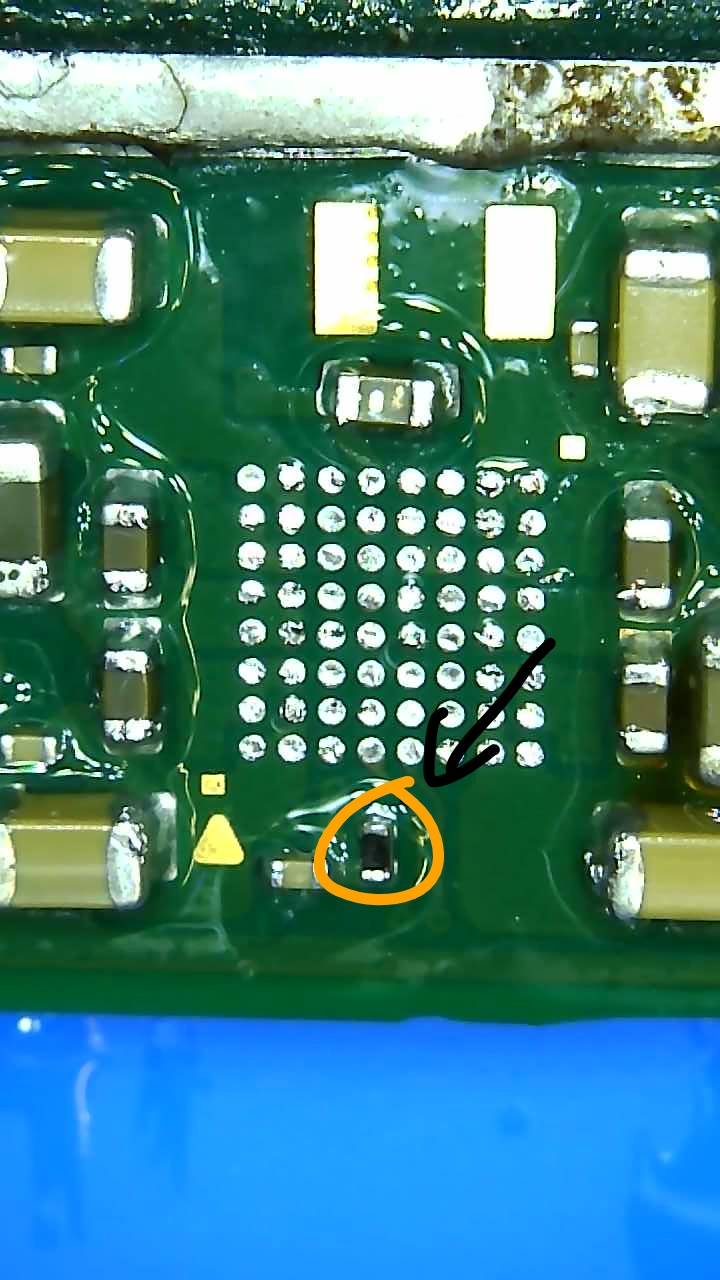
There’s a few caps also which I’ll suggest for you to remove also urrounding the [missing] Max IC as well as the 10K resistor which will likely cause you issues too.
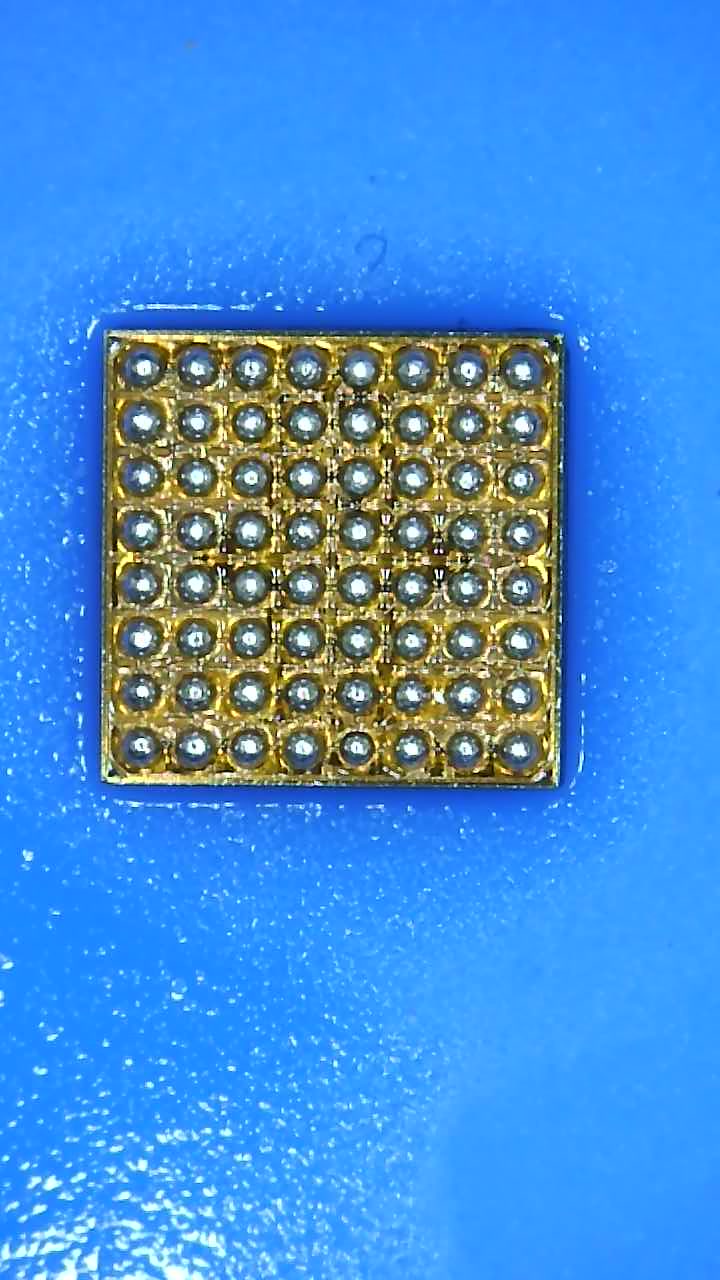
Removing the MAX IC is my fault. I began with a general cap test around all the power ic’s to find a short. So i found around the 2 Max ic a low ohm reading ( ~20ohms). The one under the Soc was the worst, there where the majority of "shorts" so i decided to remove it:grimacing: thinking it was an IC fault.
I did a big mistake! I reballed it yet but I’m waiting to resolder it, i want first find out where the real issue is.
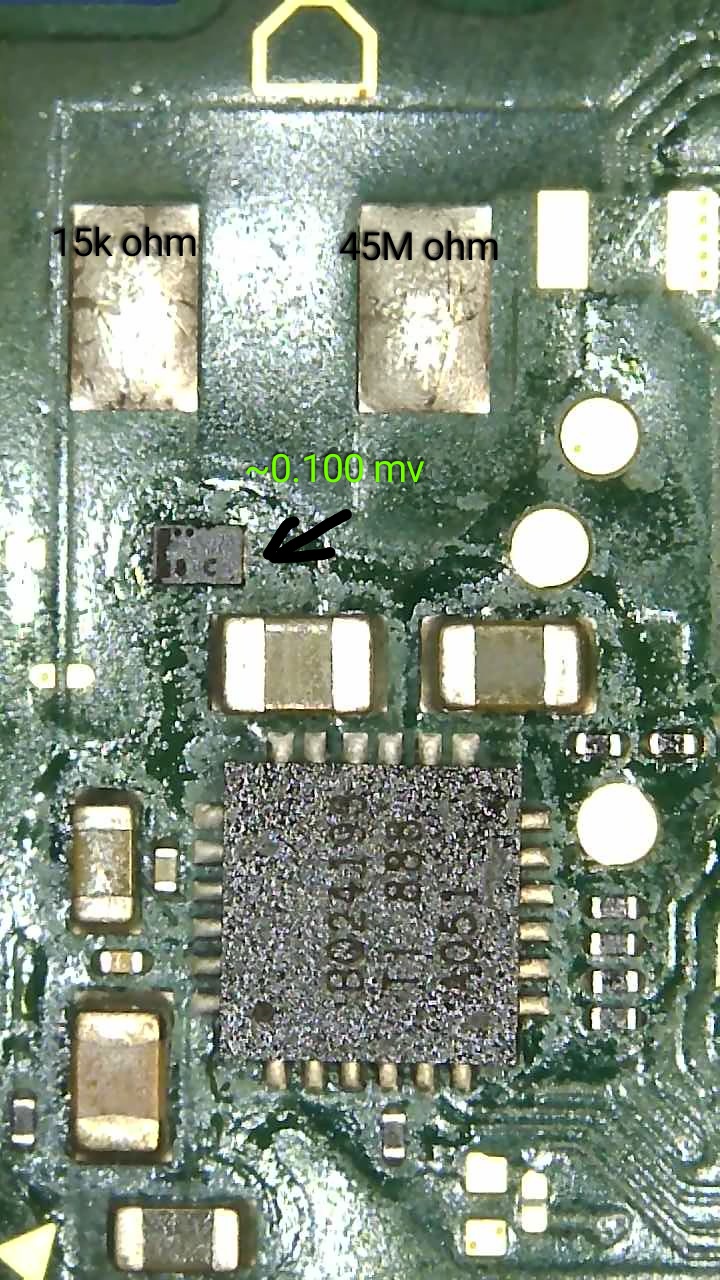
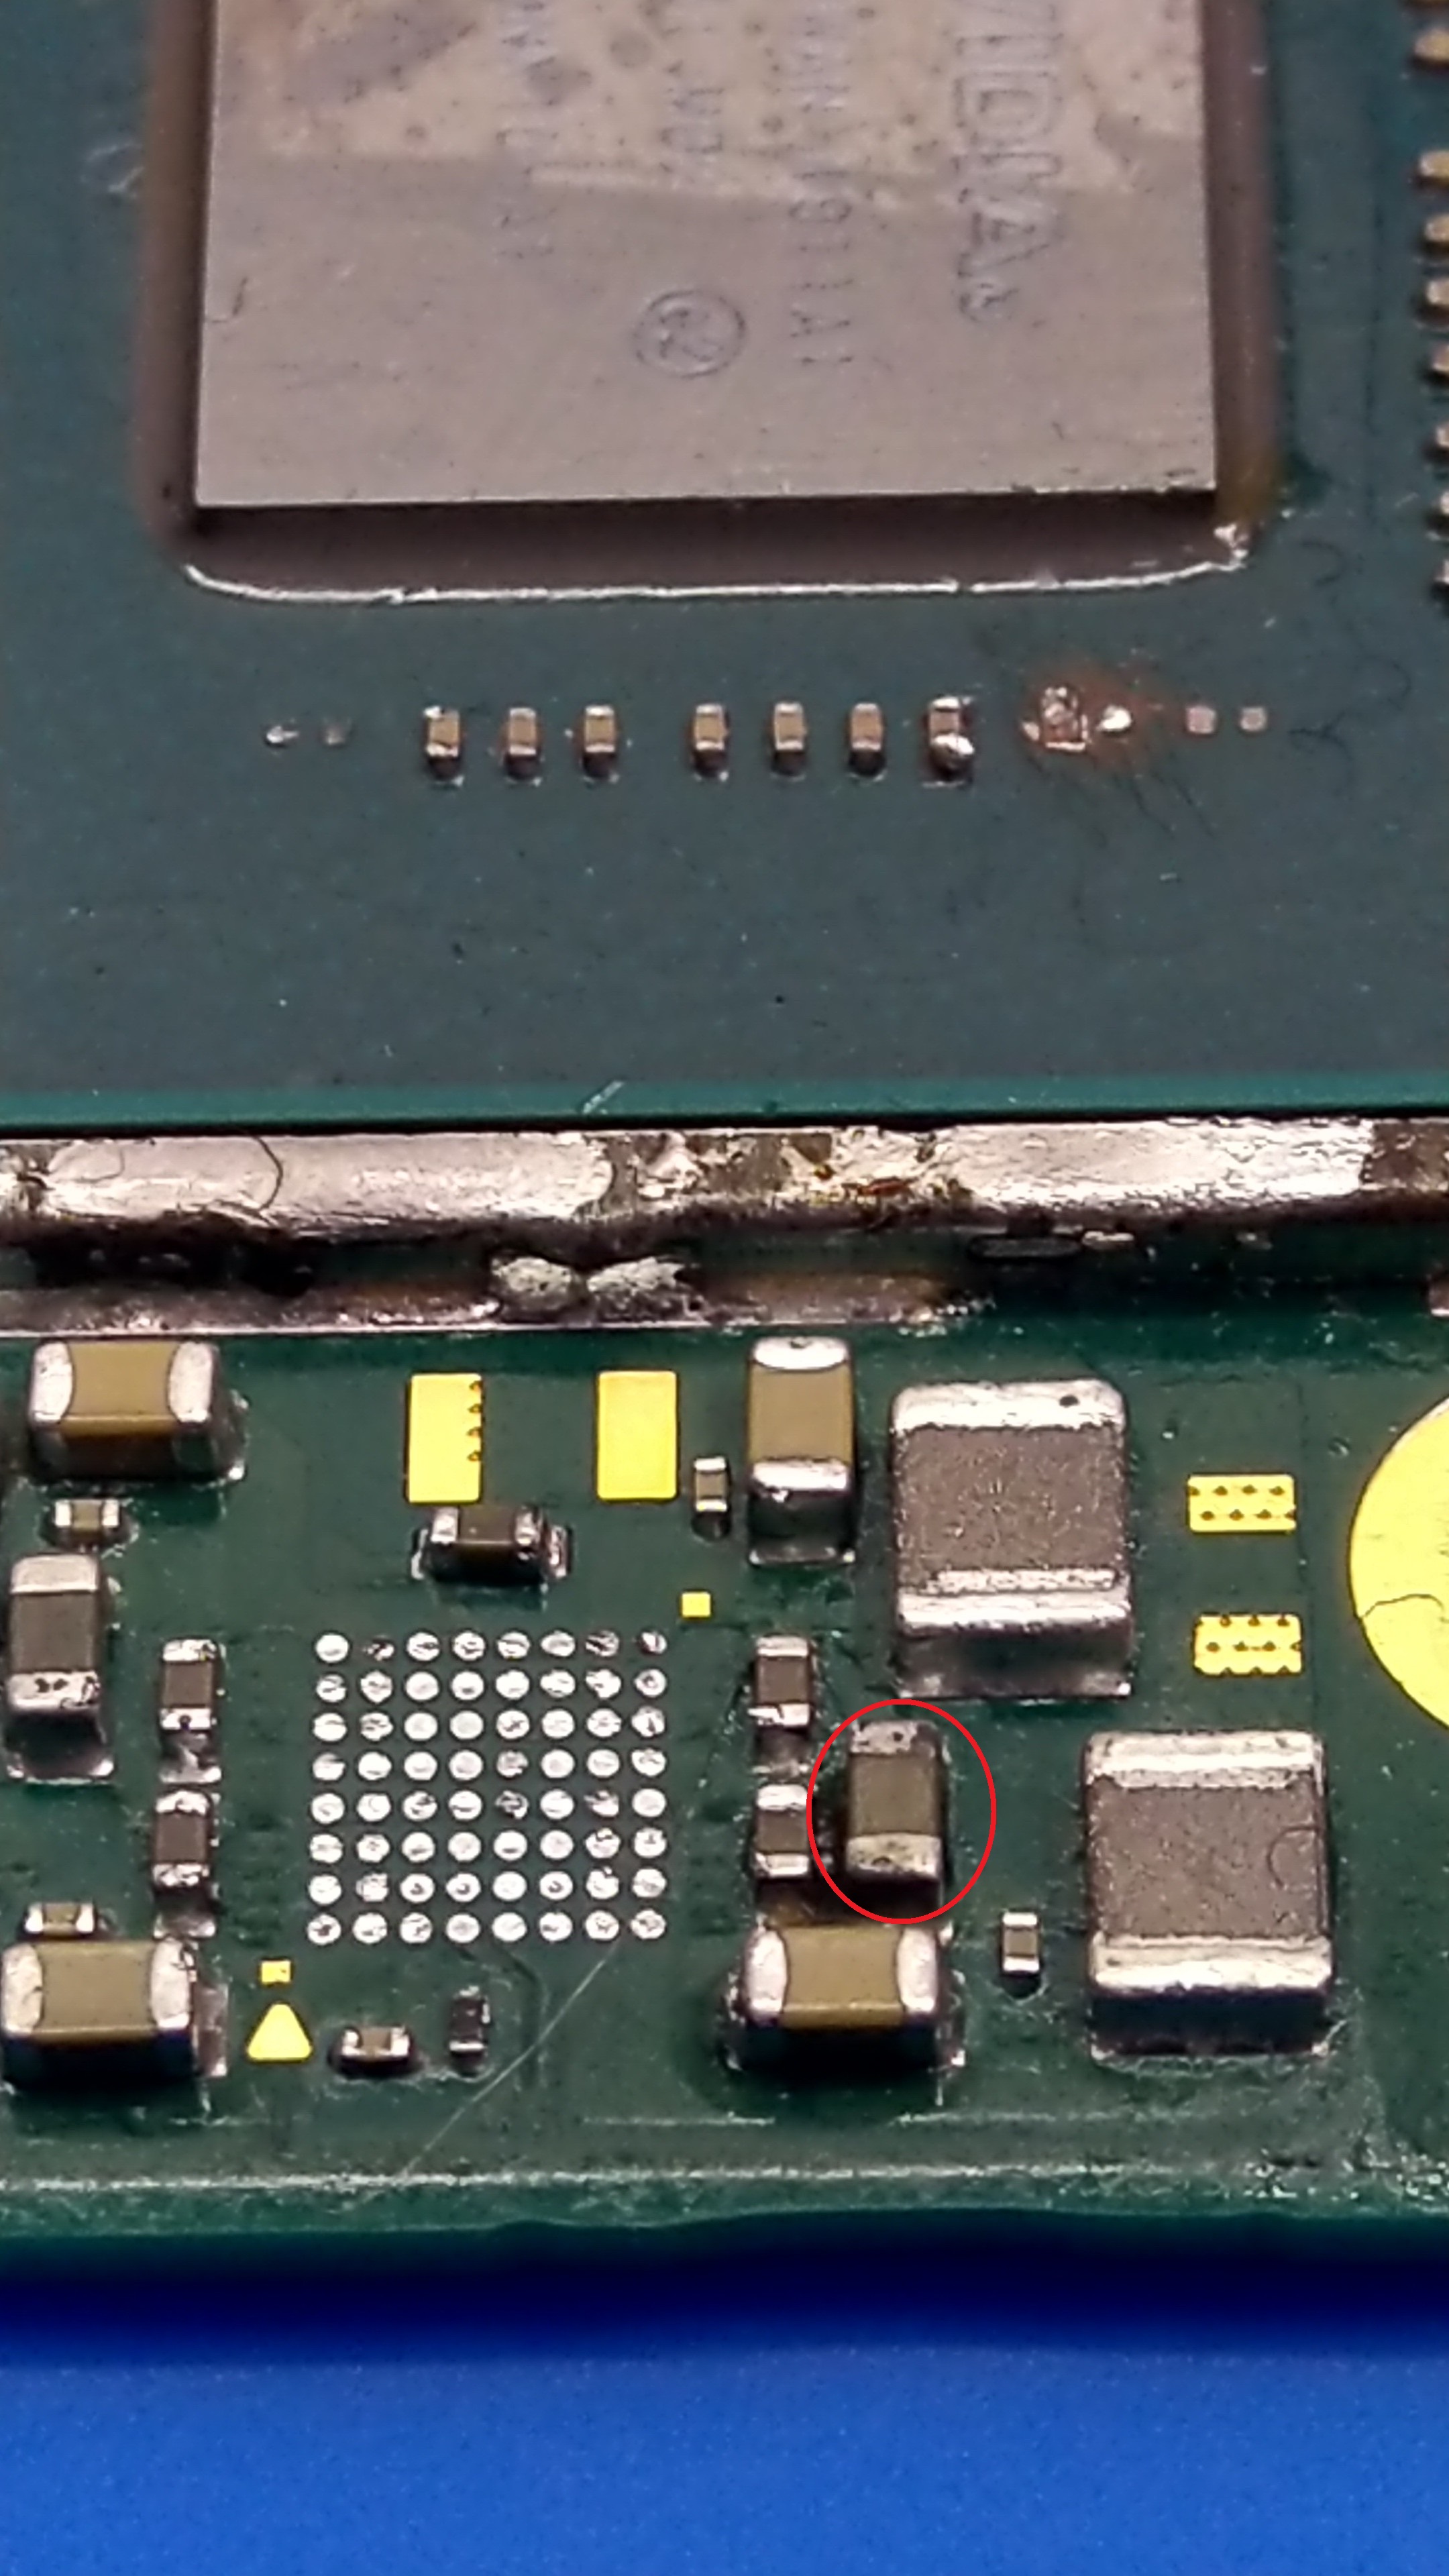
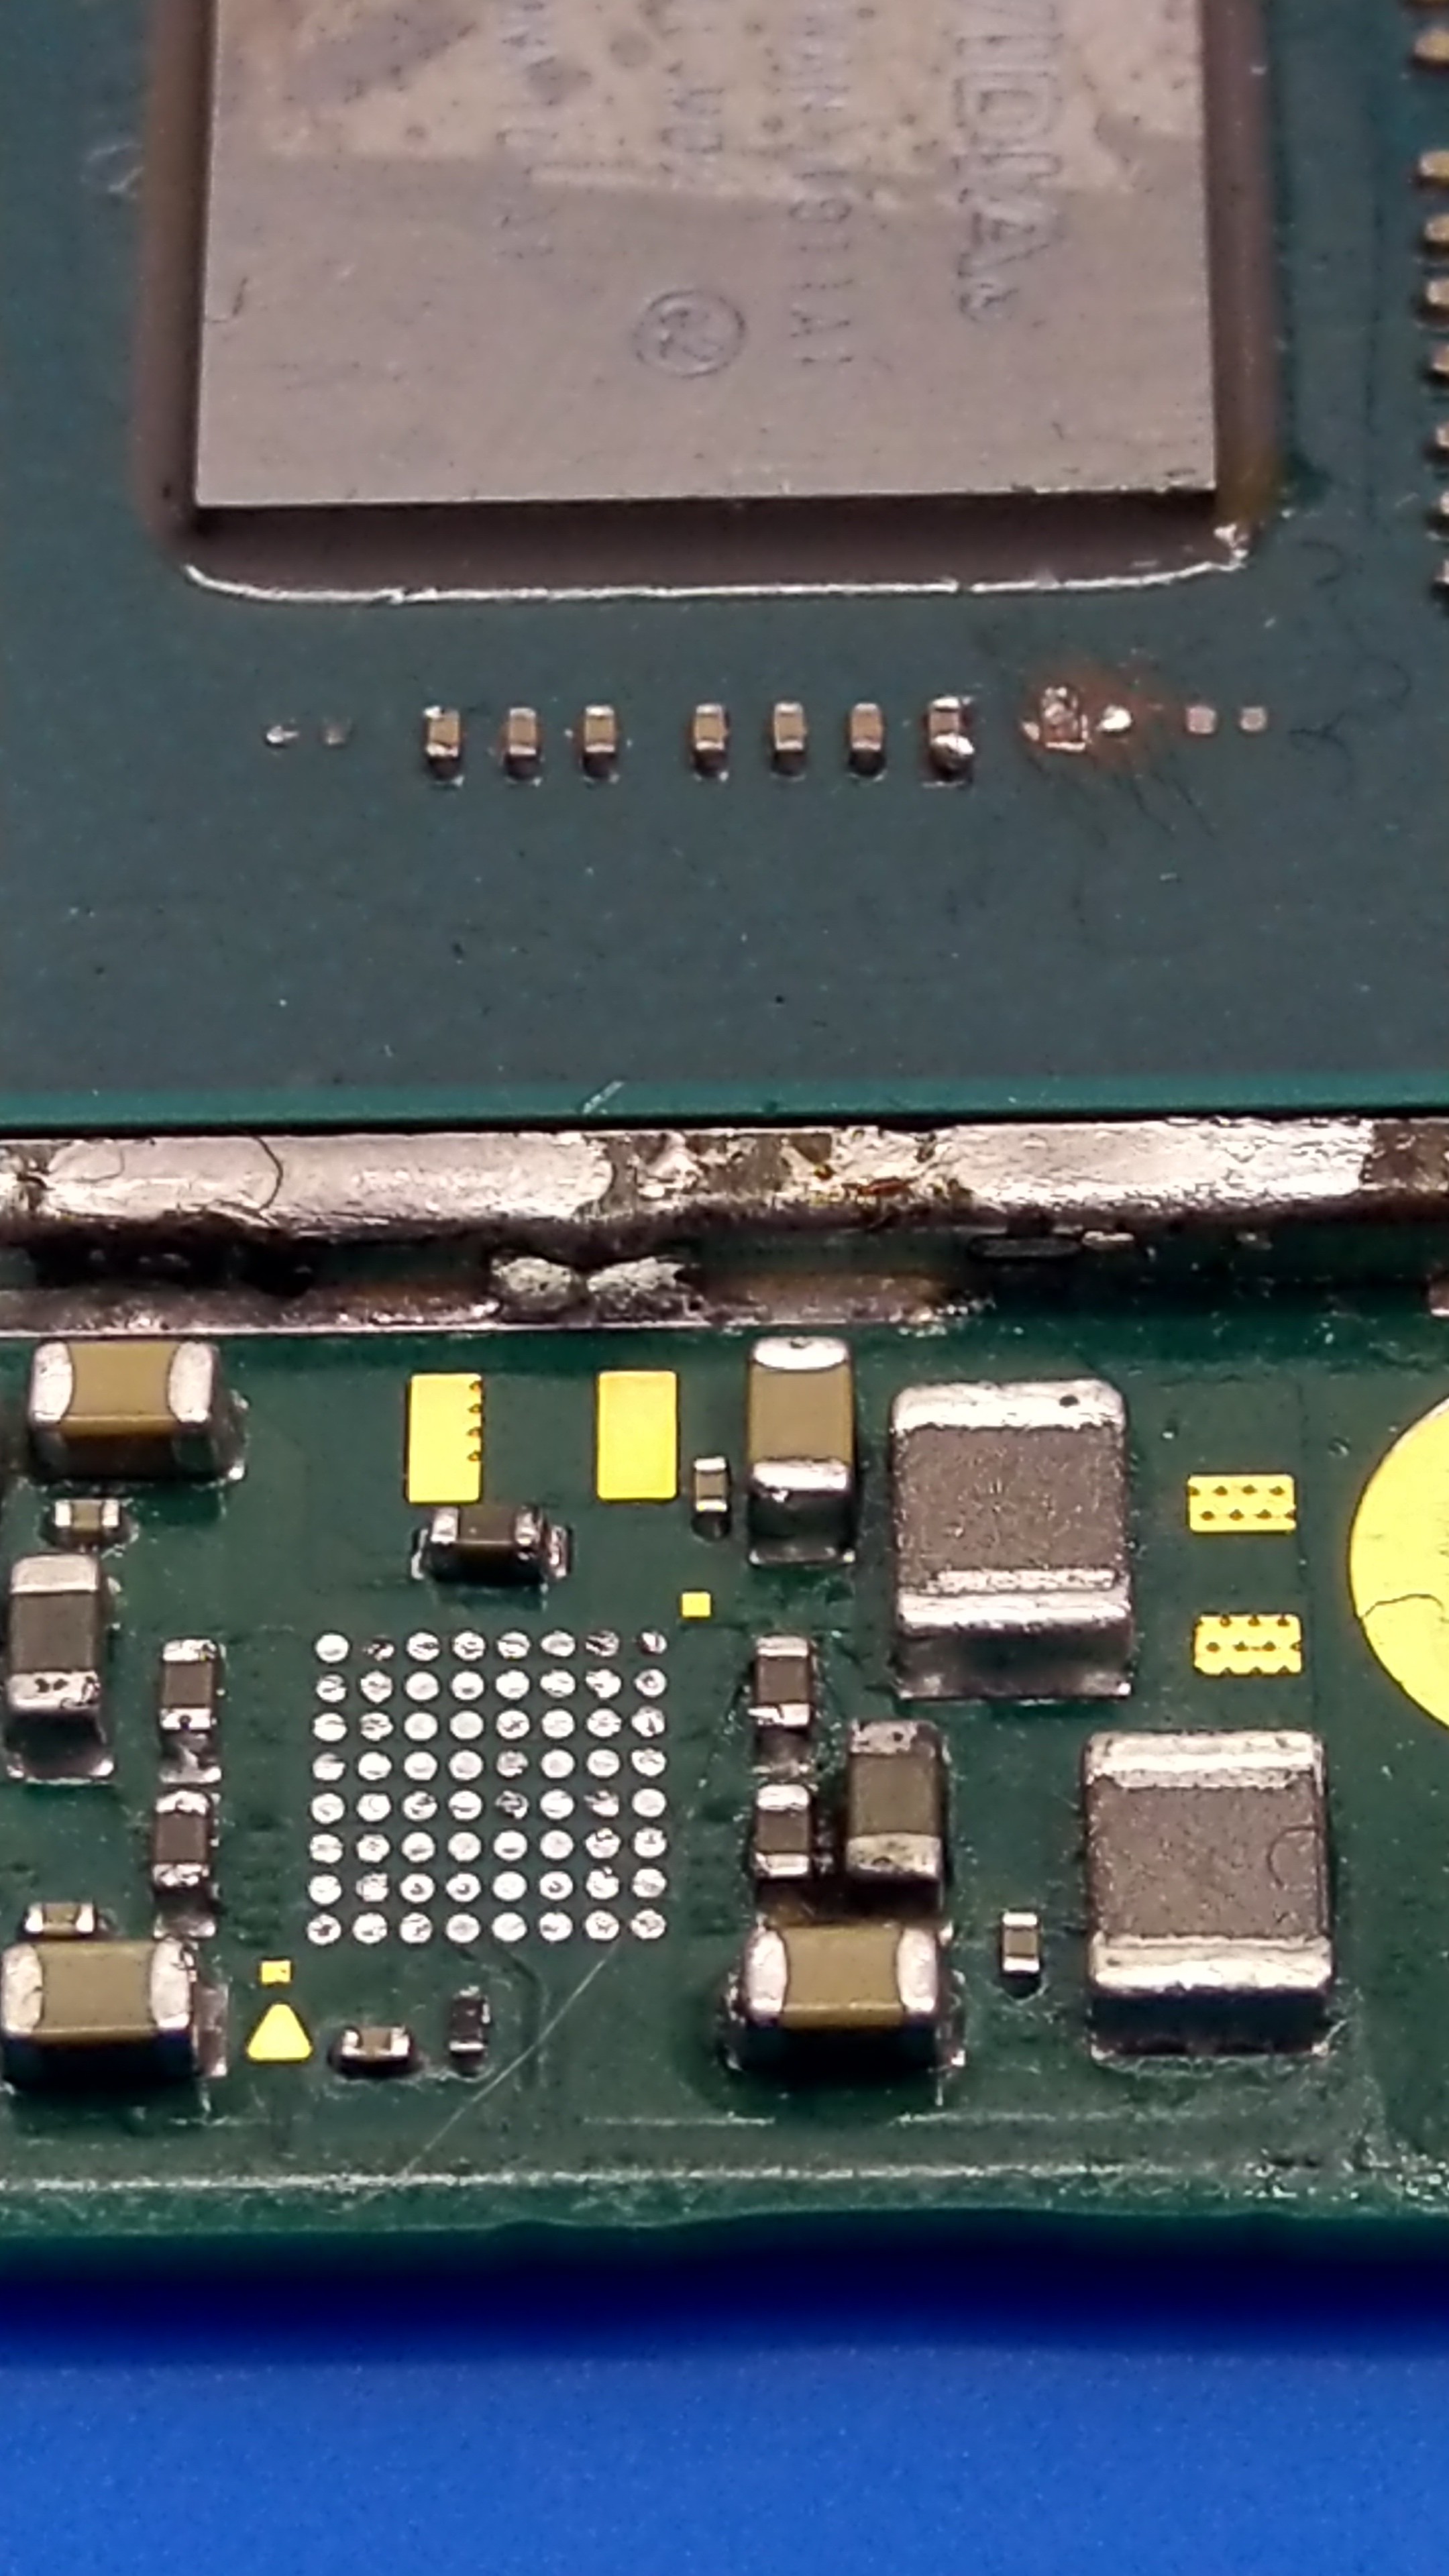
I removed also the big coil (2R2) on the SYS rail but the measurements seems ok. In resistance 15k on the rail that goes to the bq and 2.5M on the other.
Thank you Severence for helping me!
So your boot CPU rail at the main max pmic on the back of the board will normally read anywhere from about 10 to 30 is ohms relative to ground which is normal
Your main CPU rail at the Max IC front side of the board will read pretty much the same. So I think provided none of your other primary rails were short to ground, I don’t think either of the Max ICs are/were your issue.
That being said, there is clear signs of liquid surrounding the missing Max IC in your photo, so it’s probably for the best that you removed that
Yes the same thing i found on PS4 boards. The APU and RAM power coils seems to be shorted ( ~46ohm/ ~26ohms) but they aren’t. It was a BLOD board but the problem wasn’t there. Ok goodnight Severence and sorry for my english i hope you understand easly what I’m saying.
So, the work continues…
I checked the resistor and is fine, the liquid under the max ic is only flux with ipa. I know, the area doesn’t look good but it’s ok. When I’m finding the issues i not pay attention to a good looking board, the important think is functionality. When or if i have success then i will make a good clean and resolder all for a better look .
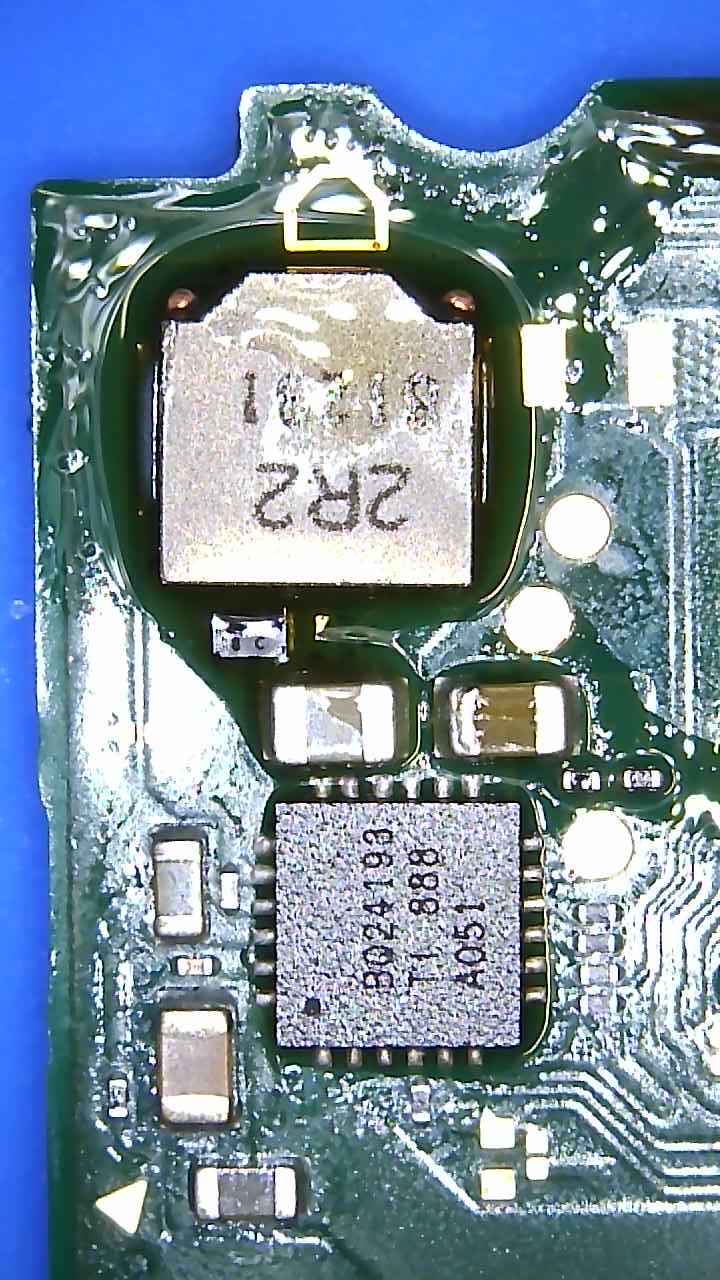
Now i resoldered back the 2R2 inductor and reflow both ic’s. The values in both rails seems right without coil but something wired happens when i invert the probes with the red one on ground and the black one on bq output rail i have only 235ohms in resistance mode. Is this normal?
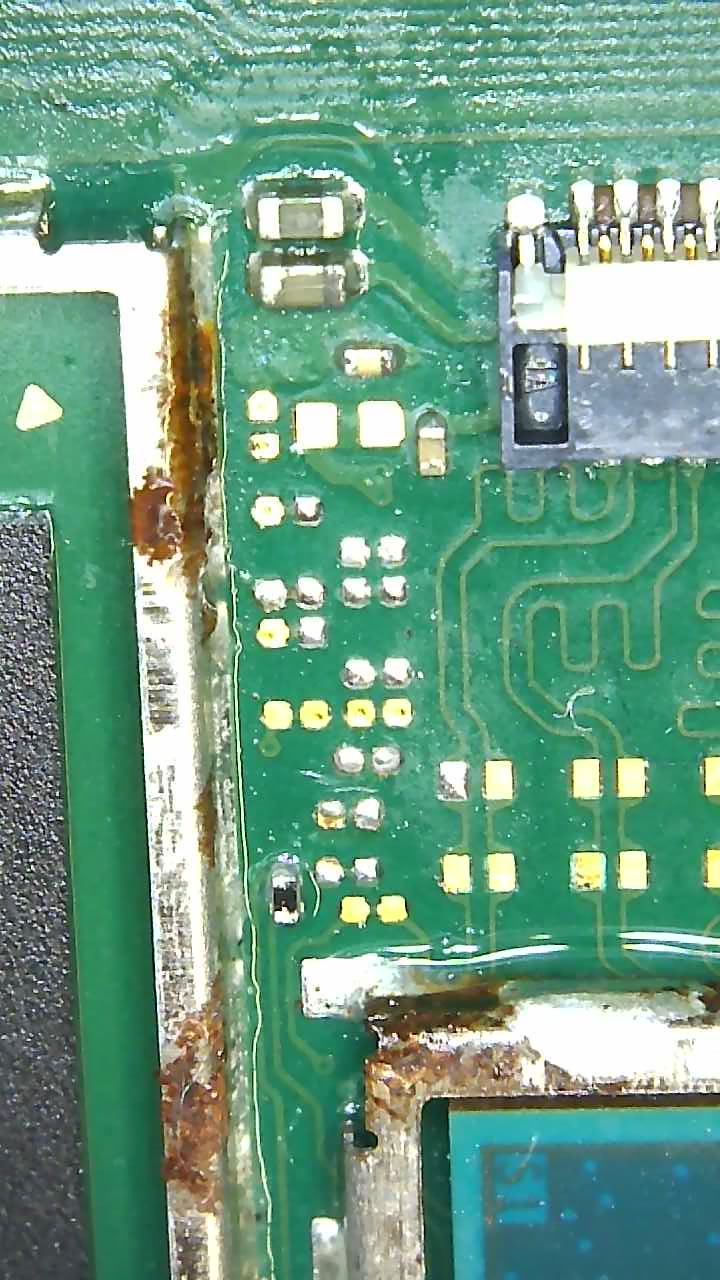
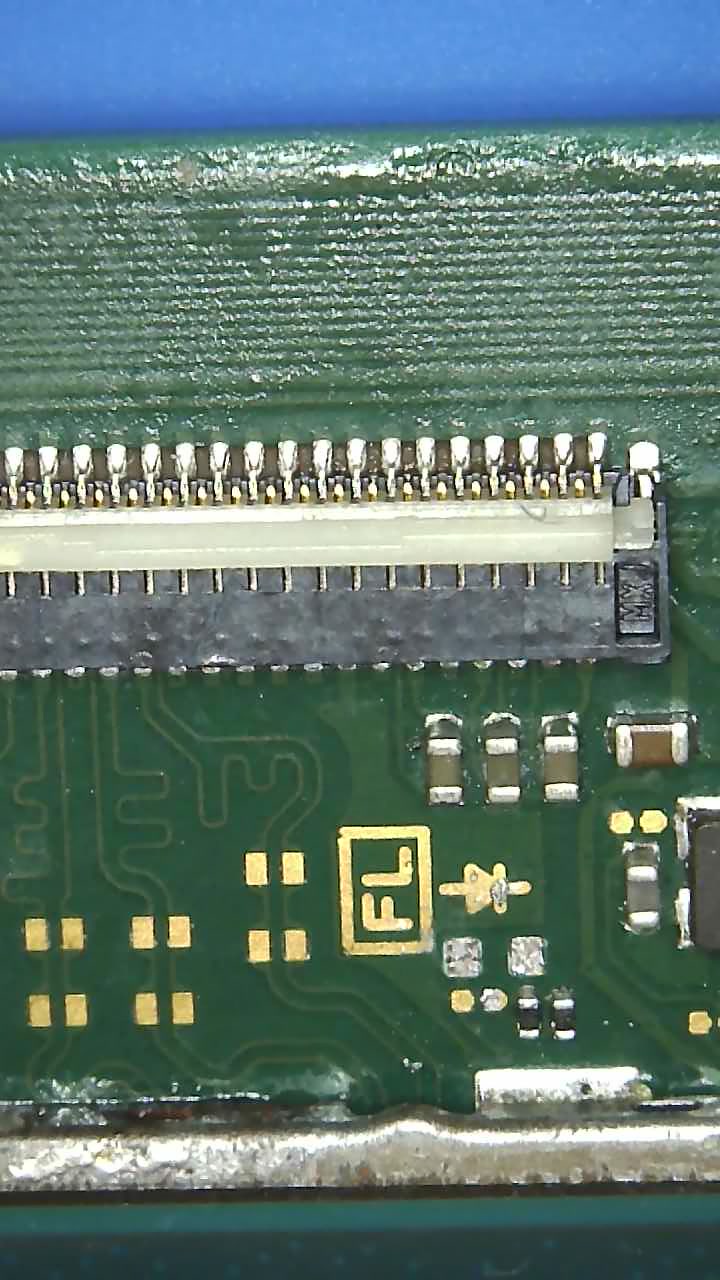
Here is where i found some spots where the modchip maybe where soldered with liquid corrosion( see the plates) i cleaned everything with also the pads with solder and ipa…
Now the interesting part …
I checked the wafer Soc where the caps where ripped off, i found i thiny microscopic spot on the worst side on the left where i can solder back the new cap. I did measurements and the values seems correct. I saw another post here with the values of these caps around 18.5ohms… i have 26ohms same value of the cpu boot rail.
I would still replace it, I appreciate you’ve cleaned it up but the end-cap on it had been compromised and in my experience with Switch boards it will come back to bite you.
Sorry my fault, it’s 1.8k
So i need to put on the Soc only the 2 external caps right? The one that have the broken pad on the right ( 26 ohms) i can leave it, did i understand?
Ok, i will leave the Soc wafer as it is for now. Next step is to resolder back the Max ic under the APU and see what happens. I have already reballed it with stencil and solder paste but i think that the balls are a little bit smaller as they should be, i try to thin the pads on board and try to solder it anyway.
yep, ignore the SoC caps for the time being, they aren’t the primary issue.
That’s fine, solder paste contains flux and when burned off balls size is marginally smaller than stock, as long as all the balls are all uniform that’s the important thing, then should be fine.

 so i decided to remove it:grimacing: thinking it was an IC fault.