New here so go easy on me. My son dropped his nintendo switch into water and I have attempted a repair. I have completed all the usual, clean the corrosion, replaced the battery. I checked for shorts and all appears to be okay. The switch appears to be going in to fast charge mode. The switch does turn on now and there is sound and the joy con and digitizer are working but the screen isnt working. Does anyone have any idea of what the problem may be?
Check your LCD connector for any bent pins, if none, then check the LCD ribbon contact side and see if there are any breaks here, often they’ll erode away in liquid damage cases.
Does the backlight come on? this is also another hotspot on liquid damaged boards, backlight ribbon pads will erode away.
Thanks for getting back to me. Doesn’t appear to be any damage. I touched the pads up a bit with an iron and the lcd display is new so the ribbon cable pads are brand new so I would assume they should fine. No backlight either unfortunately.
Can you take a photo? maybe something will stand out for me.
There is an IC next to the LCD connector, it generates a positive 5V supply and a negative 5V supply, you can carefully measure this on two of the capacitors surrounding it, check that these rails are present.
Failing that, you may have to search the forum, there was a post here a while back with someone asking for a diagram for the LCD, Calvin has created one, you can check diode readings on this connectors pins.
If your connector is good or partially good, then would expect you to have backlight, afterwards will have to check backlight IC
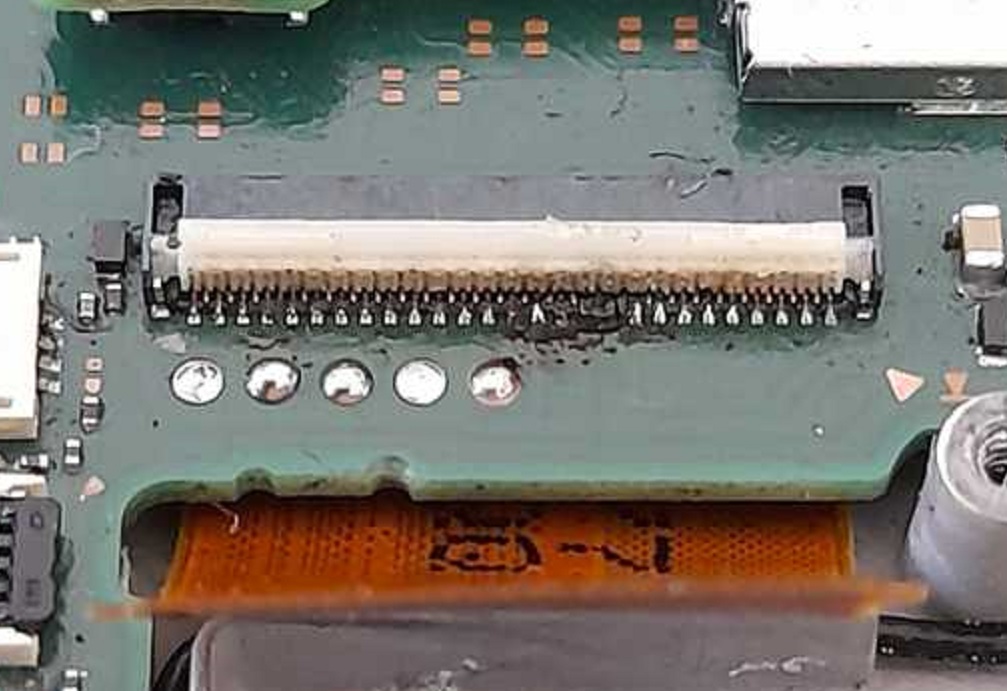
Yeah unfortunately first port of call will be replacing that LCD connector, conductors and/or pads look damaged, possibly even missing.
After removing it, ensure all pads are in tact.
When soldering new connector in place, tin all pads with quality 63/37 leaded solder (nice fluffy pillows) and when refitting the new connector, heat the opposing underside of the board at a low air speed.
Good luck, and remeber if this is your first time, practicing on a connector on a scrap or donor board (even if it’s not a switch) really helps
Also a word of warning. A lot of the “New” LCD replacements for switch coming from China, are in fact refurburbished (afaict) they appear to have had new ribbons bonded onto them, and unfortunately I’ve had two in the past few months which were faulty on arival due to a defect in either the LCD or backlight ribbons, so always test with another known good where possible. Backlight ribbon defects can often simply be repaired yourself, but LCD glass side is more of a challenge.