No Wifi, replaced the chip 2 times already

Hi all,

another Switch lite came in, water damaged. I had to replace the ribbon that goes from main board to the side board, both connectors had missing pins as well. Once all replaced, the console charged, but i quickly noticed a component that was overheating, and it was the Wifi IC. I got replaced it, the console starts, but no wifi. I tried again to replace it, same (used brand new IC). What could cause such an issue in your opinion ?
Thanks for the help.

No idea anyone ? Tried already to found similar case around, no luck.

I’d look over the following topic as your symptoms are virtually identical

Given the WIFI IC was getting hot it likely indicates the chip was internally shorted or corrosion below was causing a short, so ideally you’d check on surrounding components on these rails and measure the resistance to ground to verify the fault condition before and after replacment of the IC while comparing to a known good

And to add, stock standard IC’s will not work on Switch, so either have to be preprogrammed specifically for Switch or pulled from a Switch donor board, I would also take a very close look at the quality of the balls on the IC as many supposedly “new” chips from China are obviously used and poorly reballed

The Aliexpress seller sold the ICs as “Switch Lite Wifi” so i assume on the “paper” that this should be good. Of course, there is no guarantee about it.

I only have one Switch Lite here unfortunately that i can measure values :frowning: I will at least get the resistance to ground, to check if all is good. I need to check on Switch lite where the power is coming from for the Wifi IC.

By the way, i bought the IC from that seller : 32.66€ 14% OFF|10 stücke FÜR Schalter Lite CYW4356X KUBG Bluetooth IC Wifi BGA chip CYW4356XKUBG BCM4356X KUBG wifi Bluetooth ic chipset controller|Ersatzteile & Zubehör| - AliExpress

The tins on ic, it not effect the function, when heating the ic, the tin will be averaged out to the solder joint

Statements like that in the listing hardly inspires confidence… confirms that these ICs are very likely pulled from donors / used and the statment above is almost an excuse for what is likely a bad reball

I would inspect some of the other ICs in this lot of x10 under your microscope, ensure that the balls are all formed and that they are all the same height, also verify they haven’t stripped the very thin coating off on the bottom when they’ve tinned it prior to using stencil and solder paste.

Also go through that thread I linked to and follow the directions regarding the antenna connector etc

btw if the console is booting, can you confirm wifi is not working (making sure the antenna is good and connected) then can you confirm does bluetooth work?

Yeah, i noticed that warning as well, but i didn’t found another vendor mentioning something different in my research.

That’s what i plan to do, when going in Internet menu, search starts but doesn’t find anything, even super close to a Wifi Antenna.
I have to check the Bluetooth, i haven’t tested it yet. I will have a look and let you know.

it’s worth noting when I’m talking about checking the antenna (and the antenna connector on the board) I’m referring to the ones inside the console case as shown in step 20

Switch, wth the antennas disconnected (or suffering a fault) unlike other devices will struggle or simply won’t find or establish a wireless connection regardless of how close you are to a router or for BT how close th joy-cons are to the console

Pretty sure thie coaxial connectors on the board are pretty stock standard size wise to most other portable devices, so if you have something else you can use the antenna from that fits it might be a good call to rule that out as the potential issue

Looks like Bluetooth doesn’t detect anything either.
I haven’t seen anything wrong with the connectors, but i will check under the microscope probably tomorrow and report. Still waiting some feedback from the seller about the ICs if they are brand new or refurbished, he ensured that it was for Switch lite in his first reply. Let’s see. In case of, i can also try the IC of a donor Switch board maybe ? I just need to wait for my stencil to arrive, i already have the solder paste Chipquick that you advised me.

tbh I think it’s pretty pointless trying to get this sort of confirmation from Chinese Aliexpress sellers for the most part… The chips are used (best case) which he’s confirmed with the whole reball excuse statments, worst case he’s padded out this lot of x10 with some (maybe new) unprogrammed stock IC’s (which are already prereballed stock standard)

As I mentioned earlier, I would inspect the lot of x10 ICs you got under your microscope and look closely at the balls and condition of the poly coating, the bad reballs by sellers will (as is typical) be using low grade solder paste which will look extremely dull, whereas the factory [unprogrammed] ICs will look shiny (despit the fact they’re using lead free solder)… the sellers reballed ICs will likely have uneven ball sizes and the stock will be nice and even, the sellers will have a burnt, stripped, or a dark orange look to the poly coating, whereas the stock ICs will not, hope that all makes sense.

Btw I’m pretty sure I’ve used Wifi IC’s from Mariko/Lite boards on regular rev Switch boards and vice versa with no issue (unless my memory is failing me) so think that’s a none issue

Hi there,
coming back to this topic finally to give some news, the seller replied (believe it or not :slight_smile: ) and confirmed that it is used ICs. I checked over the microscope the balls, definitely not shiny, but i couldn’t say that they have any uneven ball sizes or so, to me it doesn’t look that bad at first. Anyway, i still haven’t got my stencil, as soon as i have it, i will try to reball one of them and resolder it. If it doesn’t work, i will check the power rails and we will see where it goes. Time is missing at the moment a bit (i am building my house with my father, this is top priority), and i don’t like to work on these “in a hurry” or during night :slight_smile: But for sure i will keep you updated

I see, I suppose just to rule everything else out it might be worthwhile reballing an IC fom a donor specifically, if it still has issue then the problem is more complicated

Sounds interesting (more than wifi chips :smiley: ) can you post details and photos on this :slight_smile:

Yes, i have now a donor board, once i receive the stencil, i will give a try to that and see.

Sure i can, we are currently working on the water supply and bathroom, basically besides blocks and bricks and concrete for the floors where of course we asked for help, we are doing everything on our own (even more his own then mine, because i just go to help at the end of my working day and during weekend).
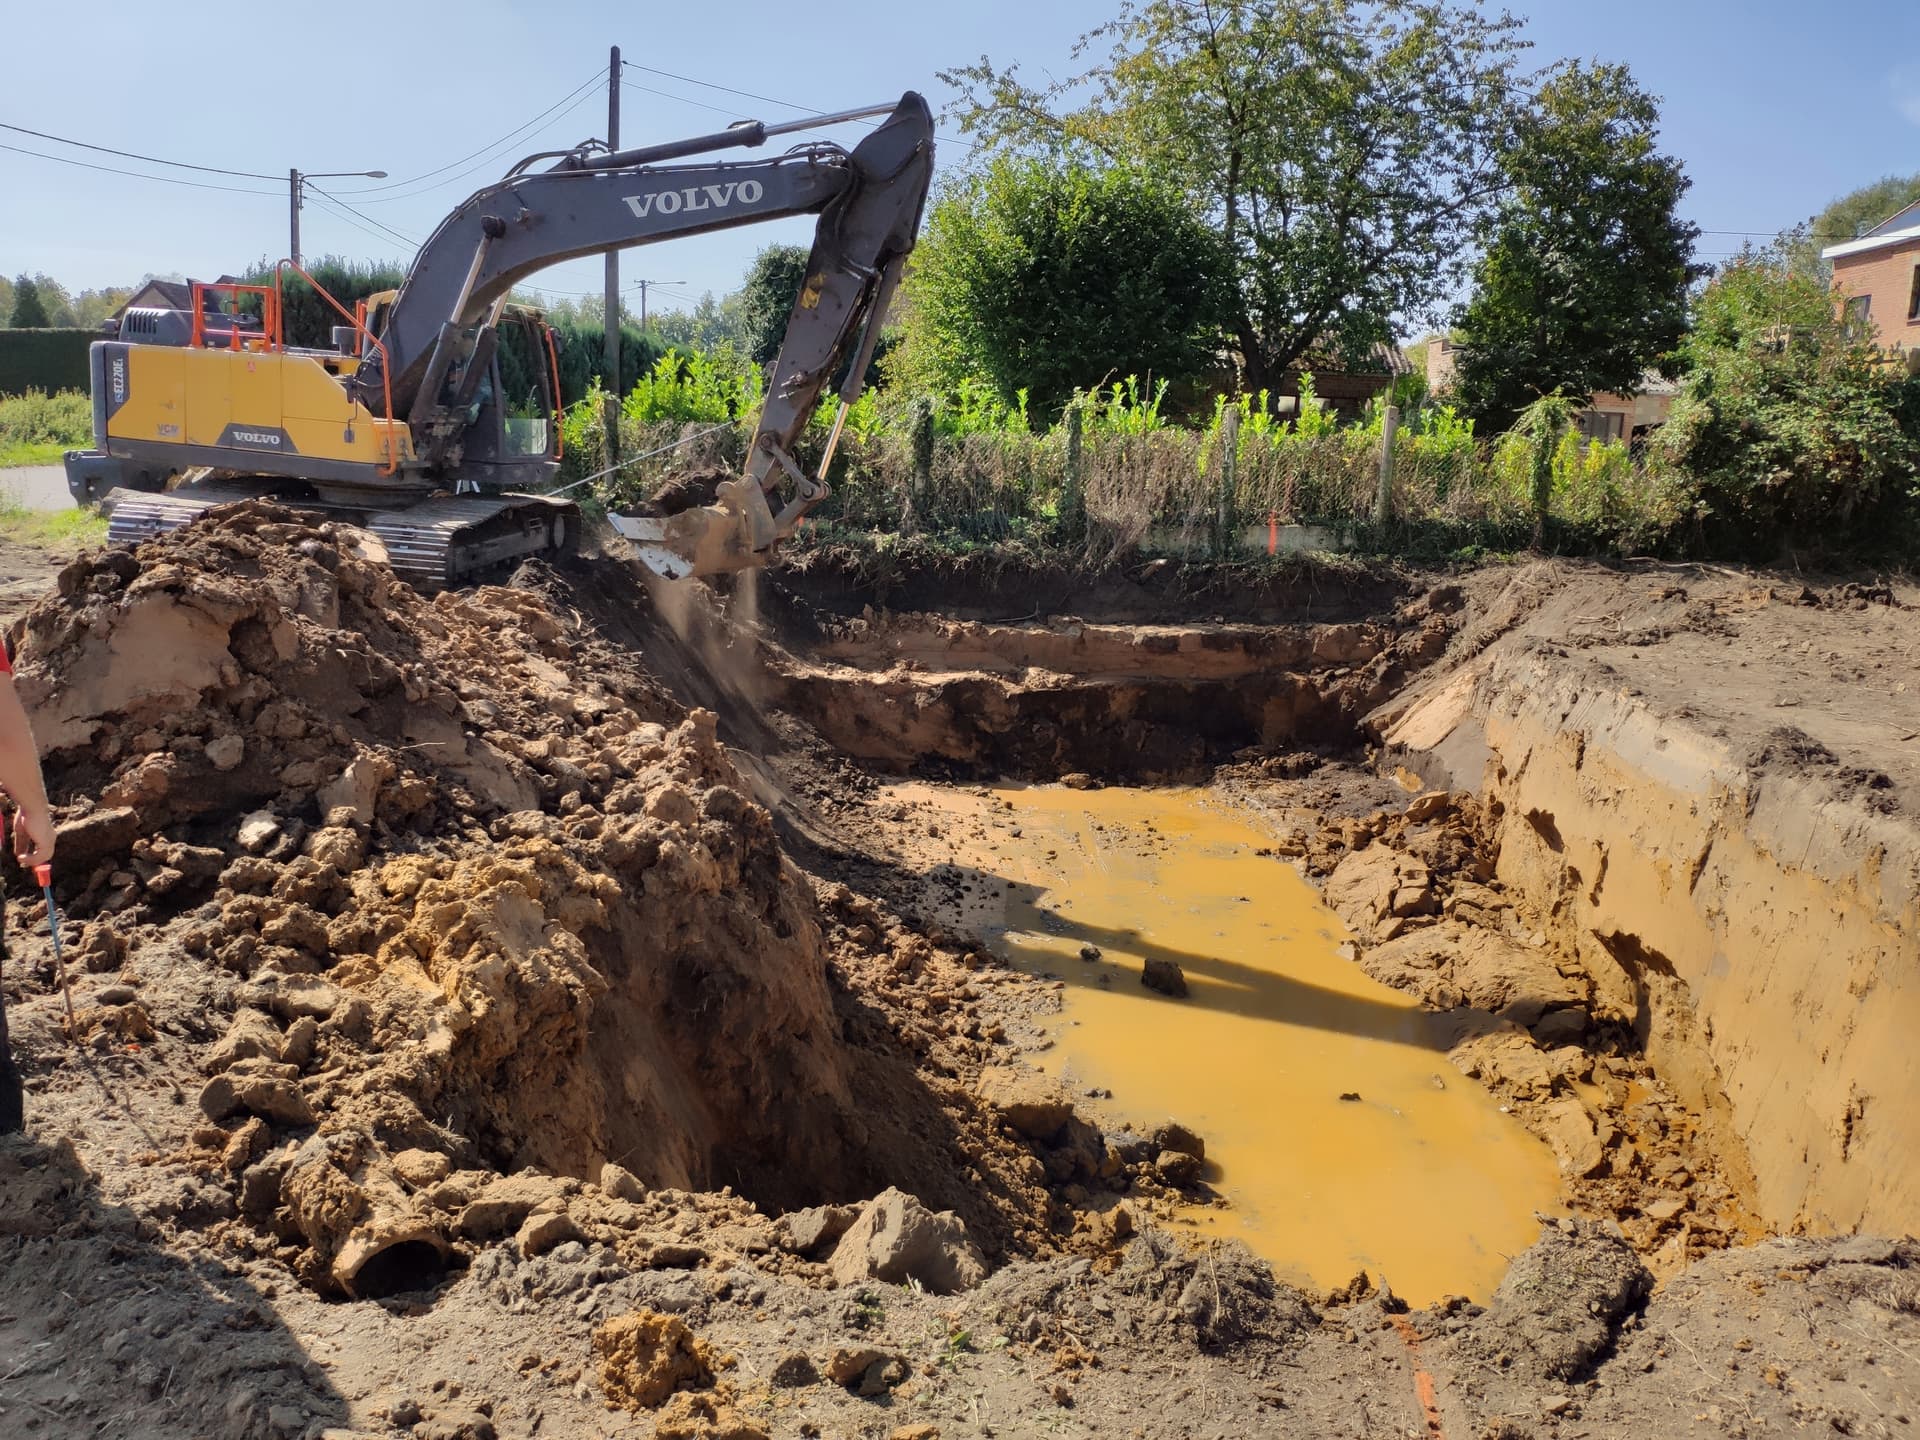
We started in 2019/09


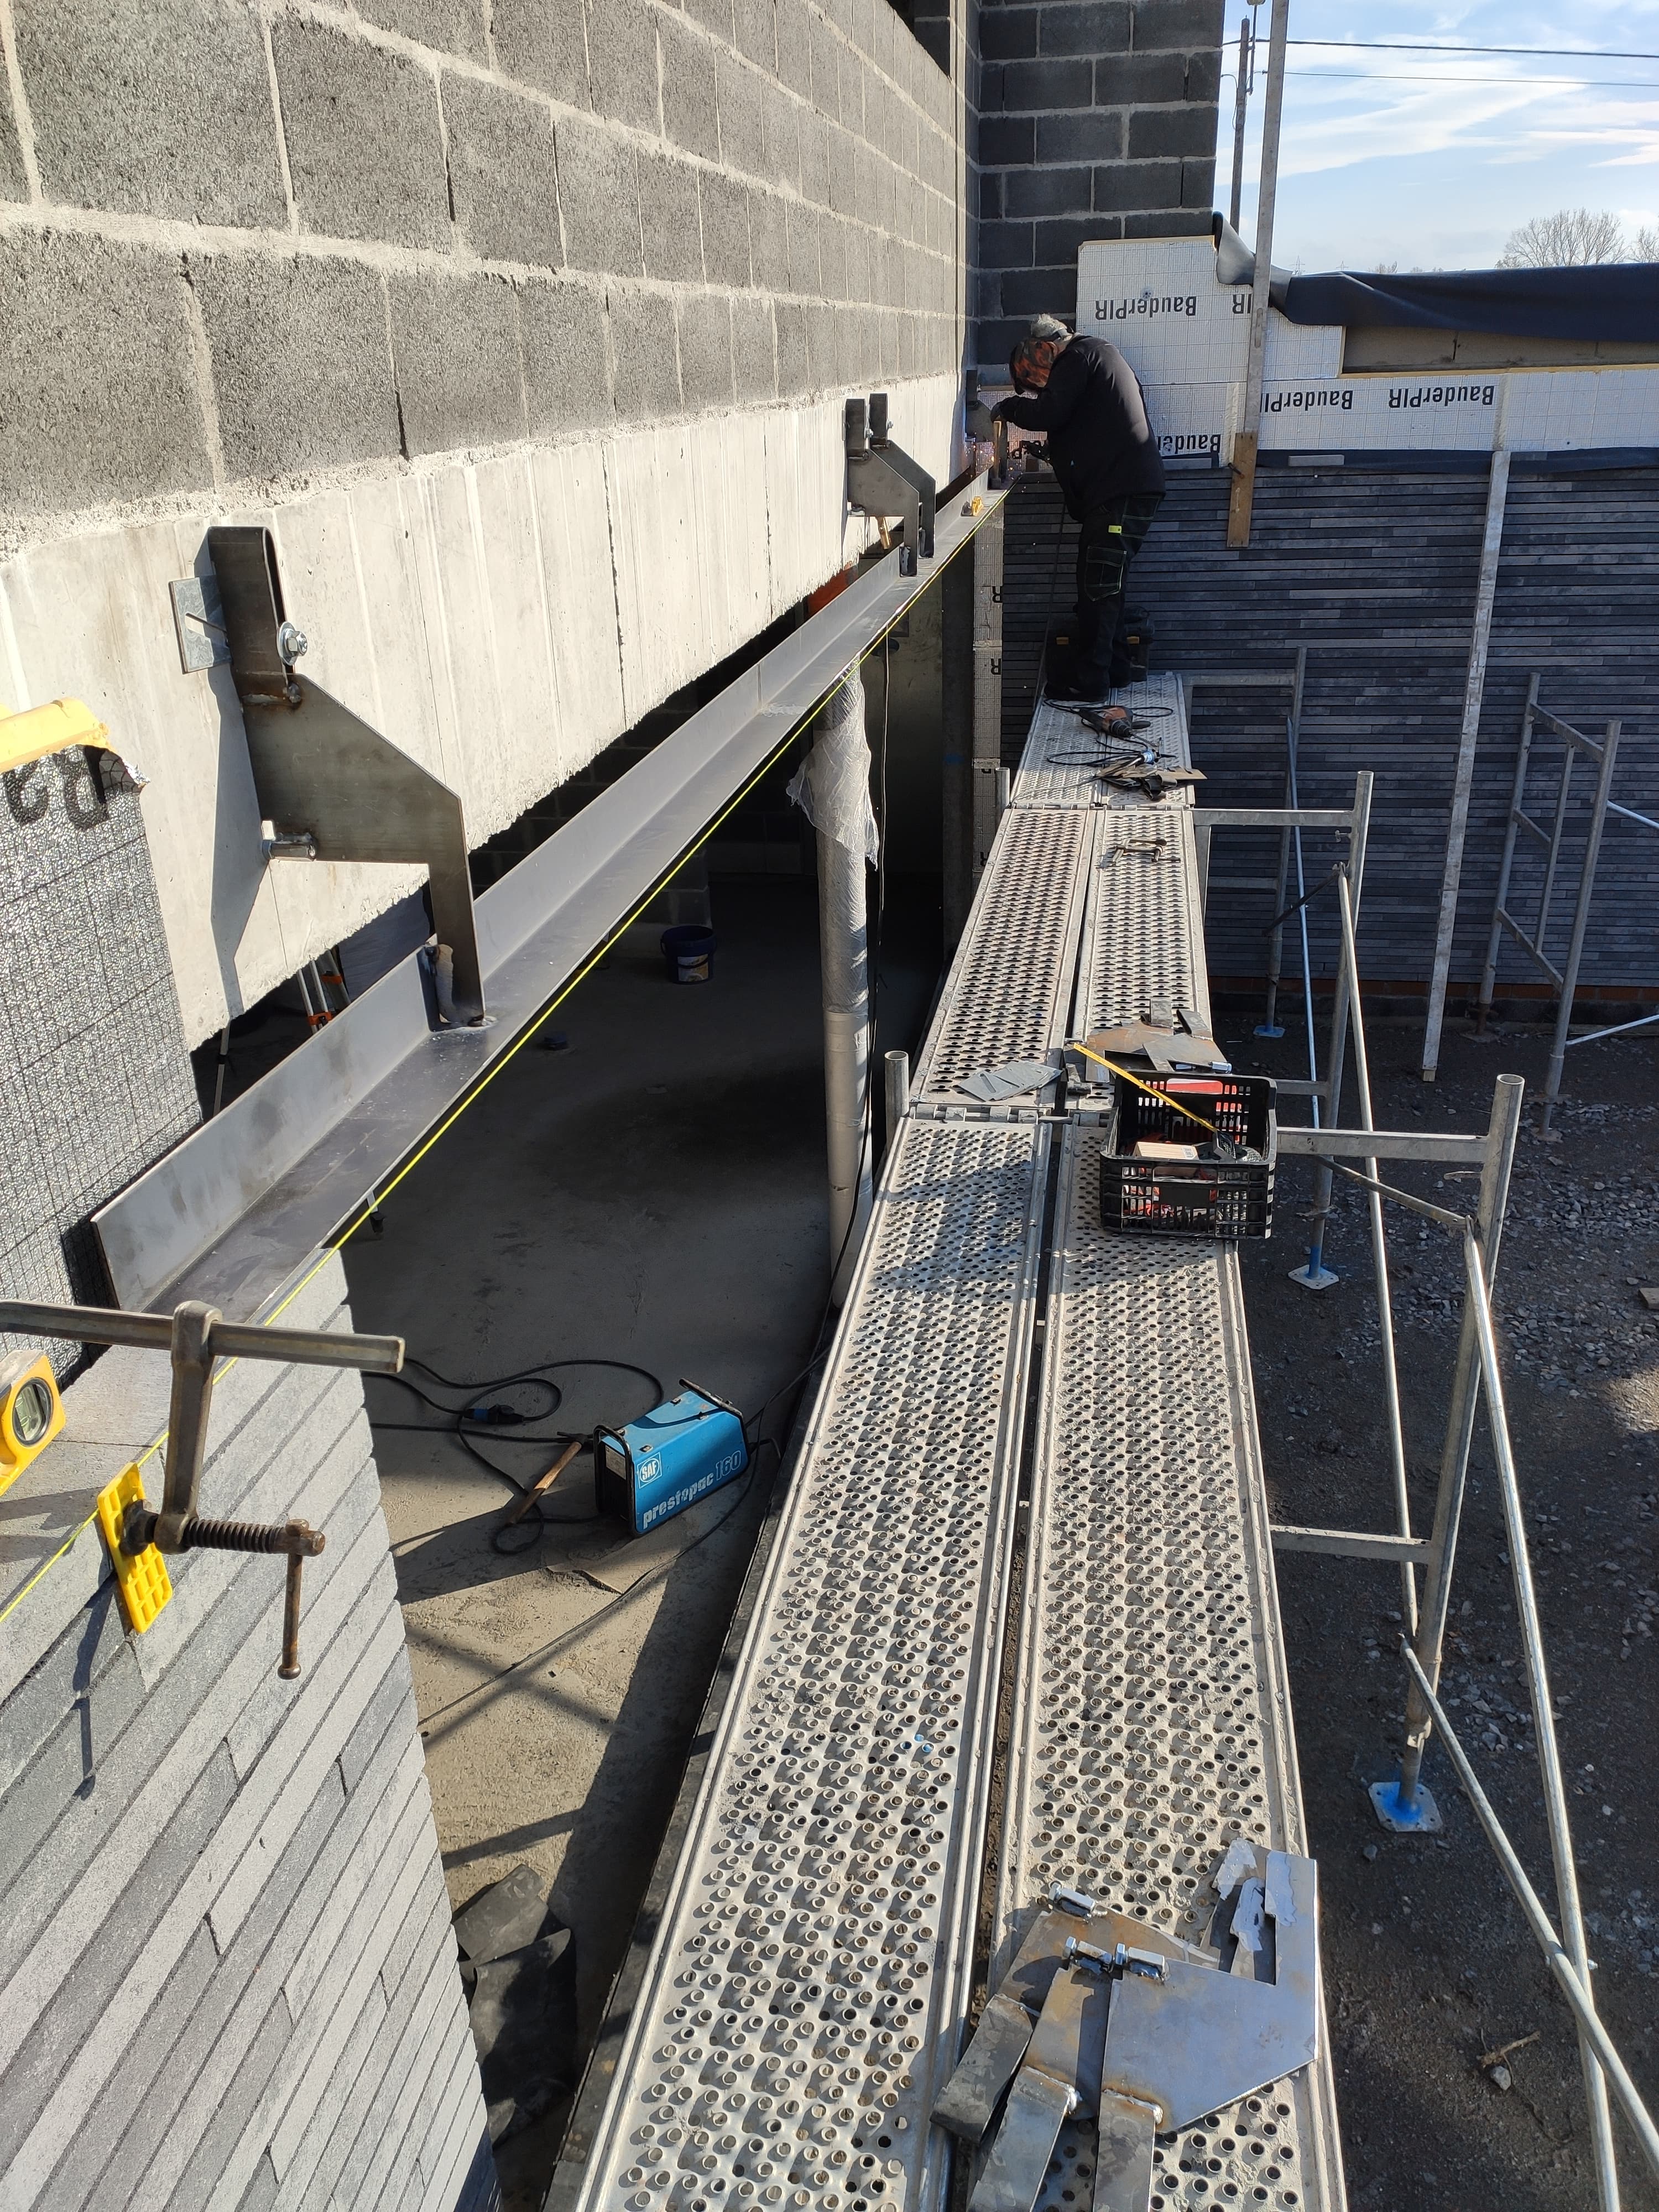
Here my father welding the link between basement steel to the walls one, if you remember i told you this is his primary job, with car mechanical.

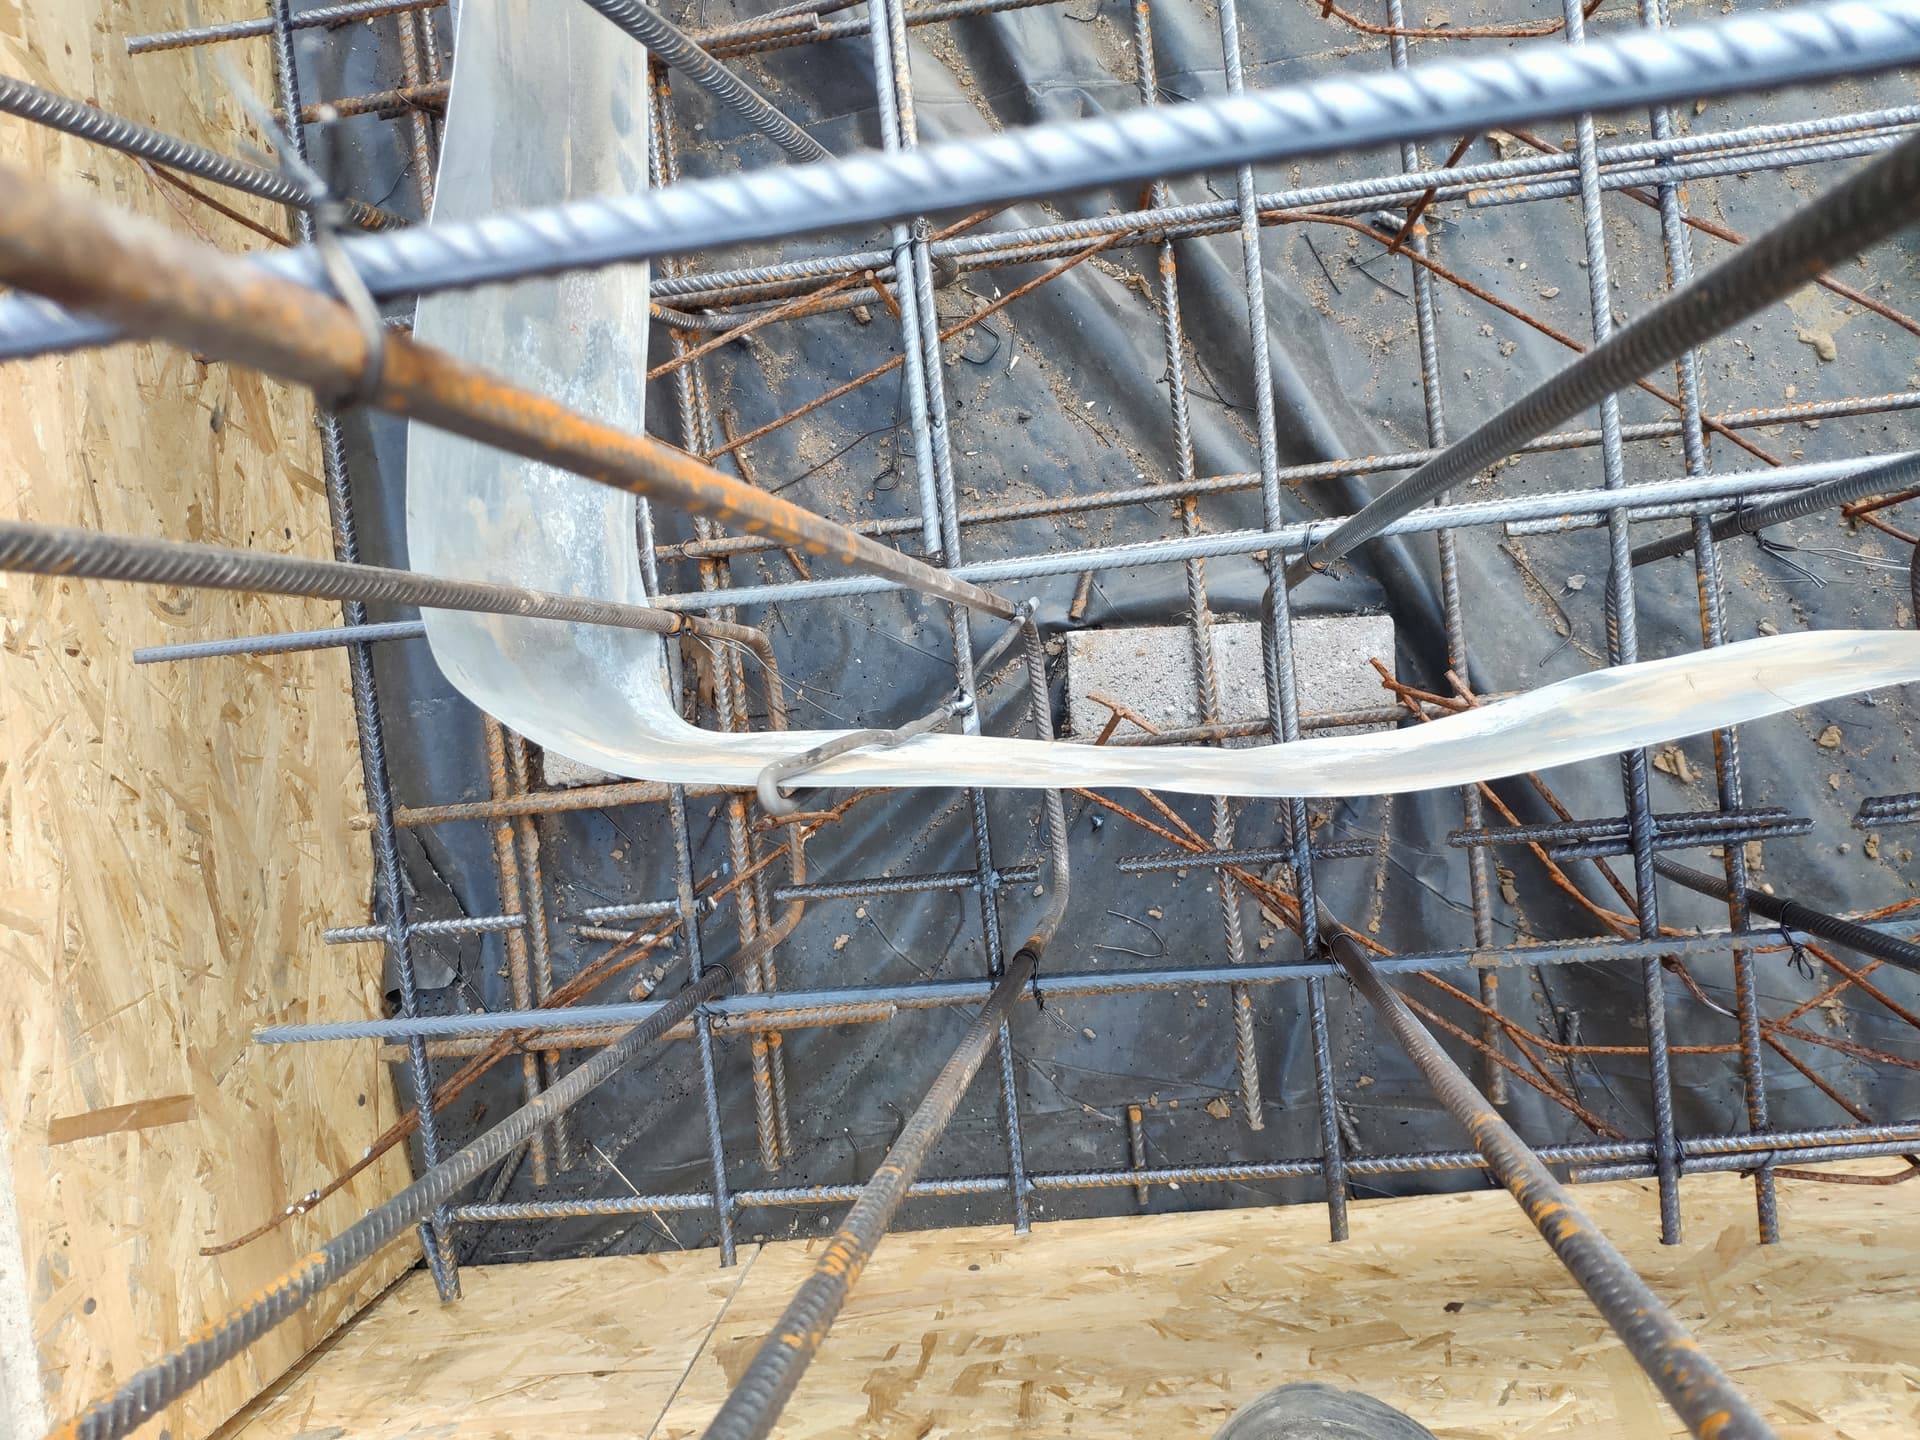
And here where you can see a stainless steel sheet that do the complete turn of the basement which stands between the floor and the walls, 50/50 in each, to prevent any water infiltration between the 2 concrete parts (walls are made after the floor).

Works well, as you can see, water stays inside.

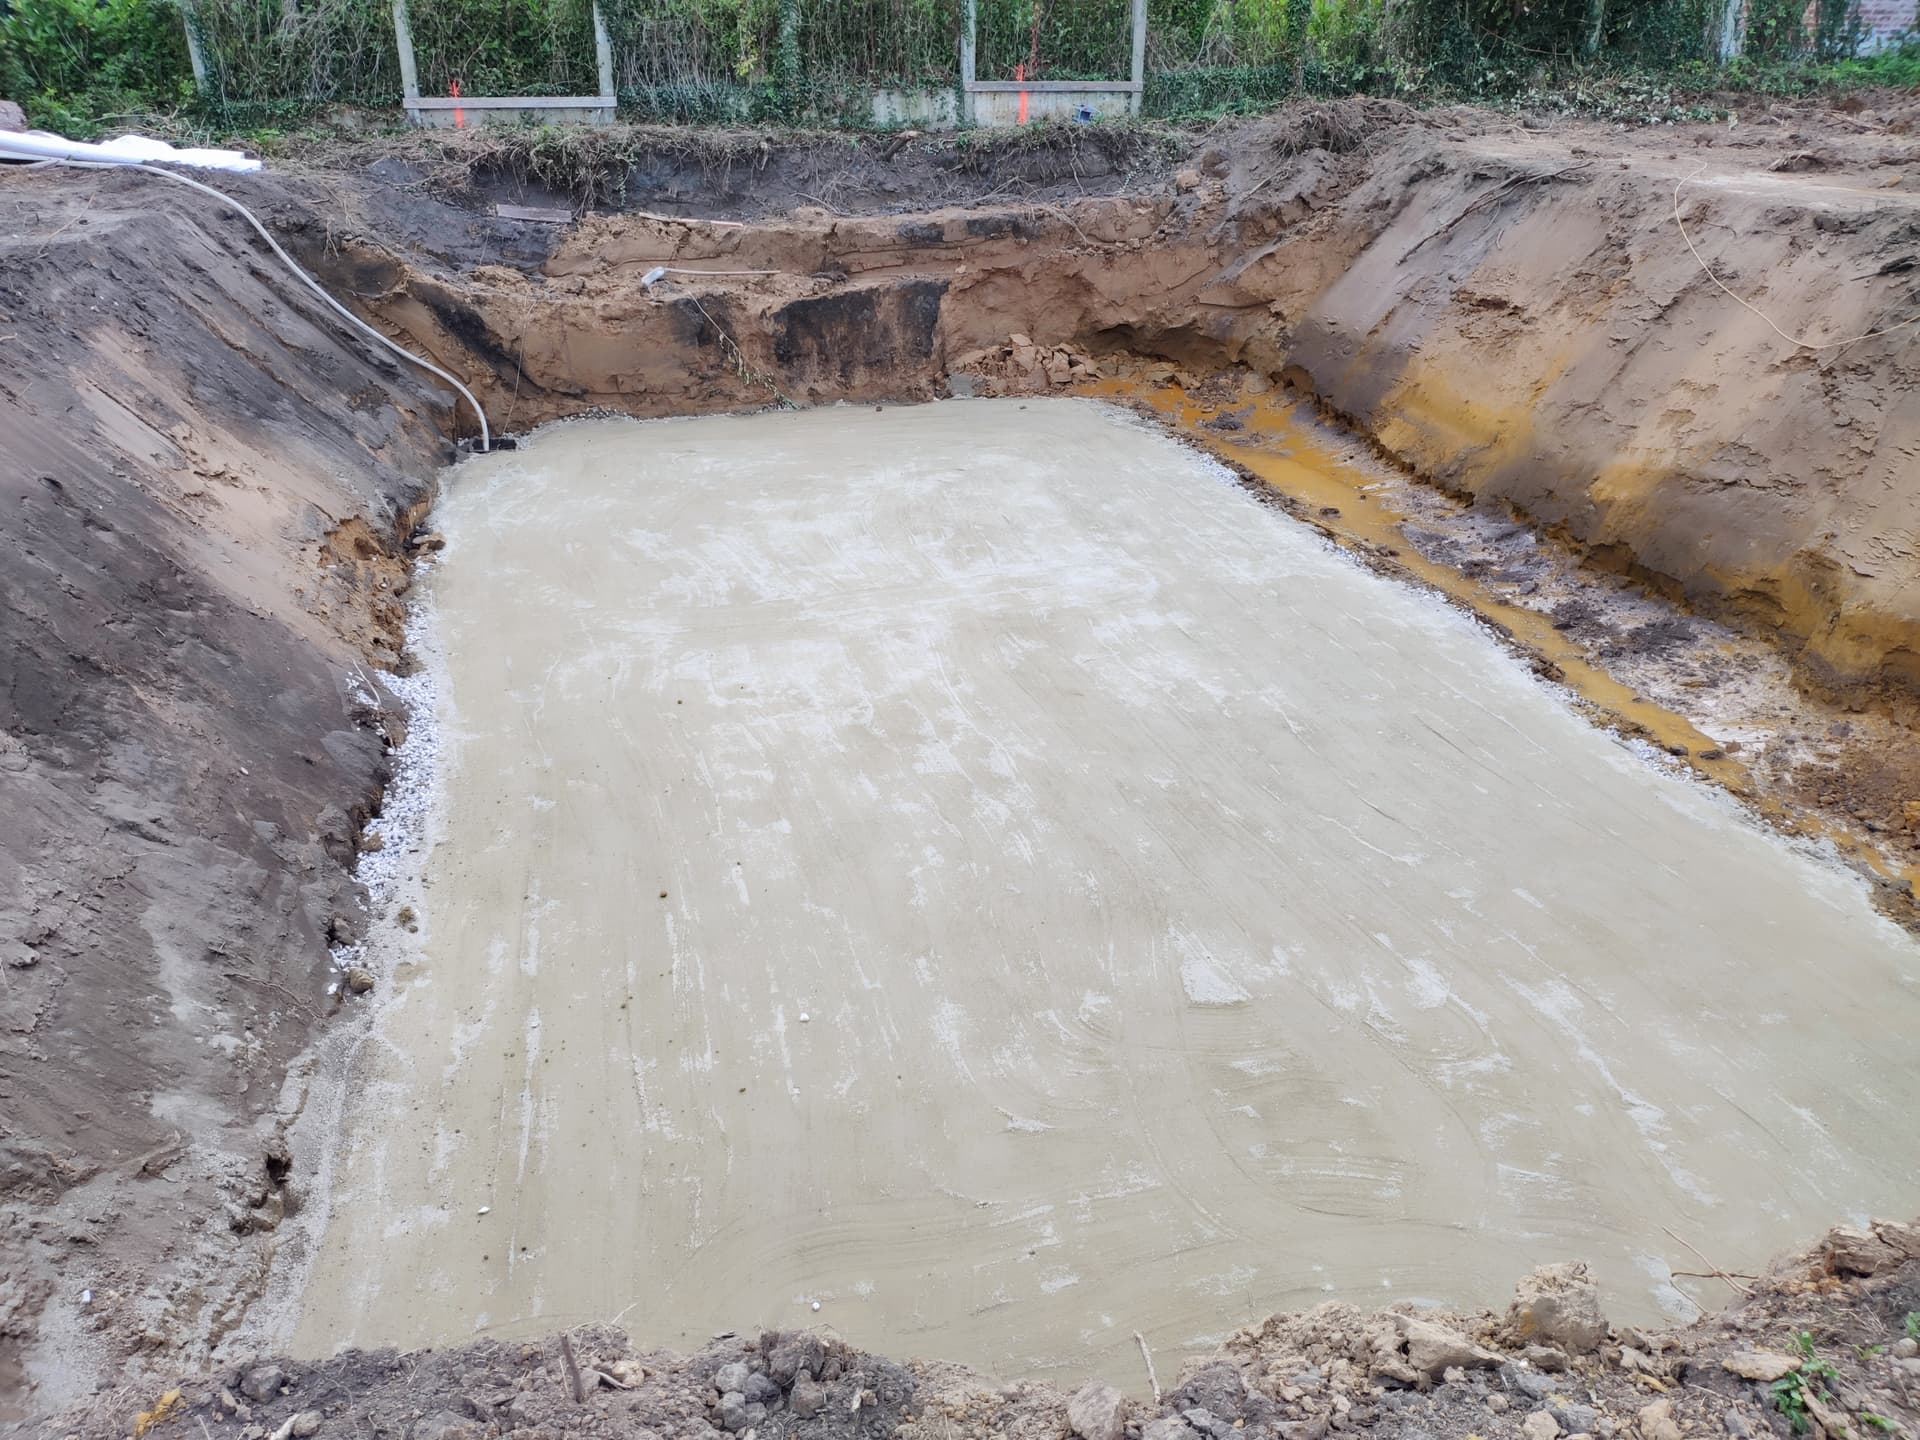
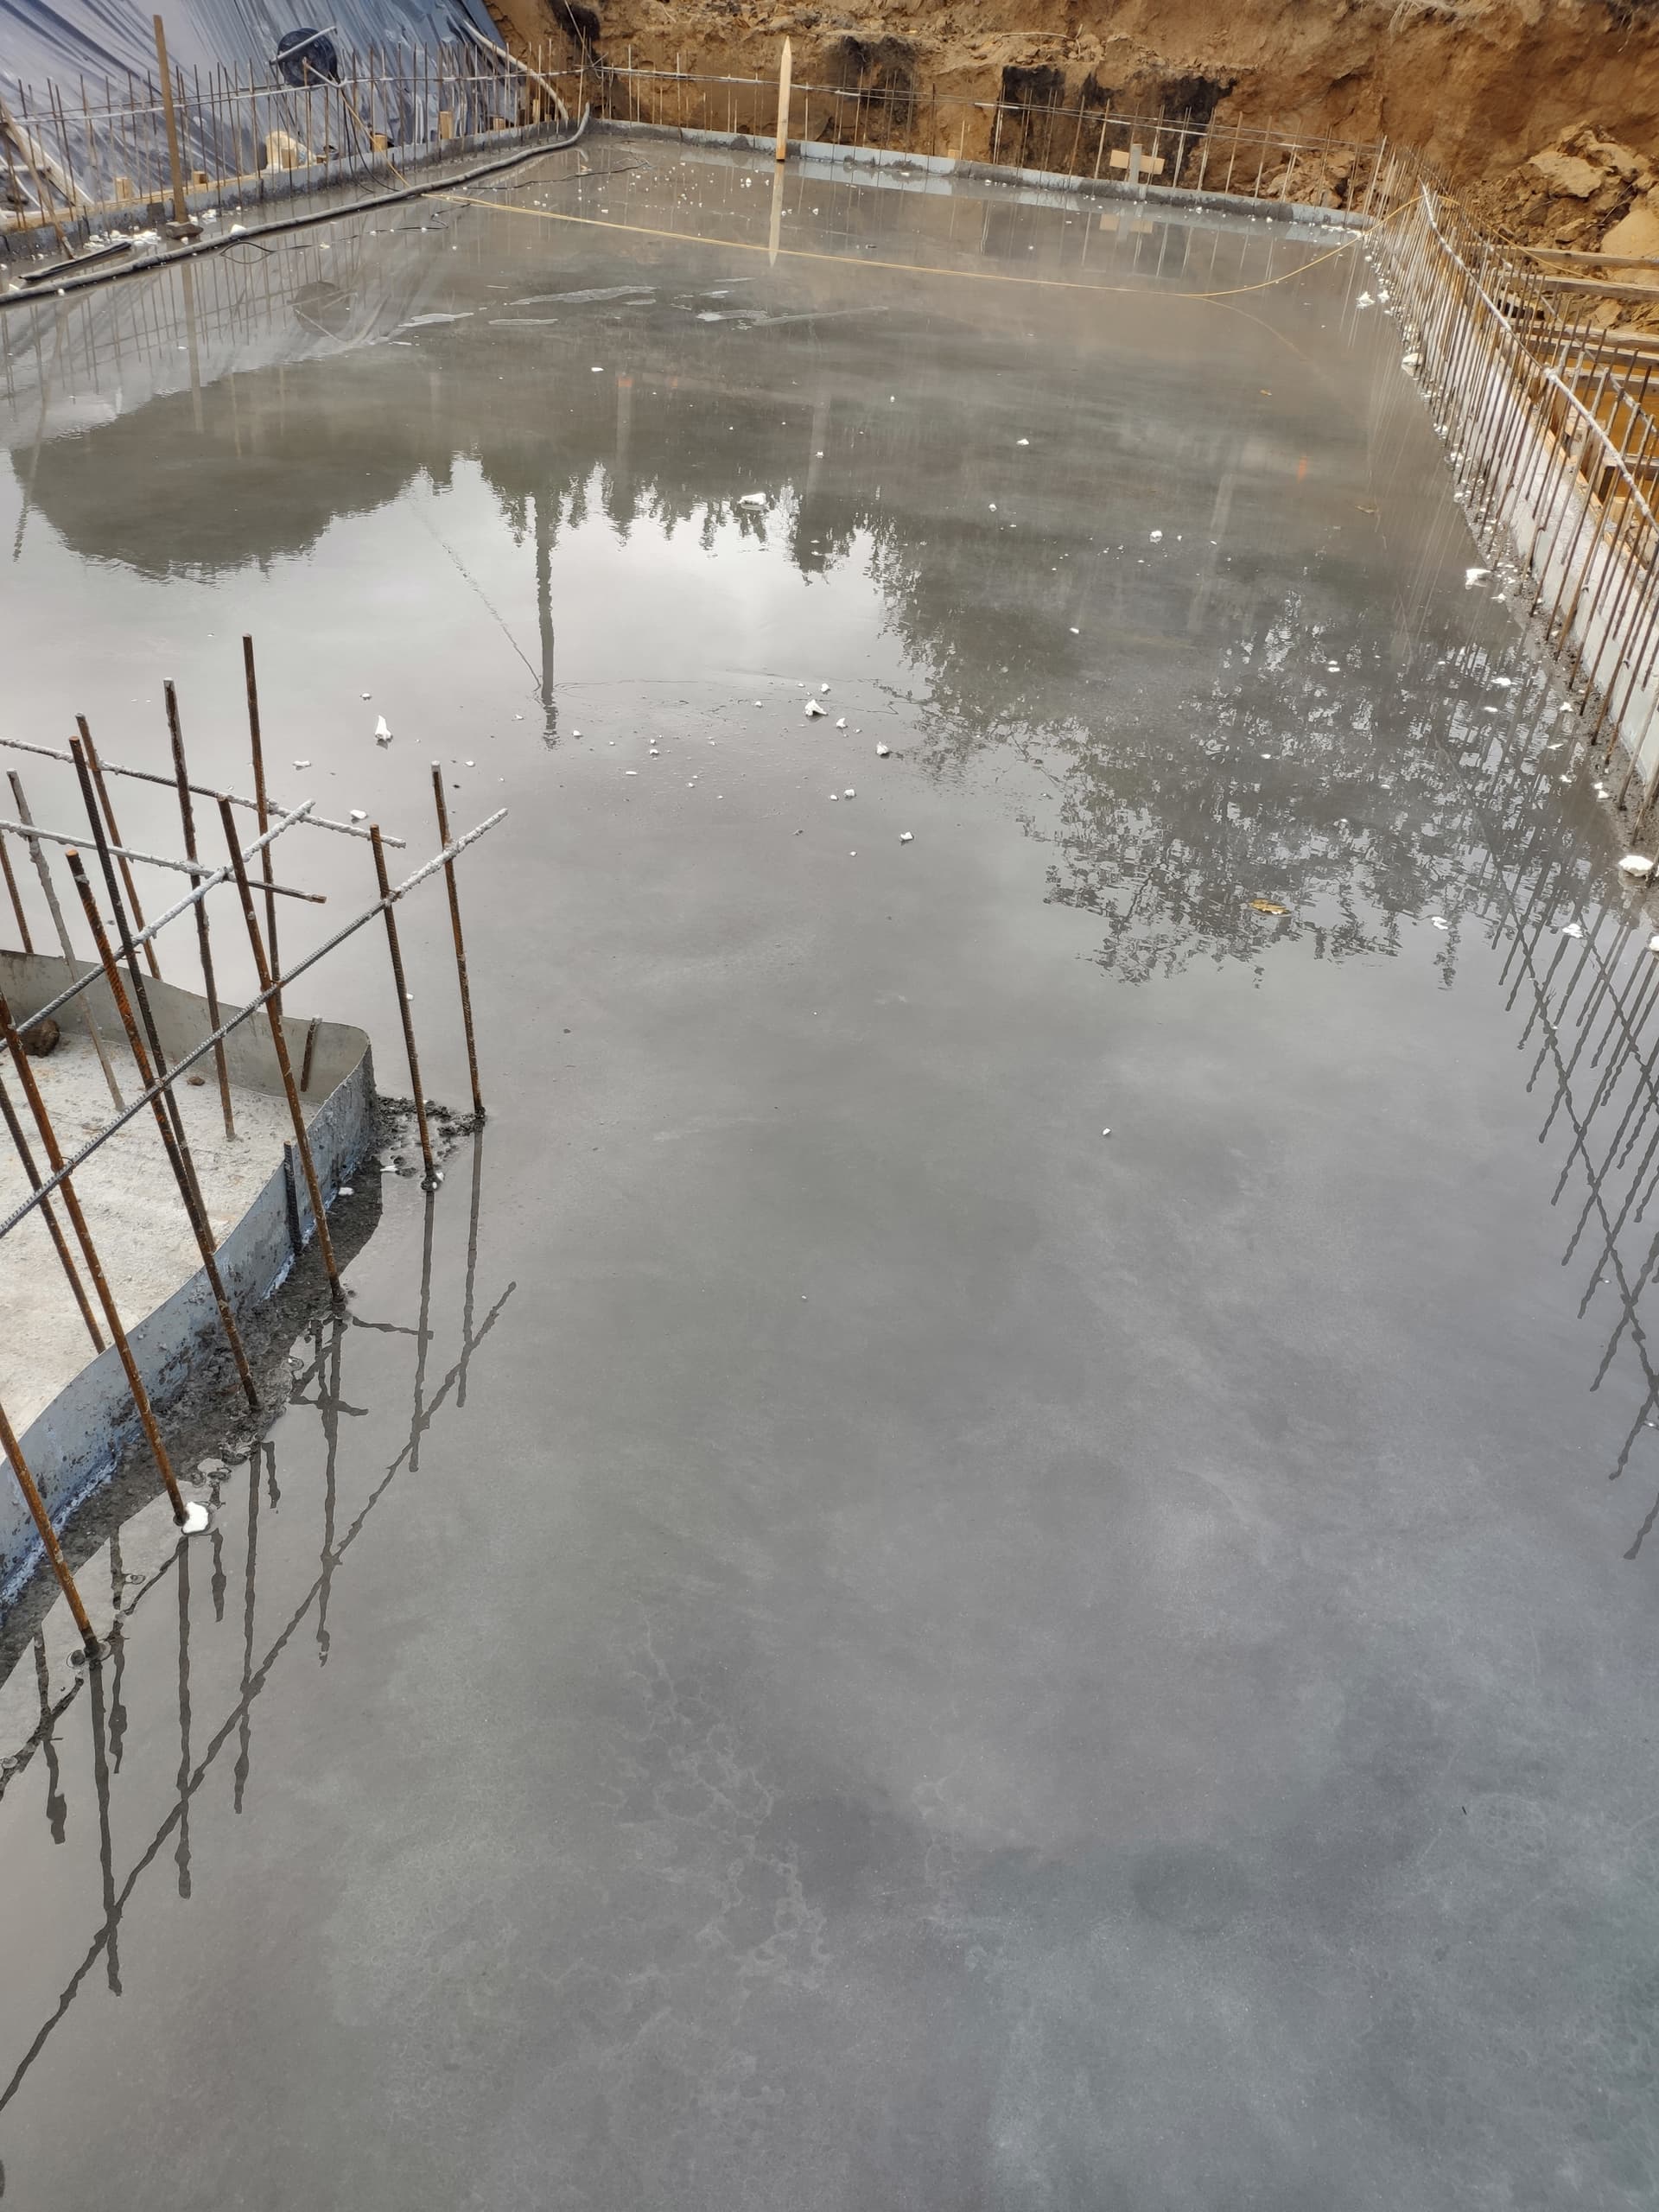
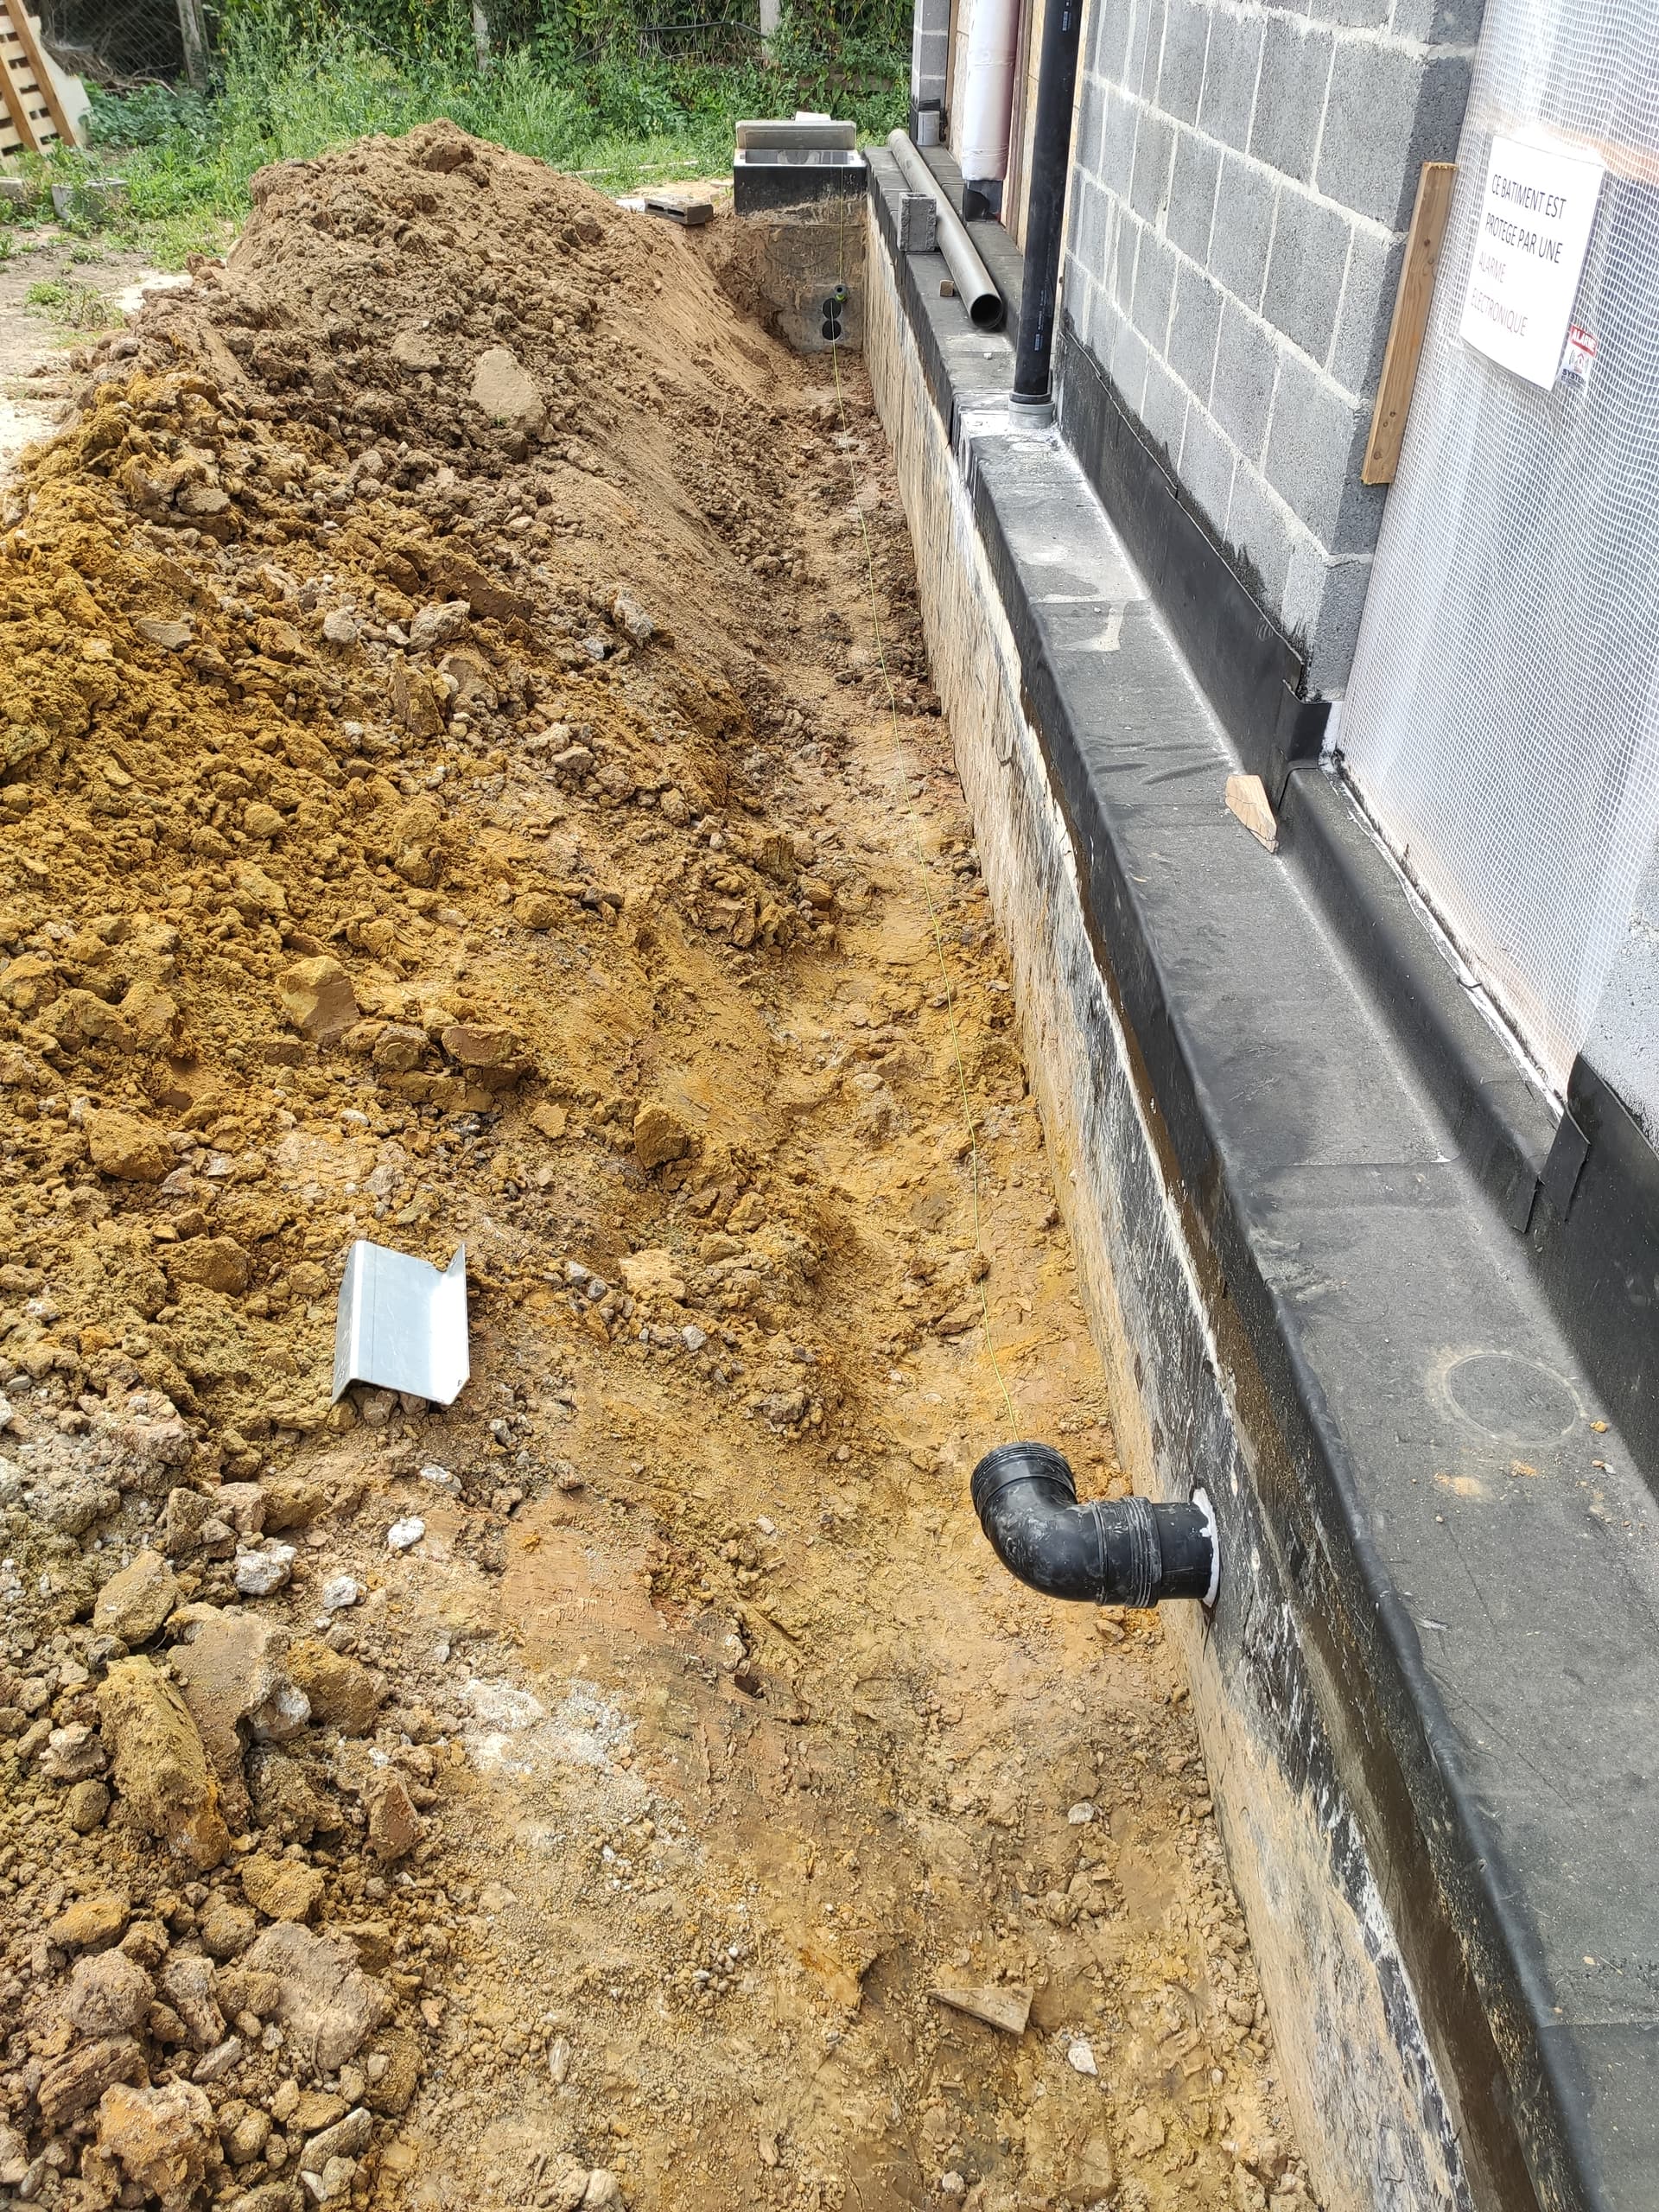
And basement finished, 40cm of concrete, all painted against water infiltration.

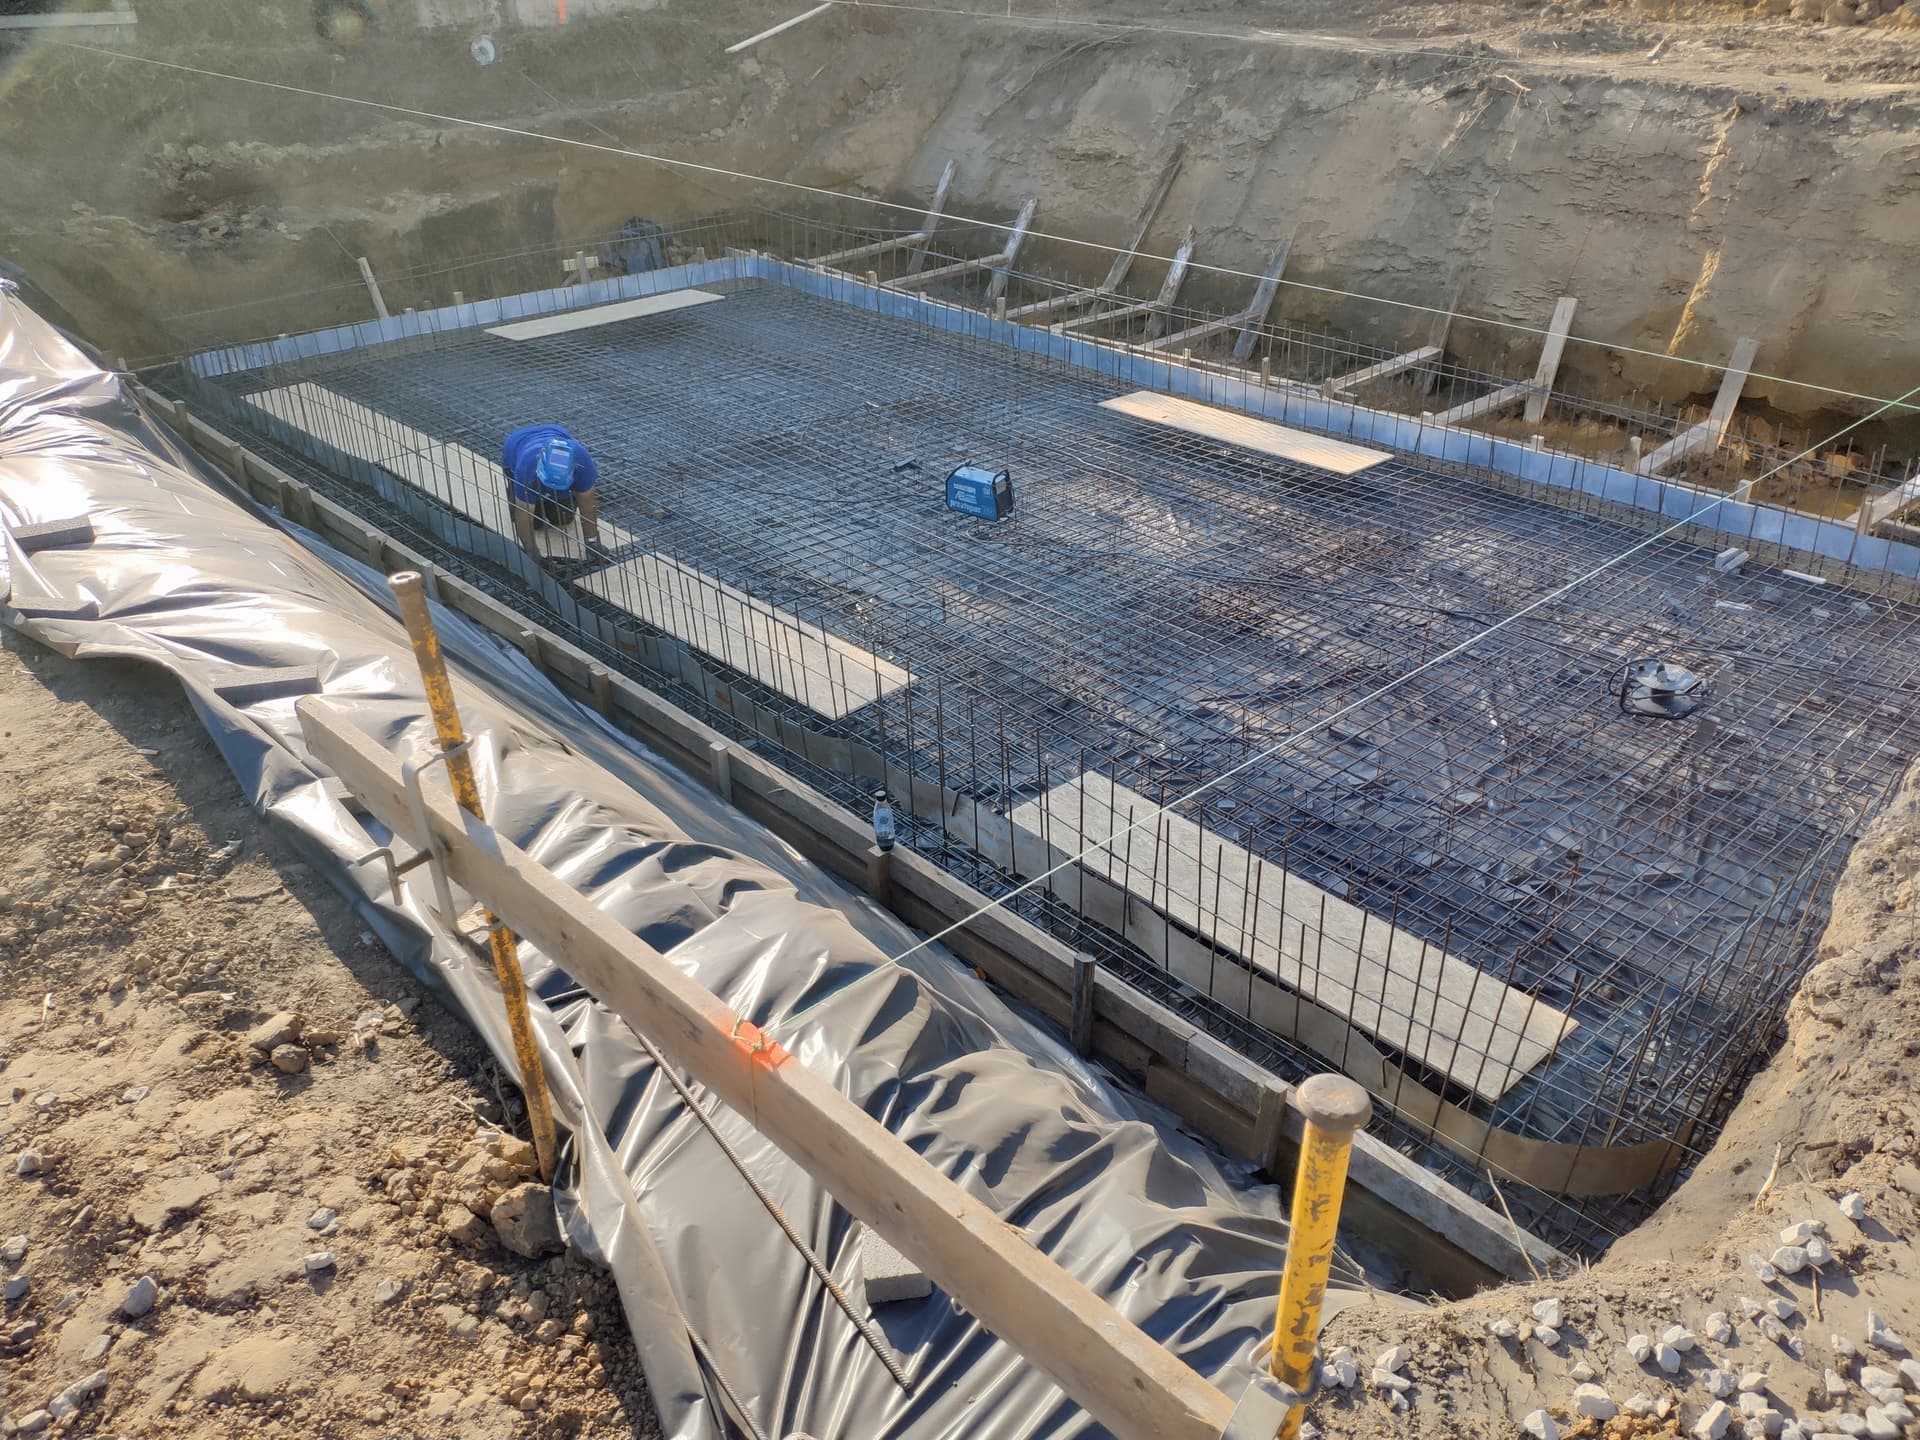
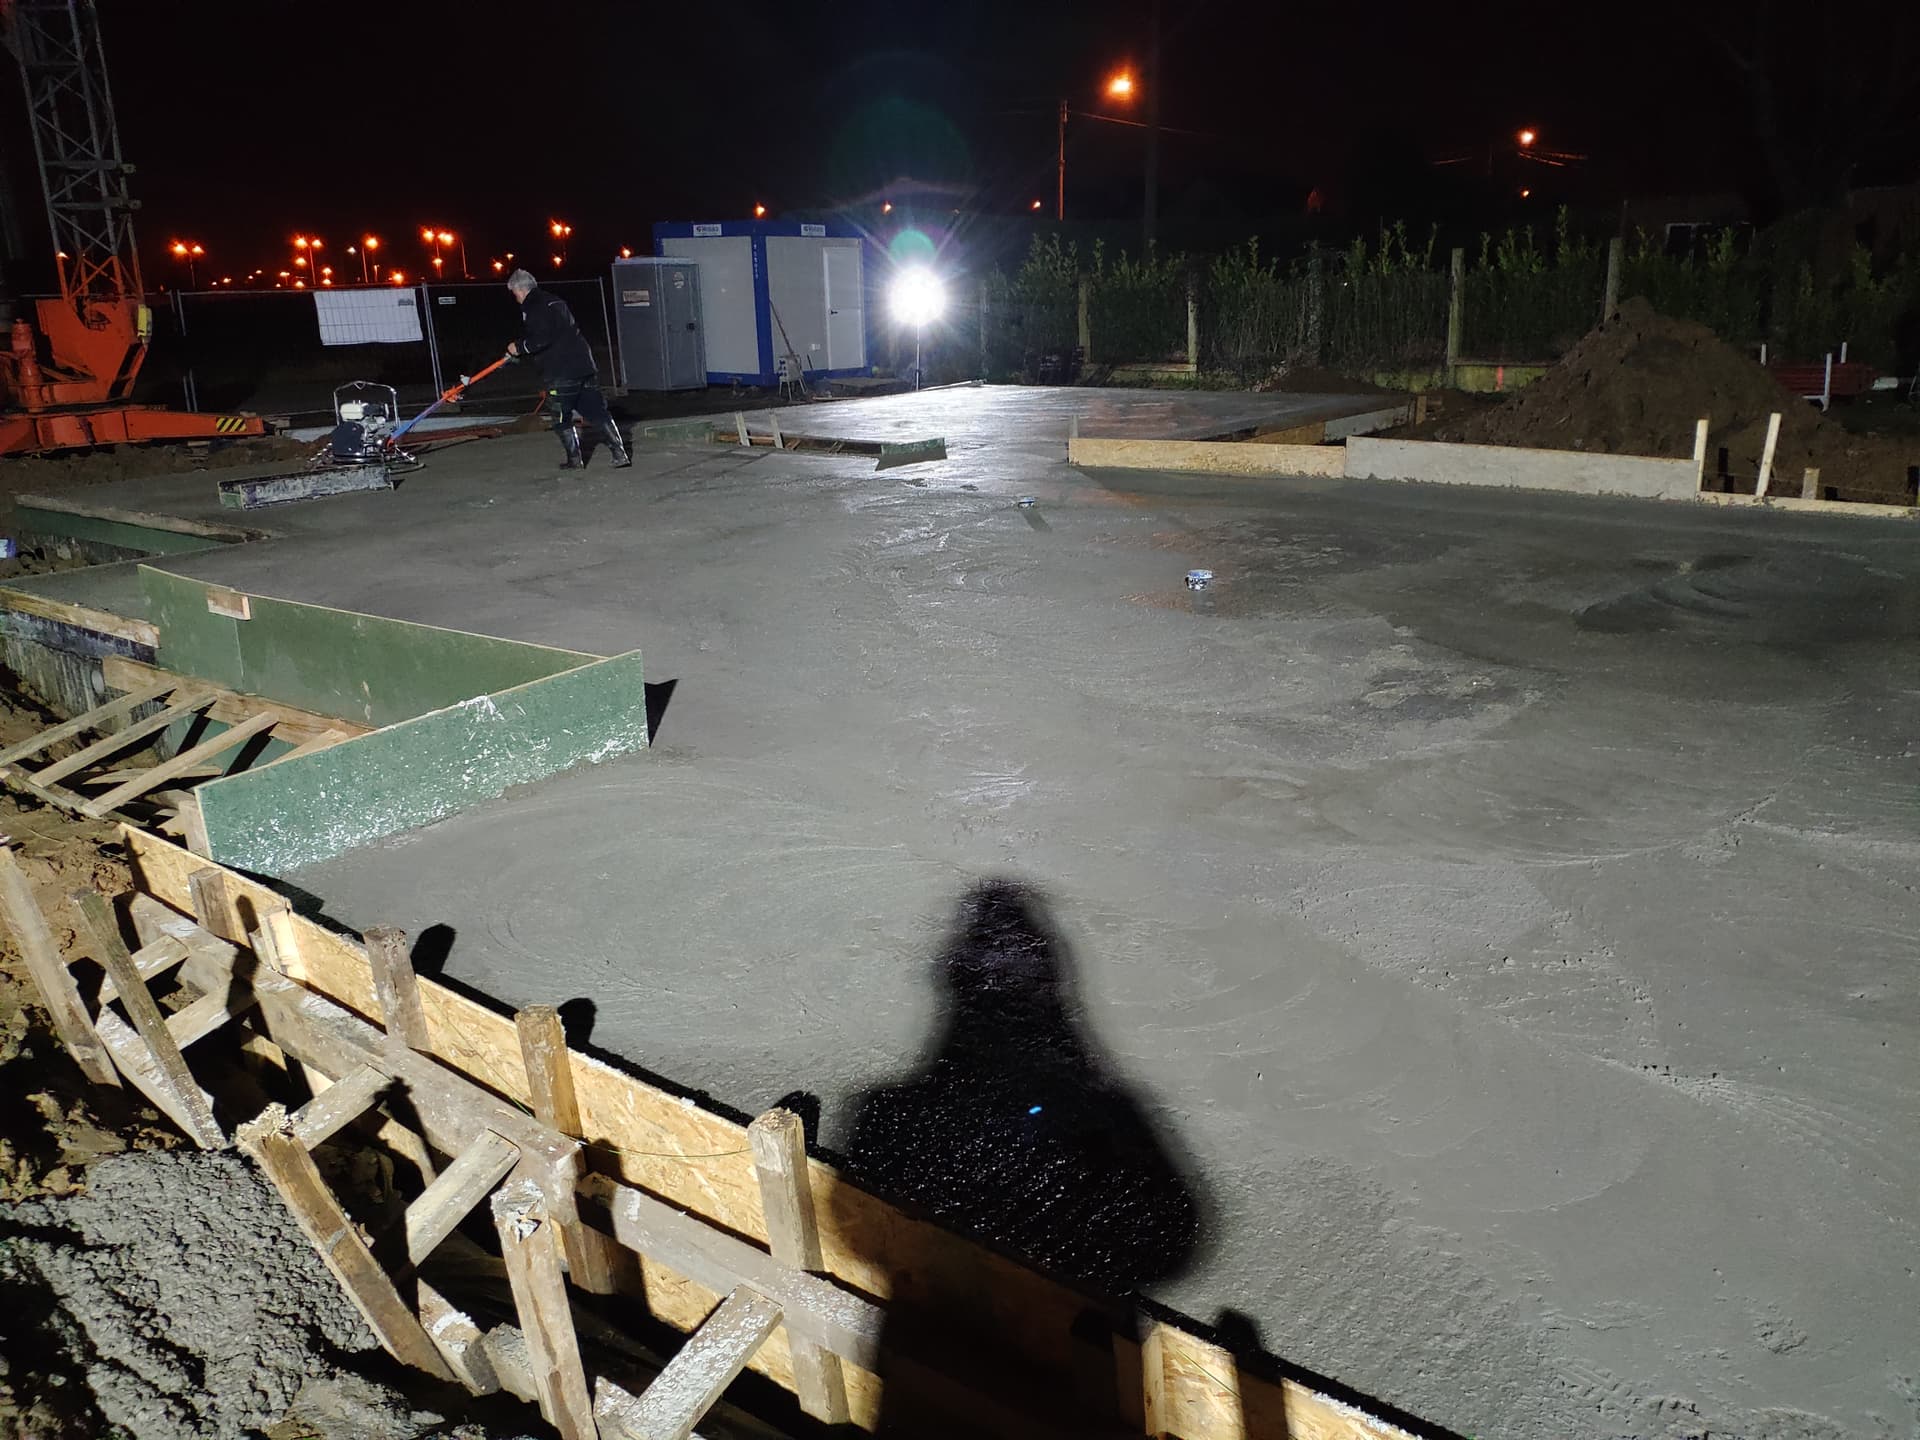
Then floor, as you can see, we finished very late :rofl:

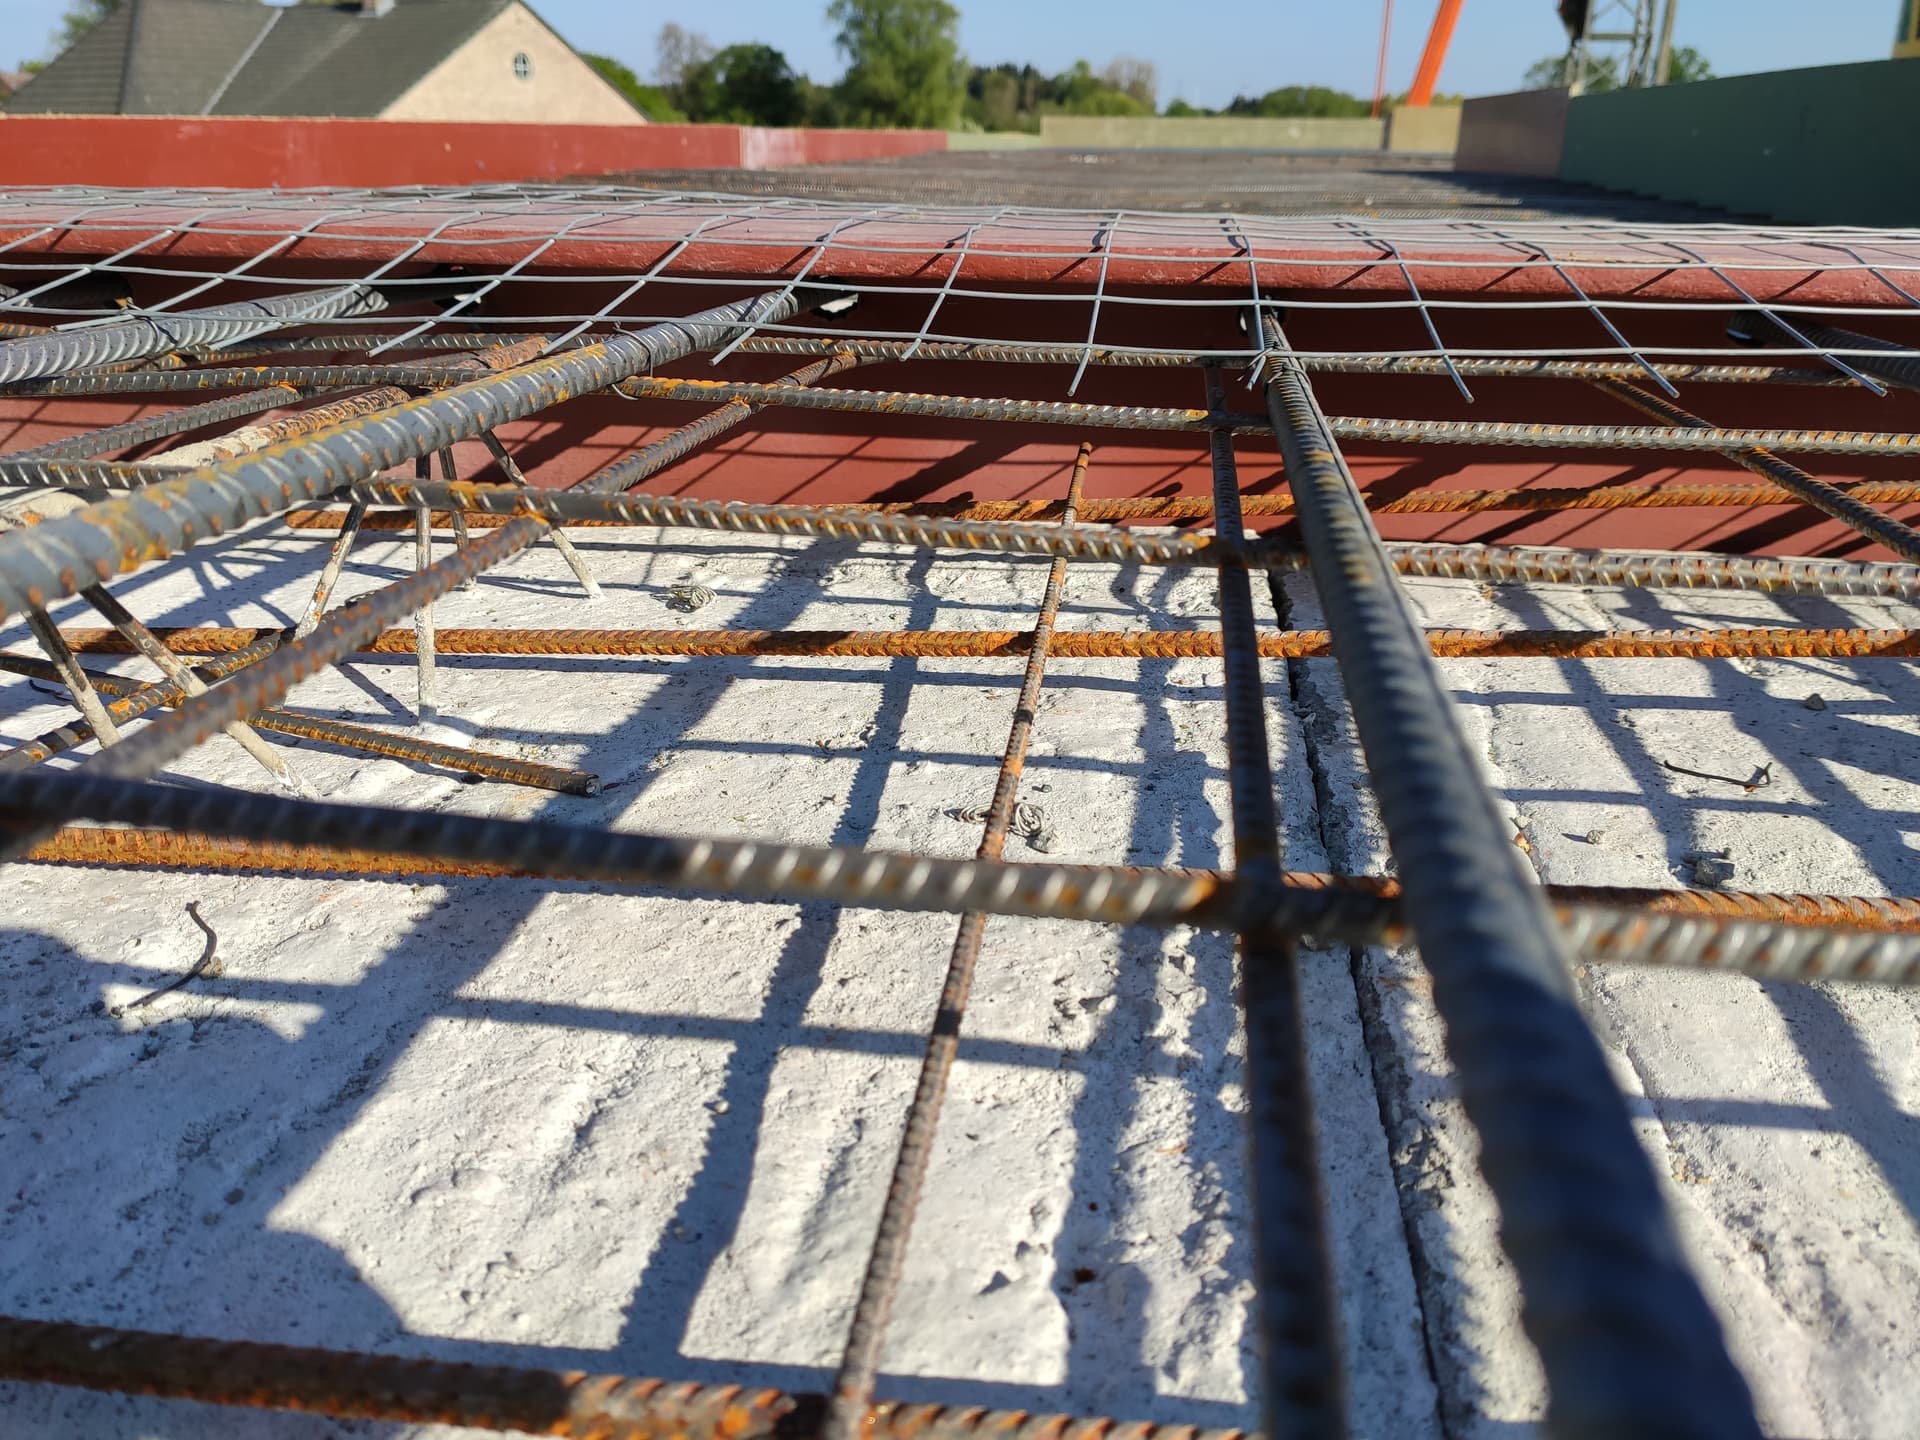
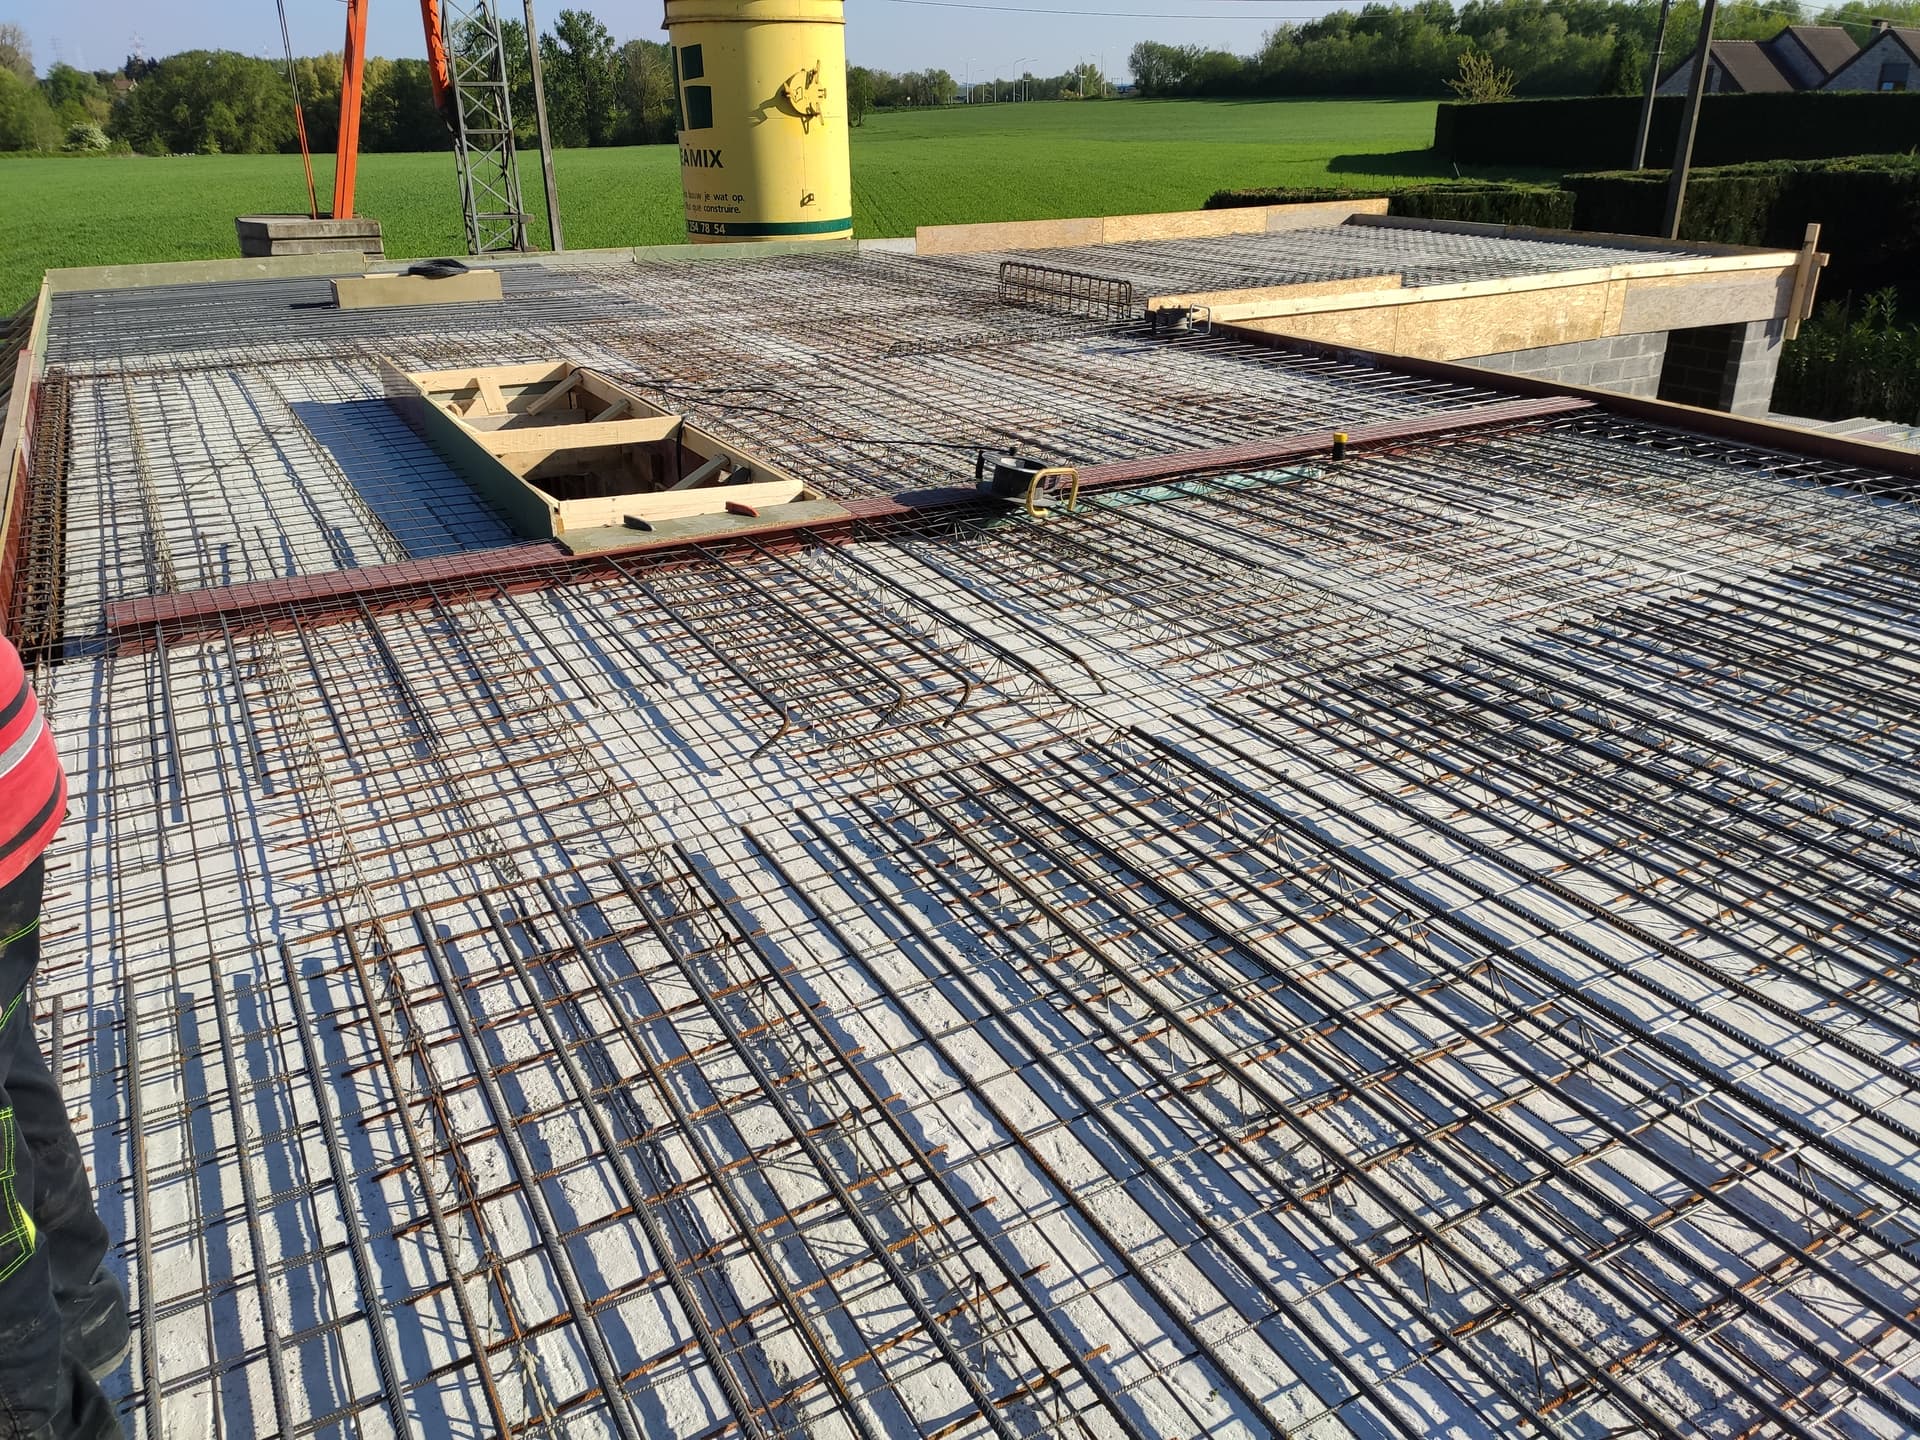
Then first floor, same story, notice also that some steel bar goes inside the beams


Floors achieved :

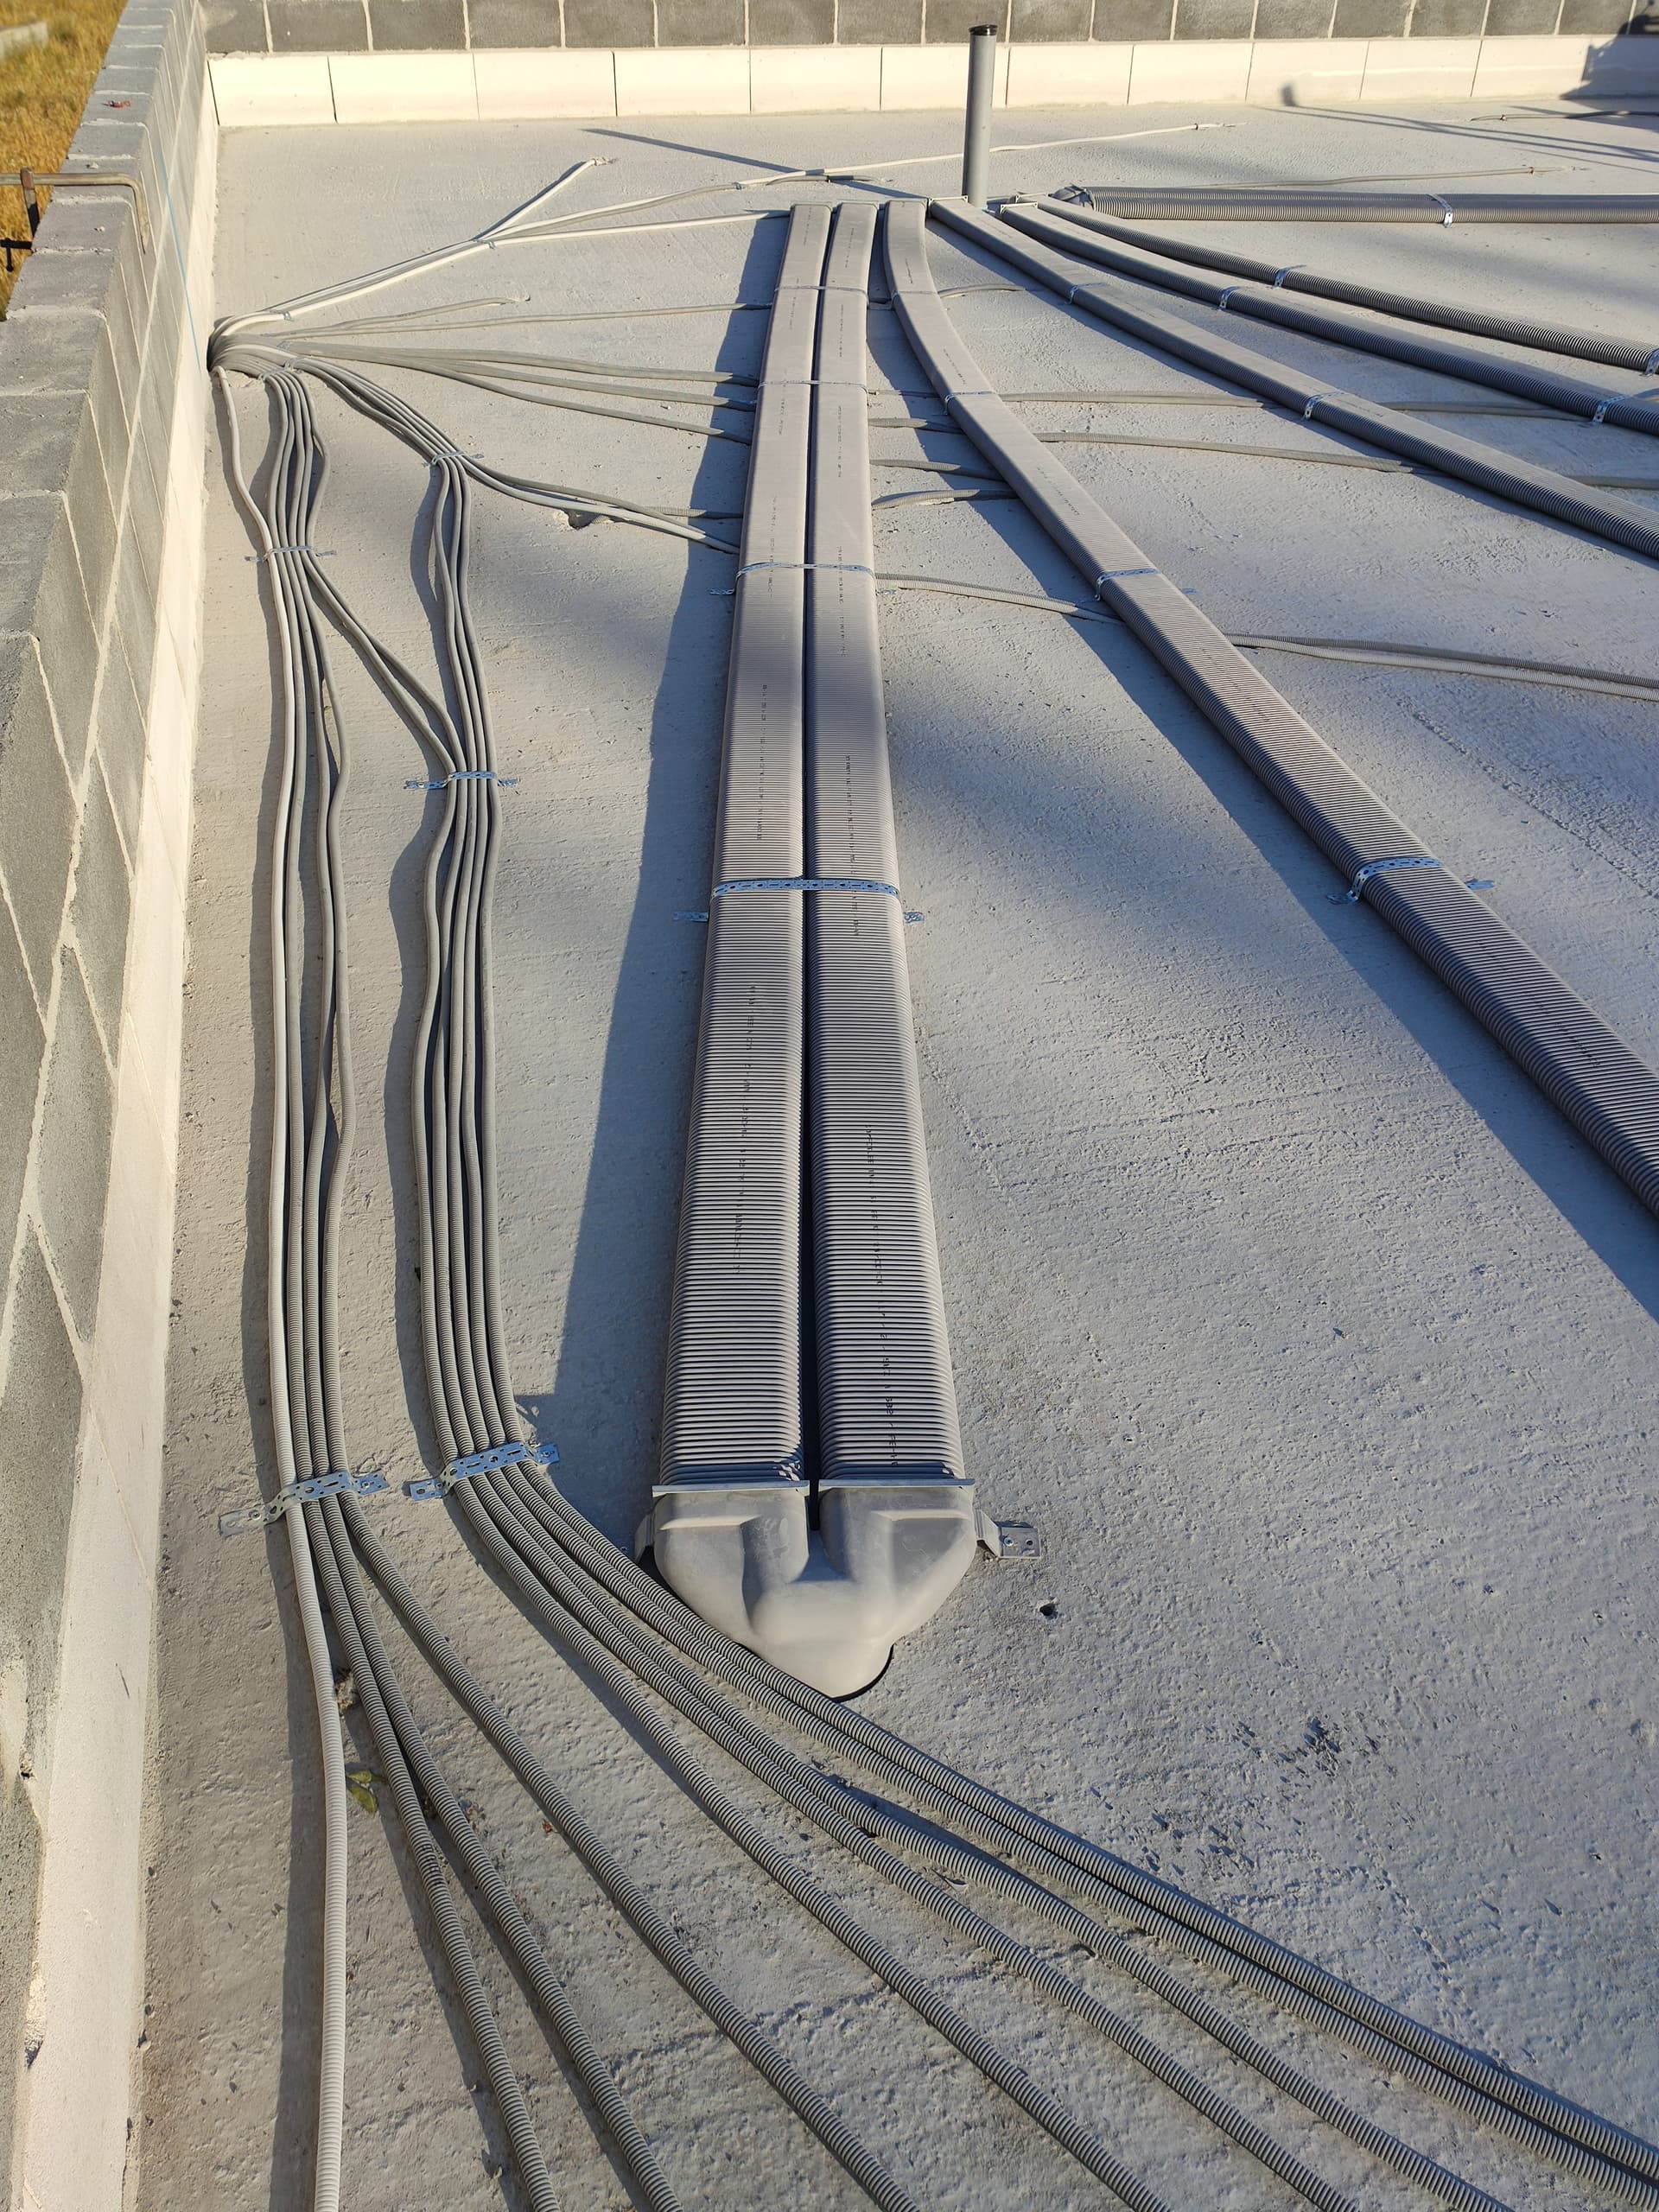
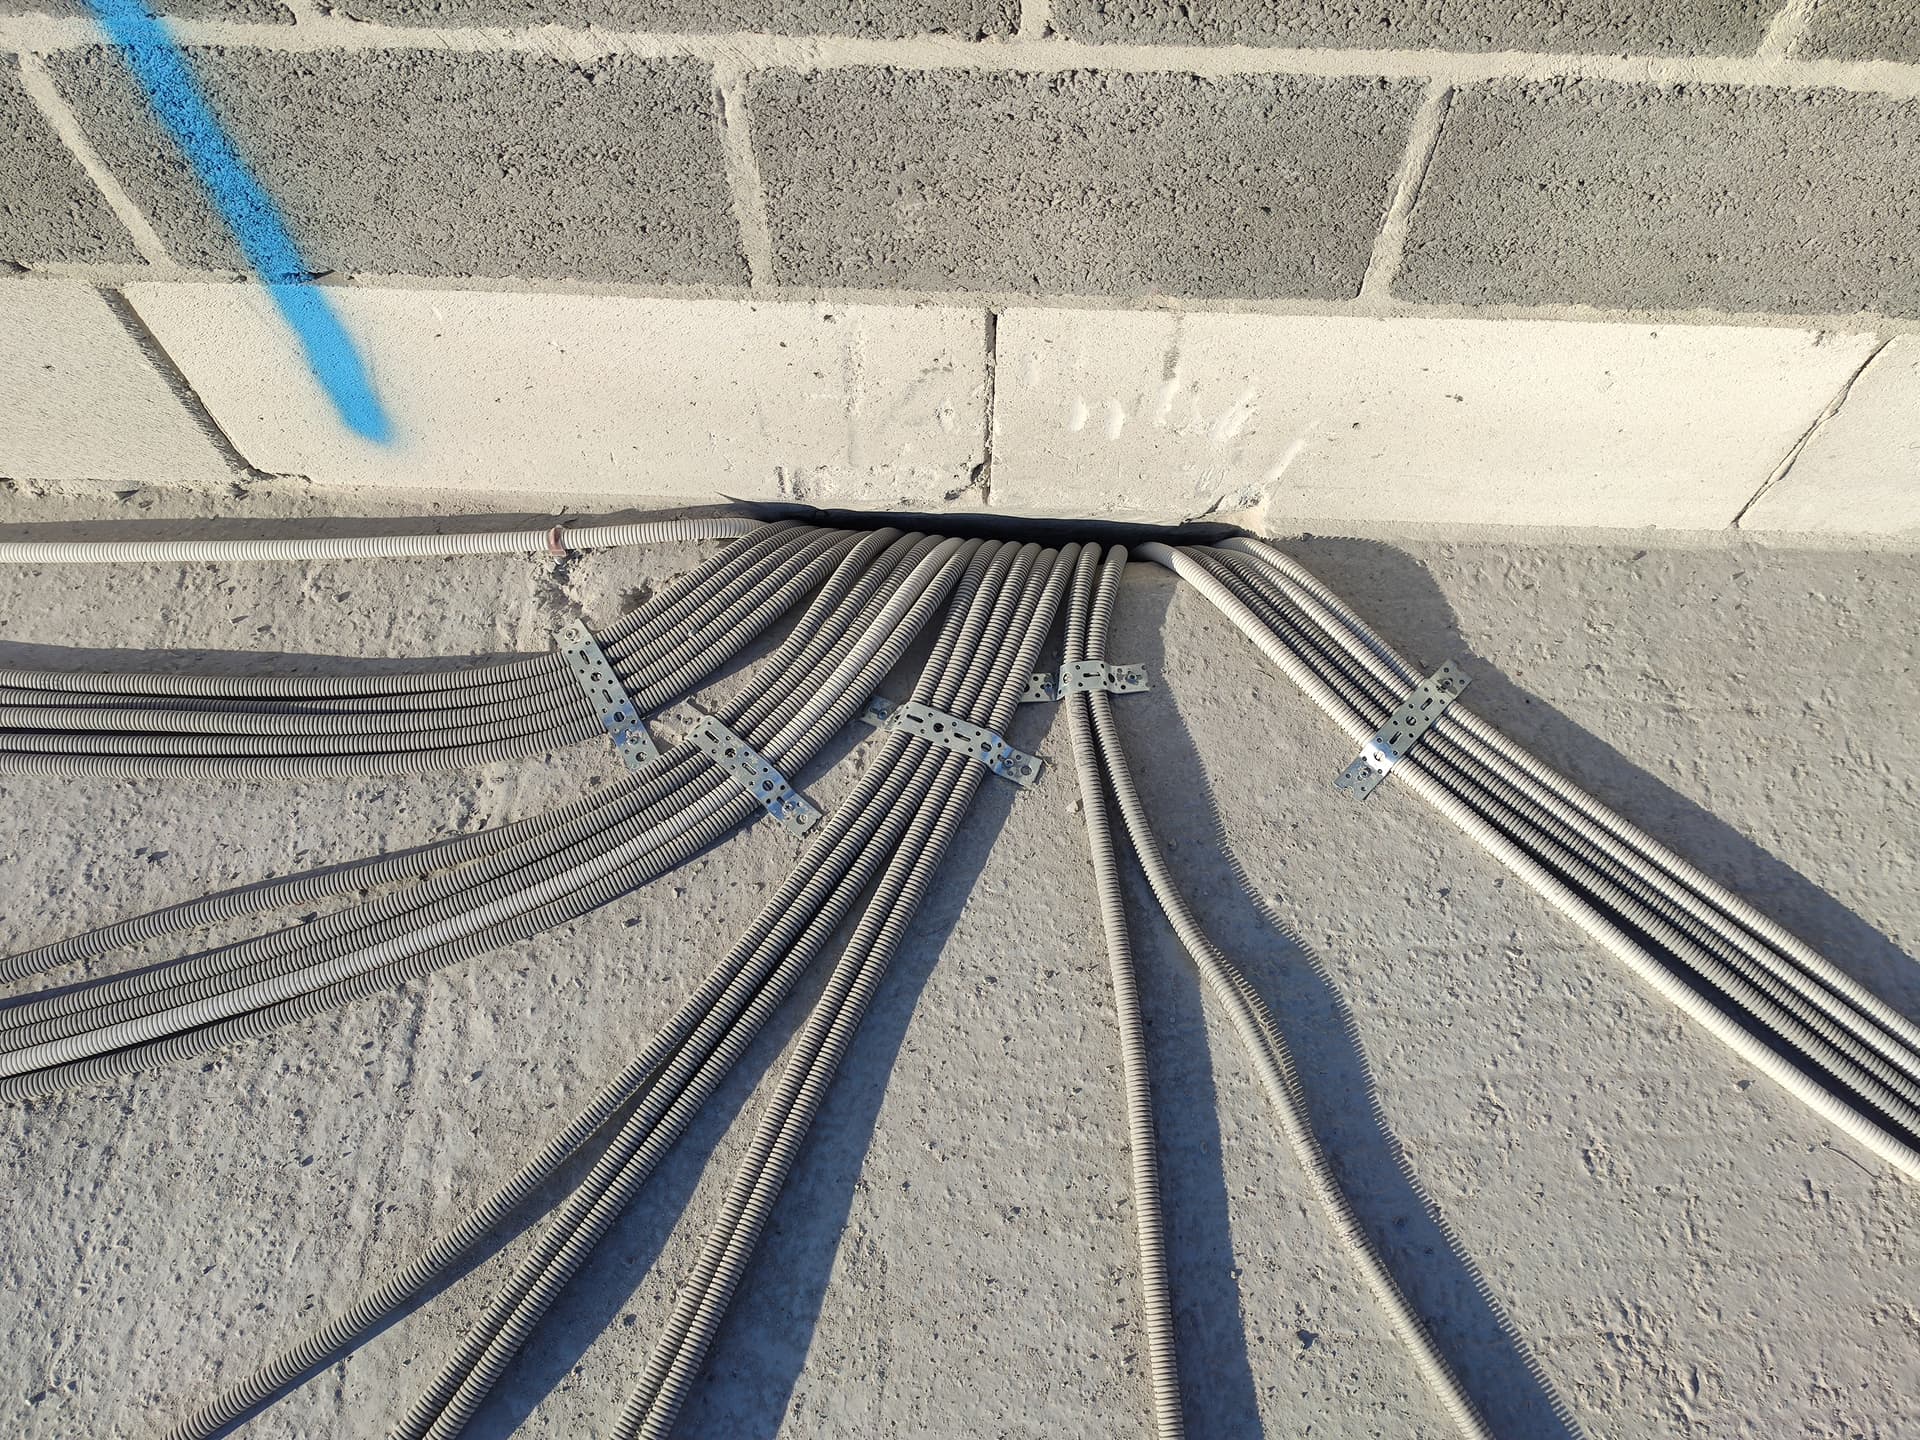
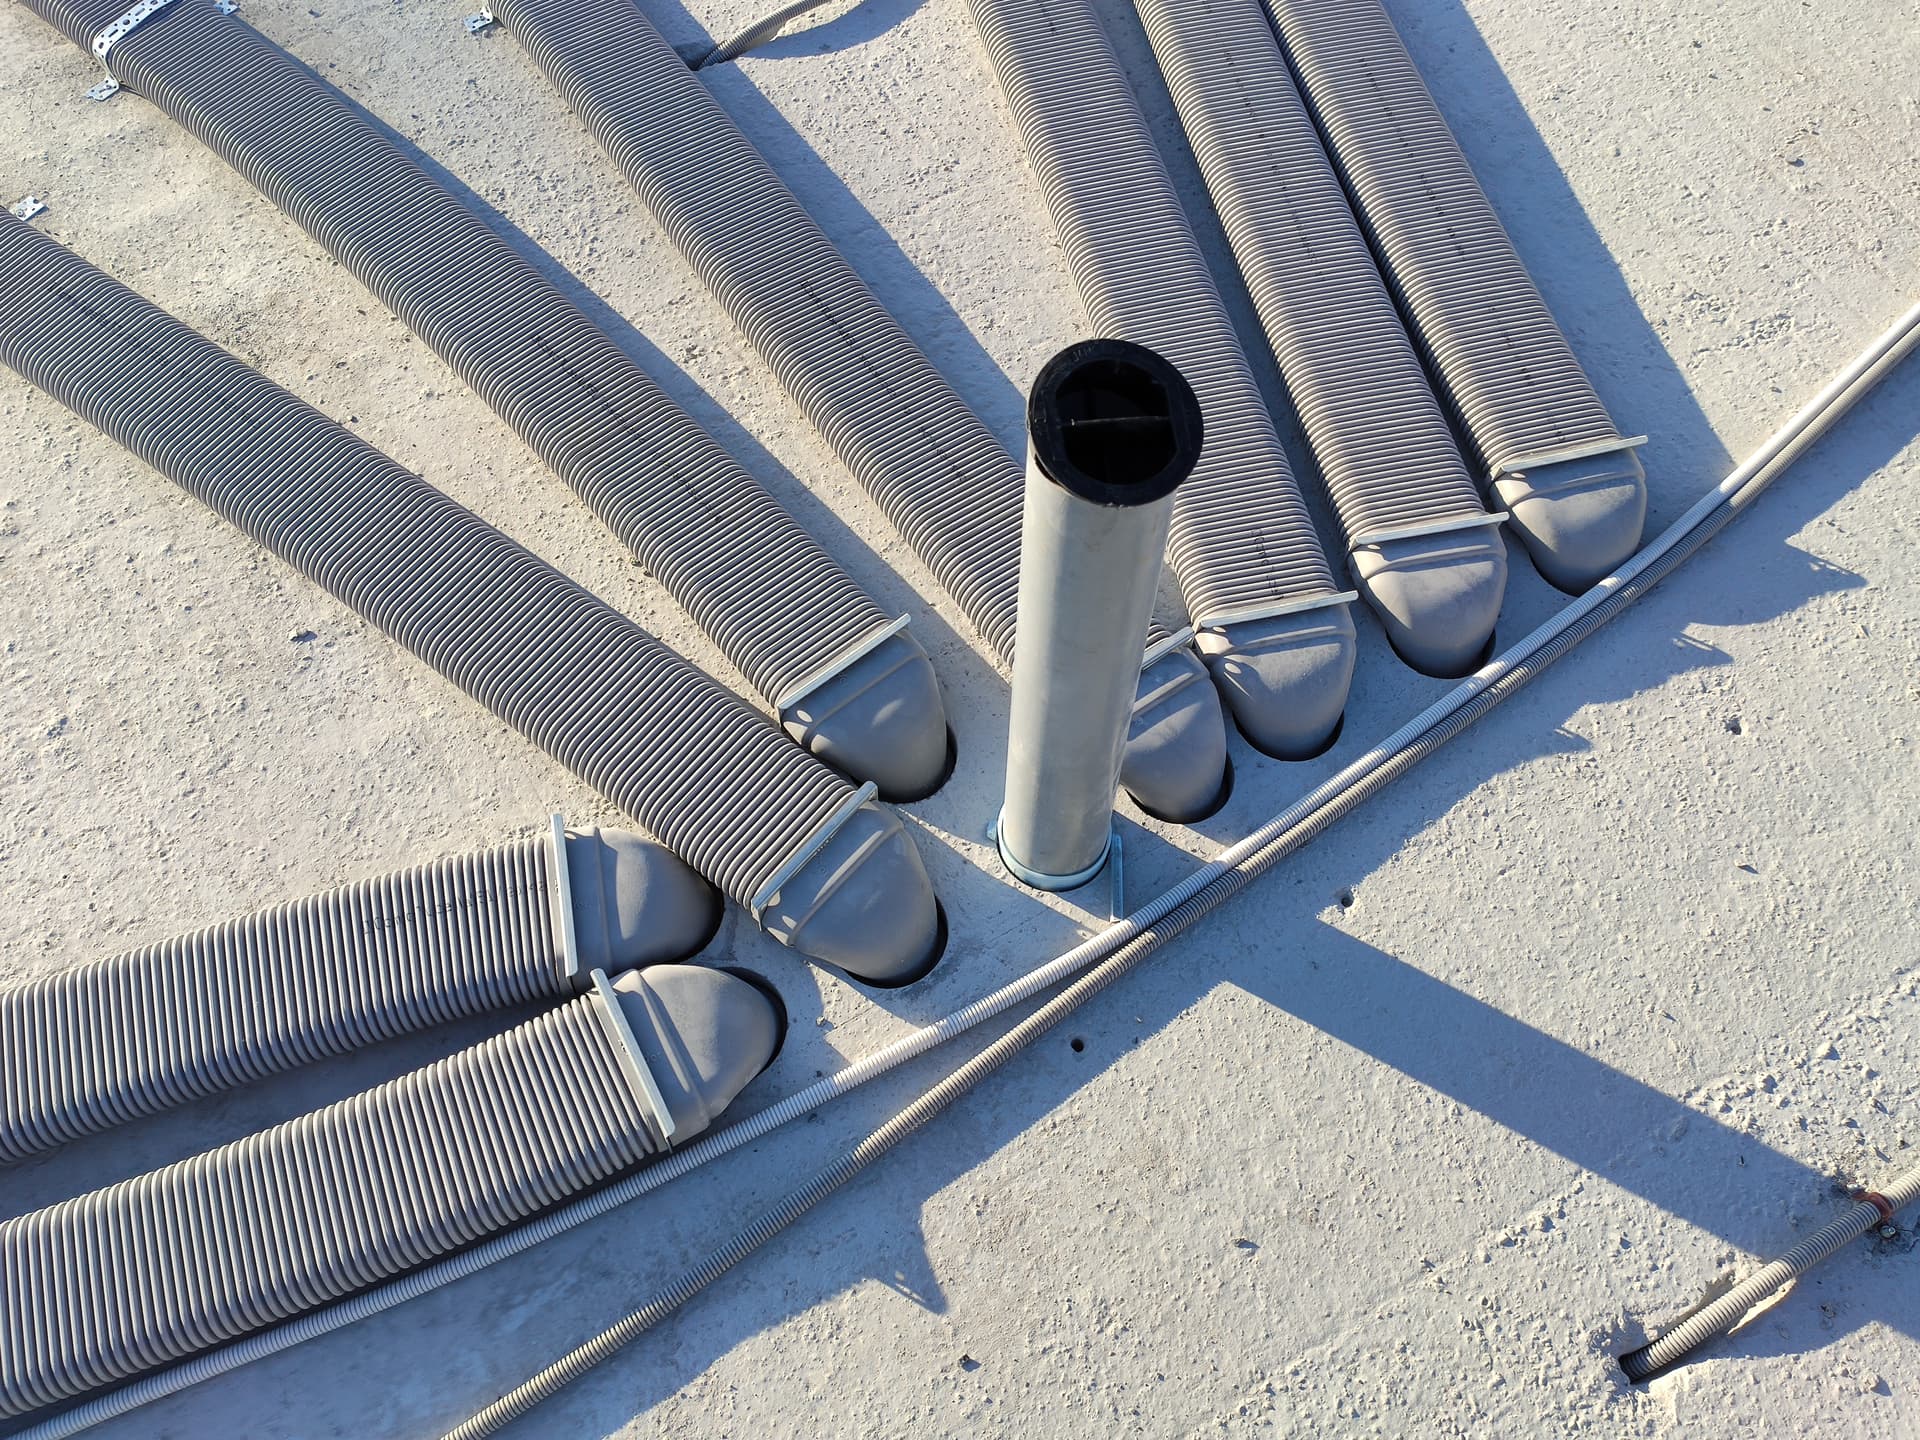
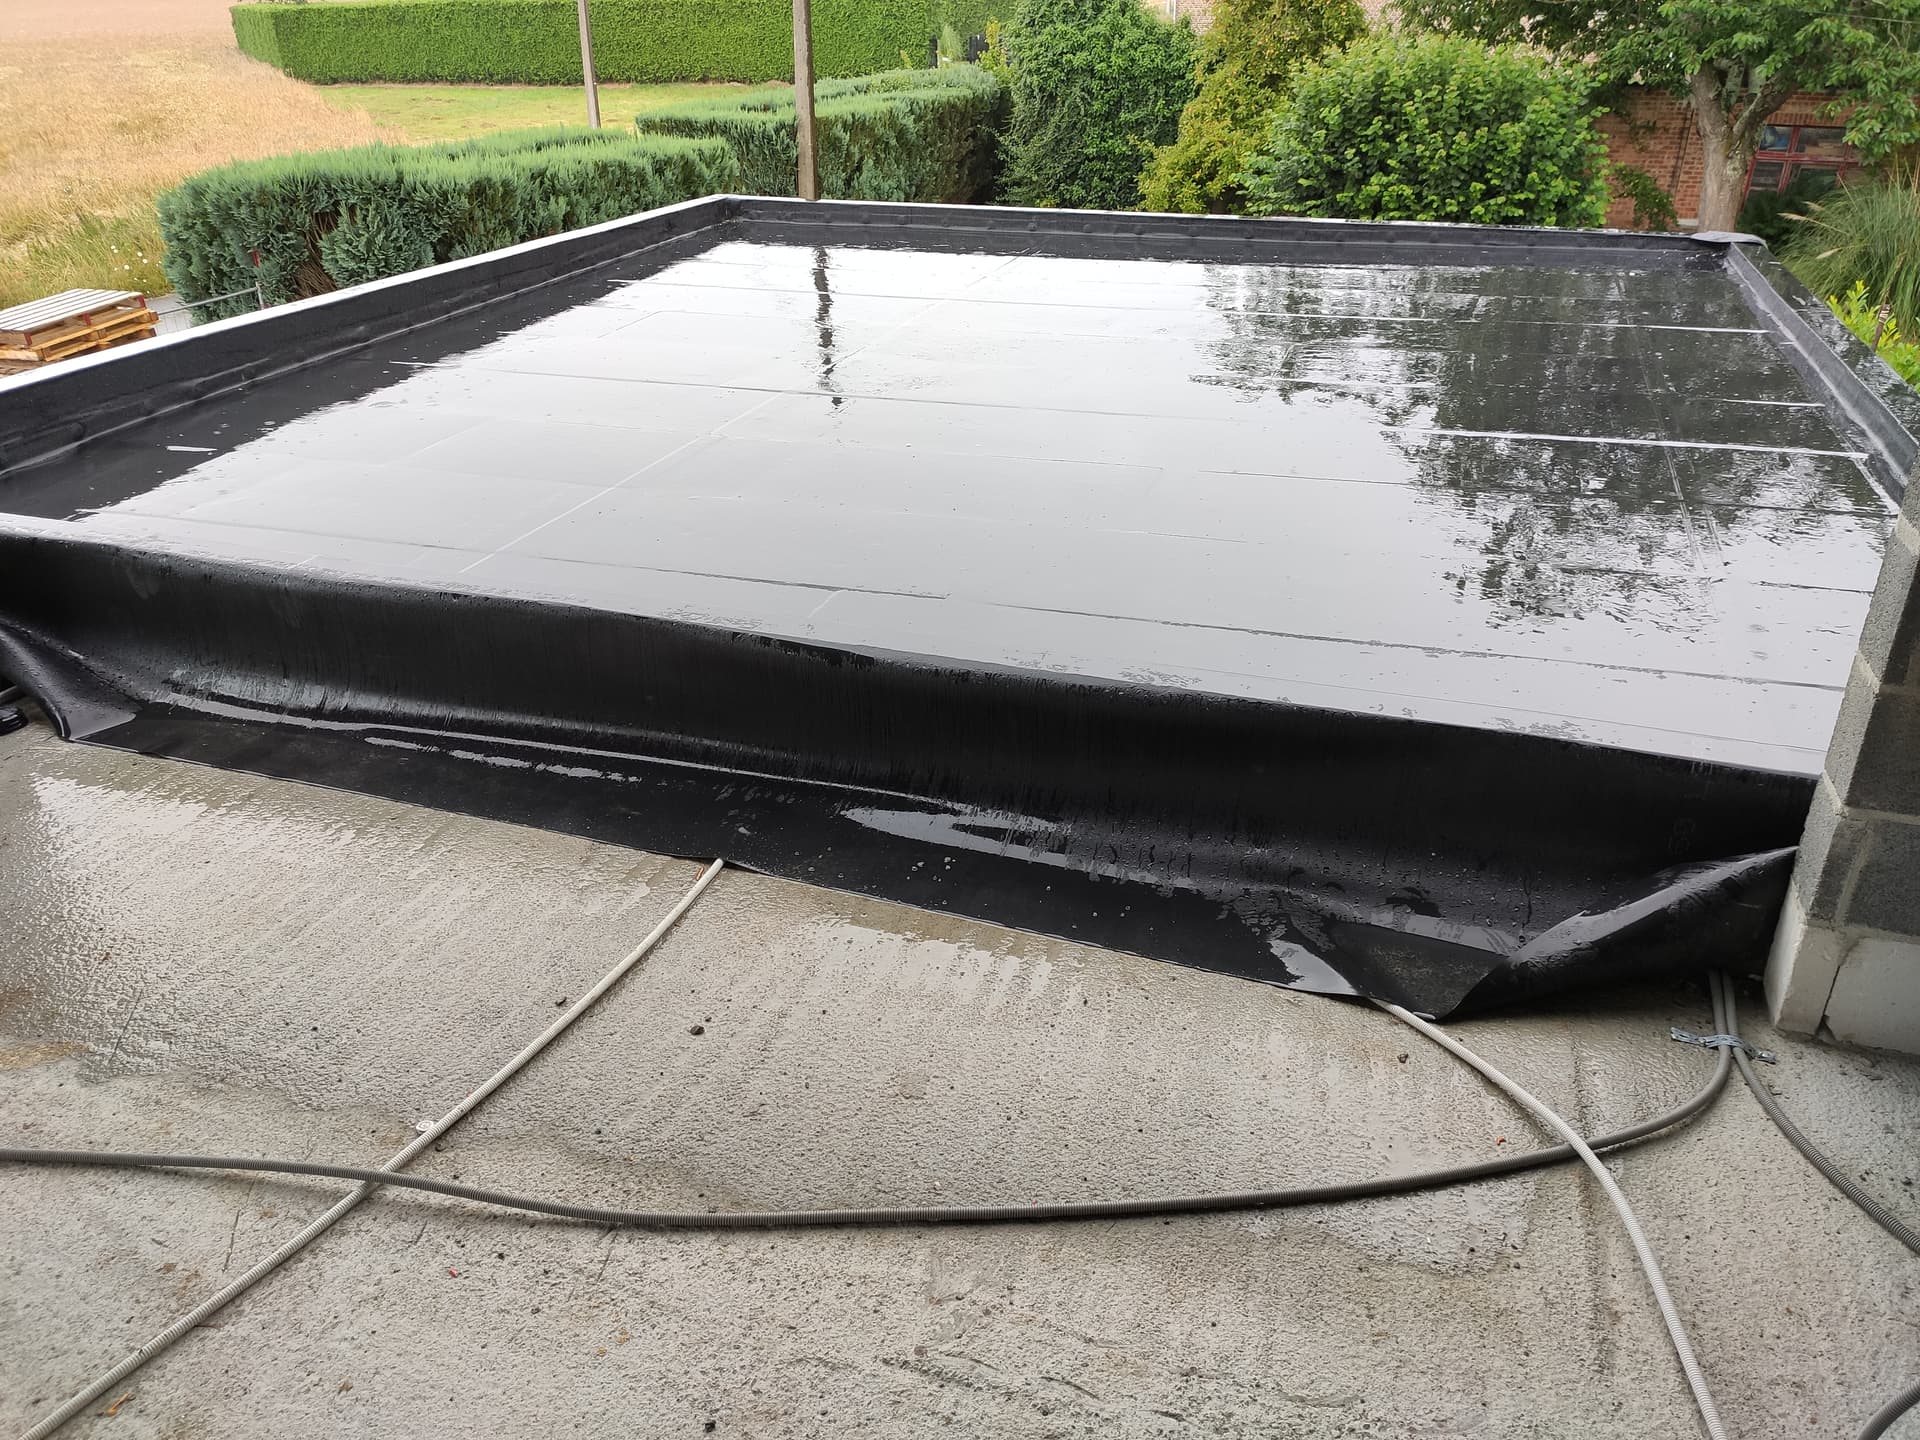
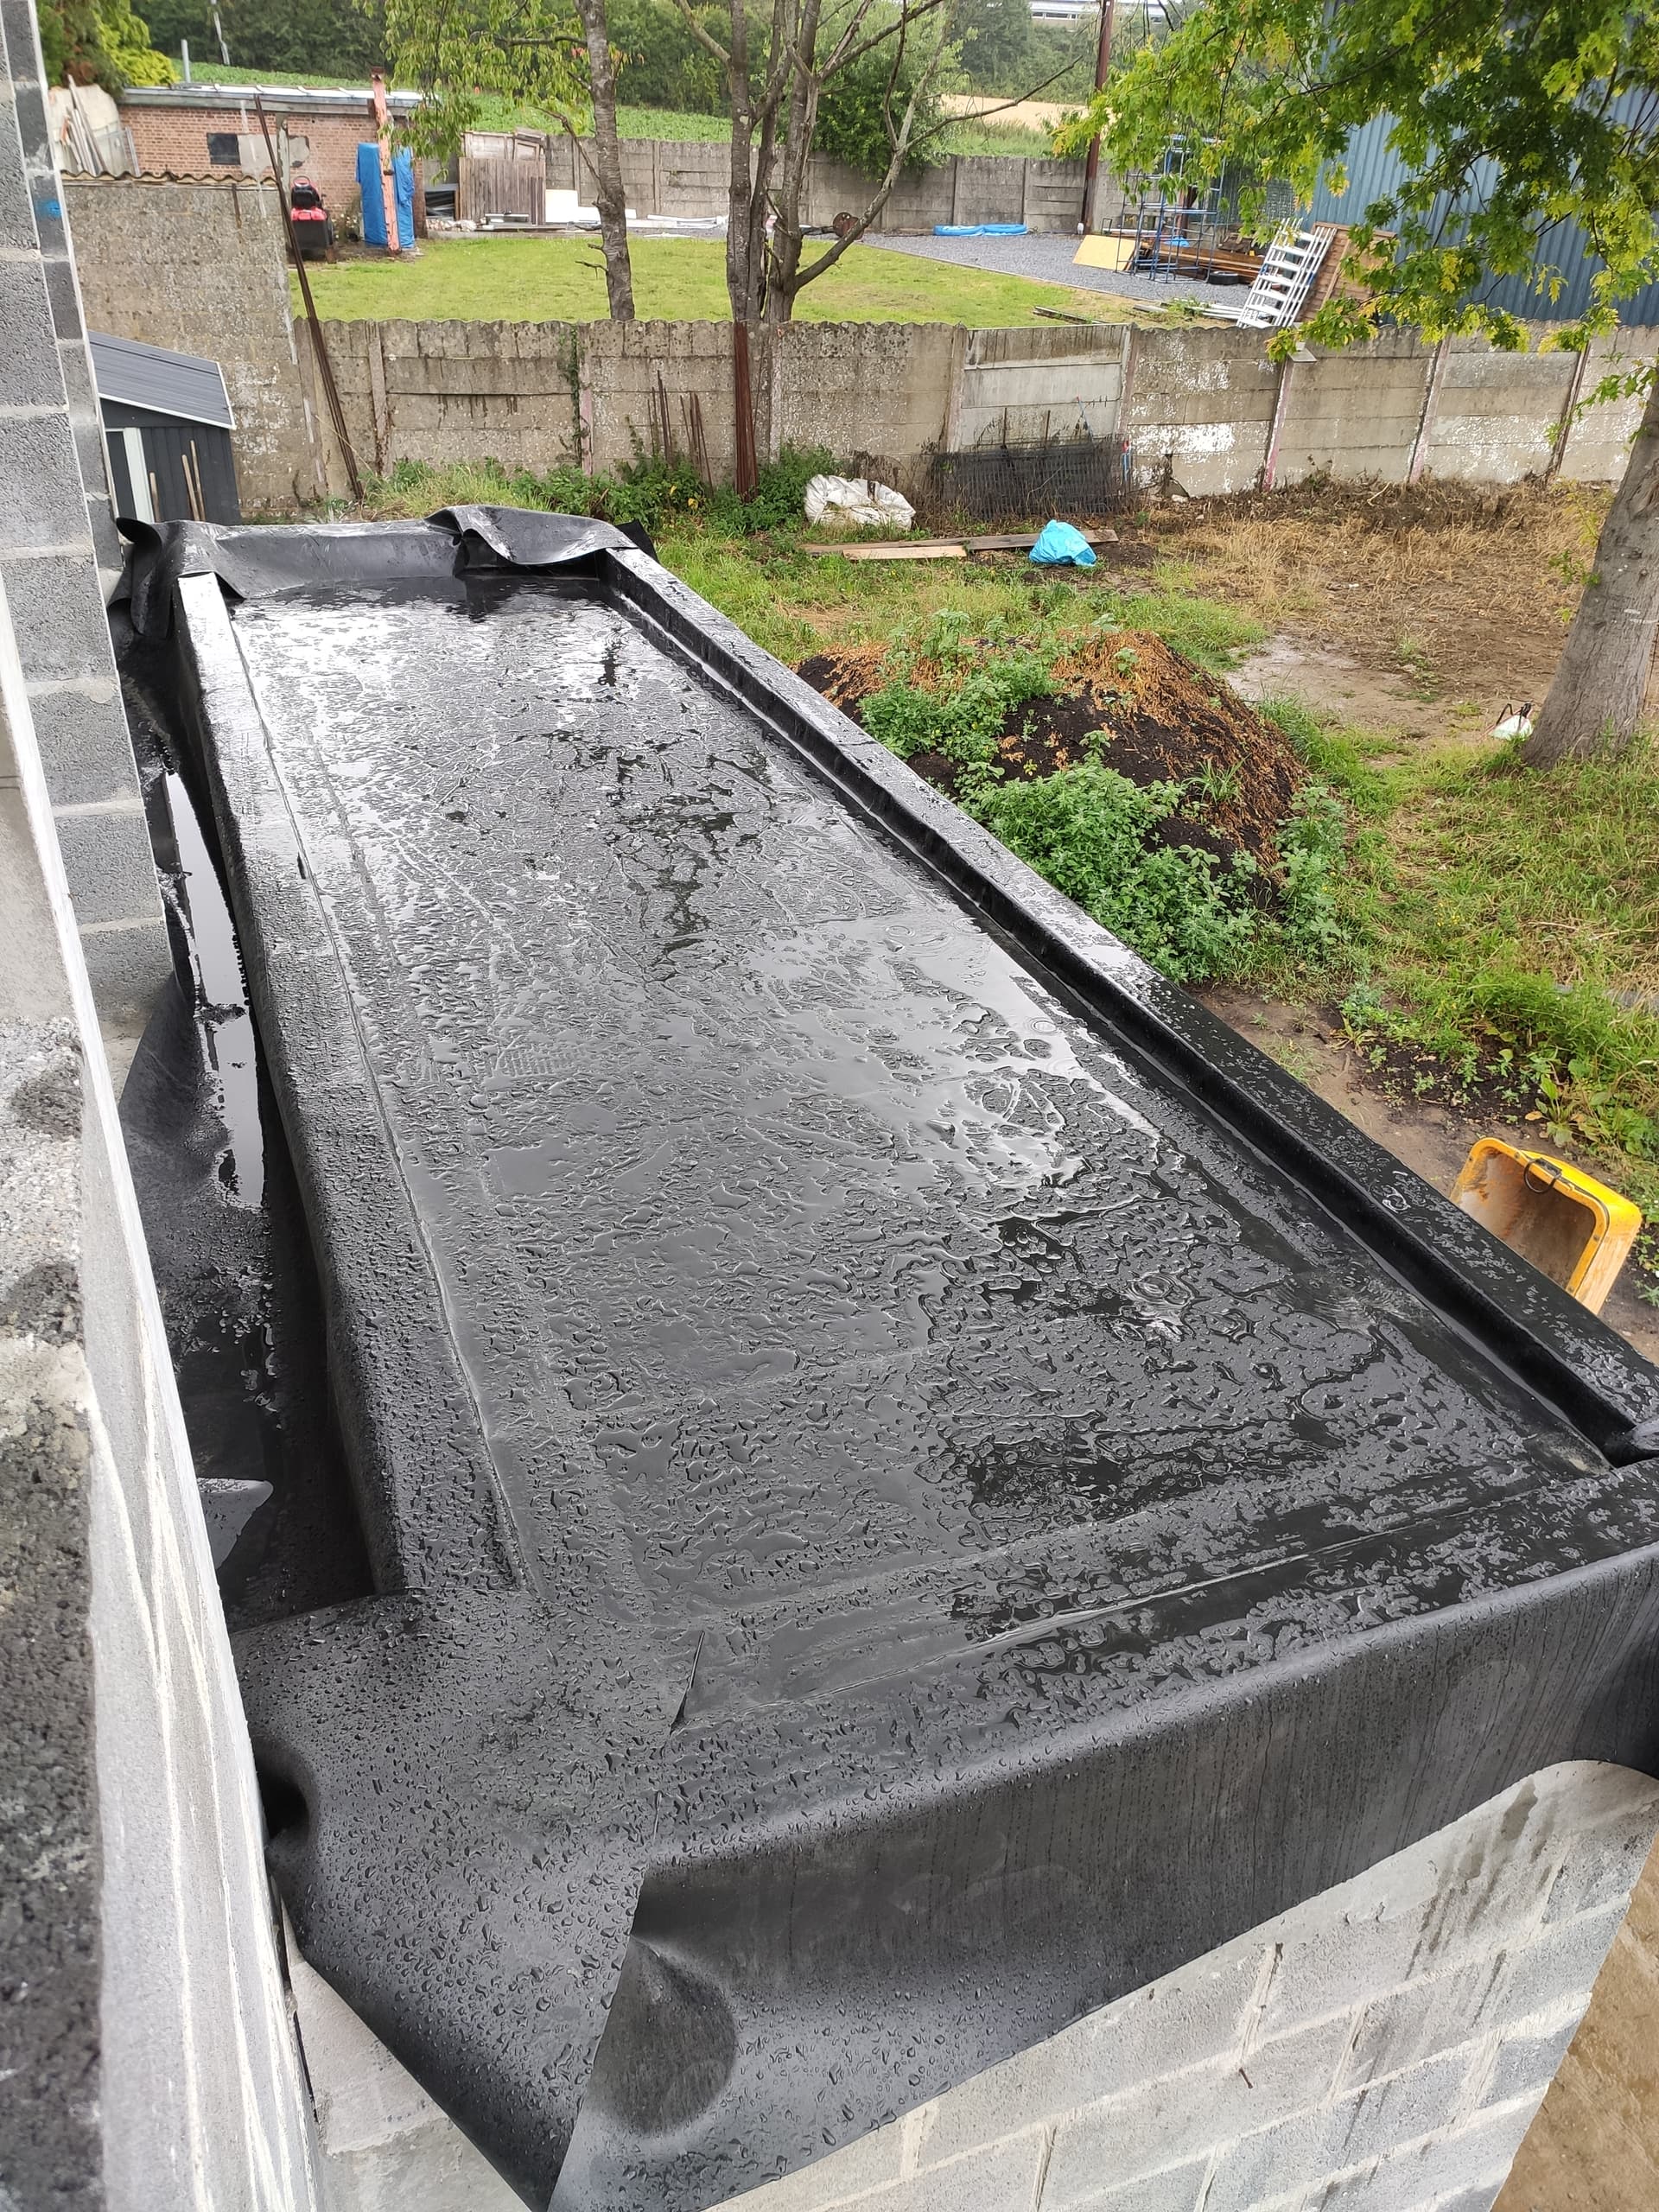
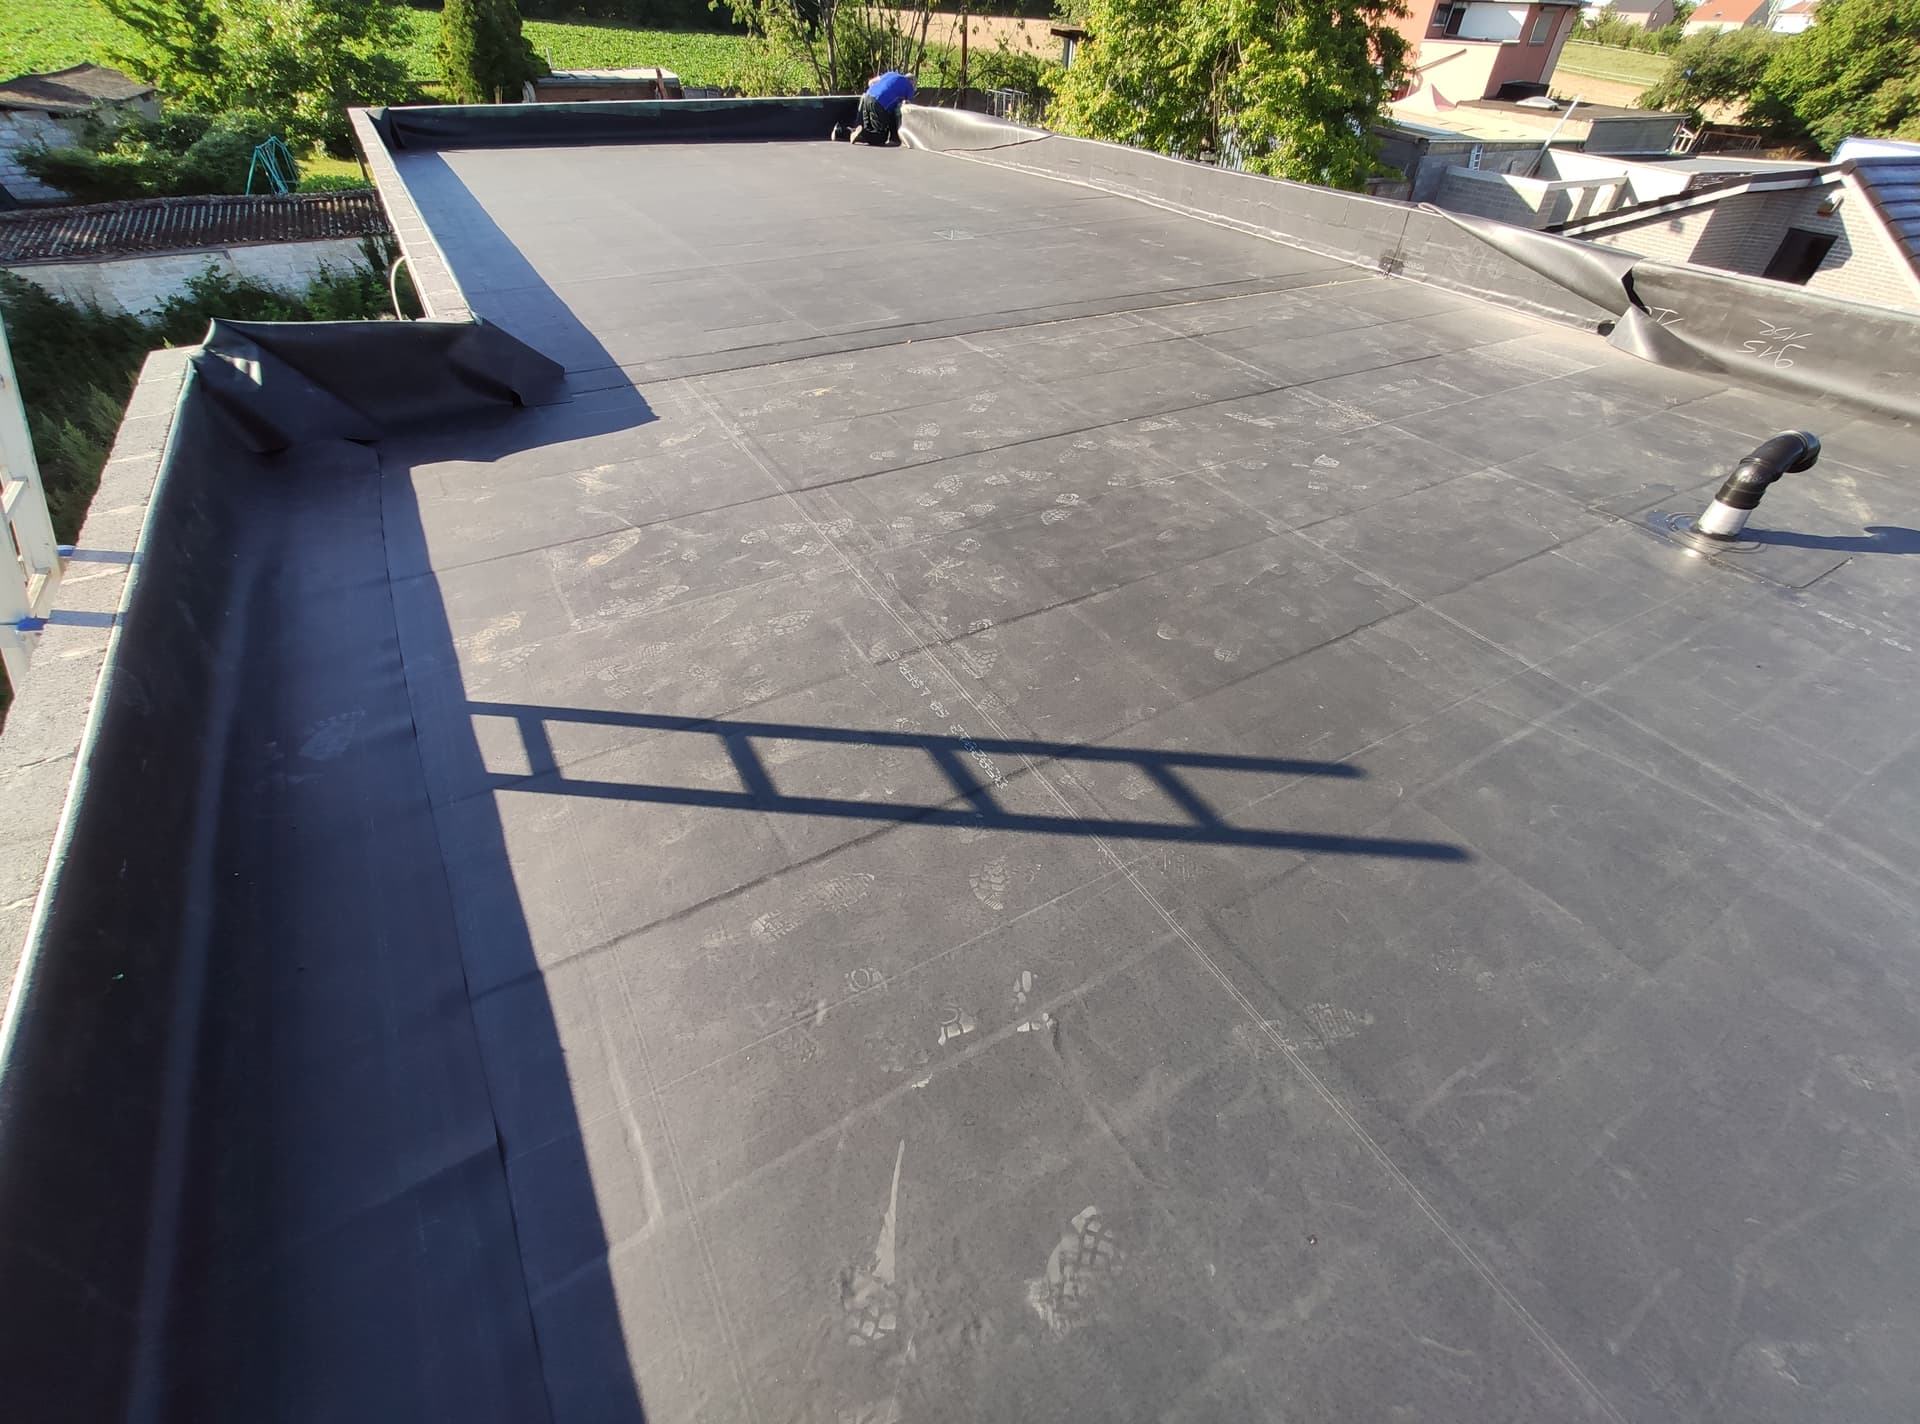
Then on the roof defining all the electrical point for lights and other stuff as well as the ventilation system, as this will then be covered by sloping screed (hope this is the right word) and then a waterproof membrane (EPDM), you need to do it right immediately.


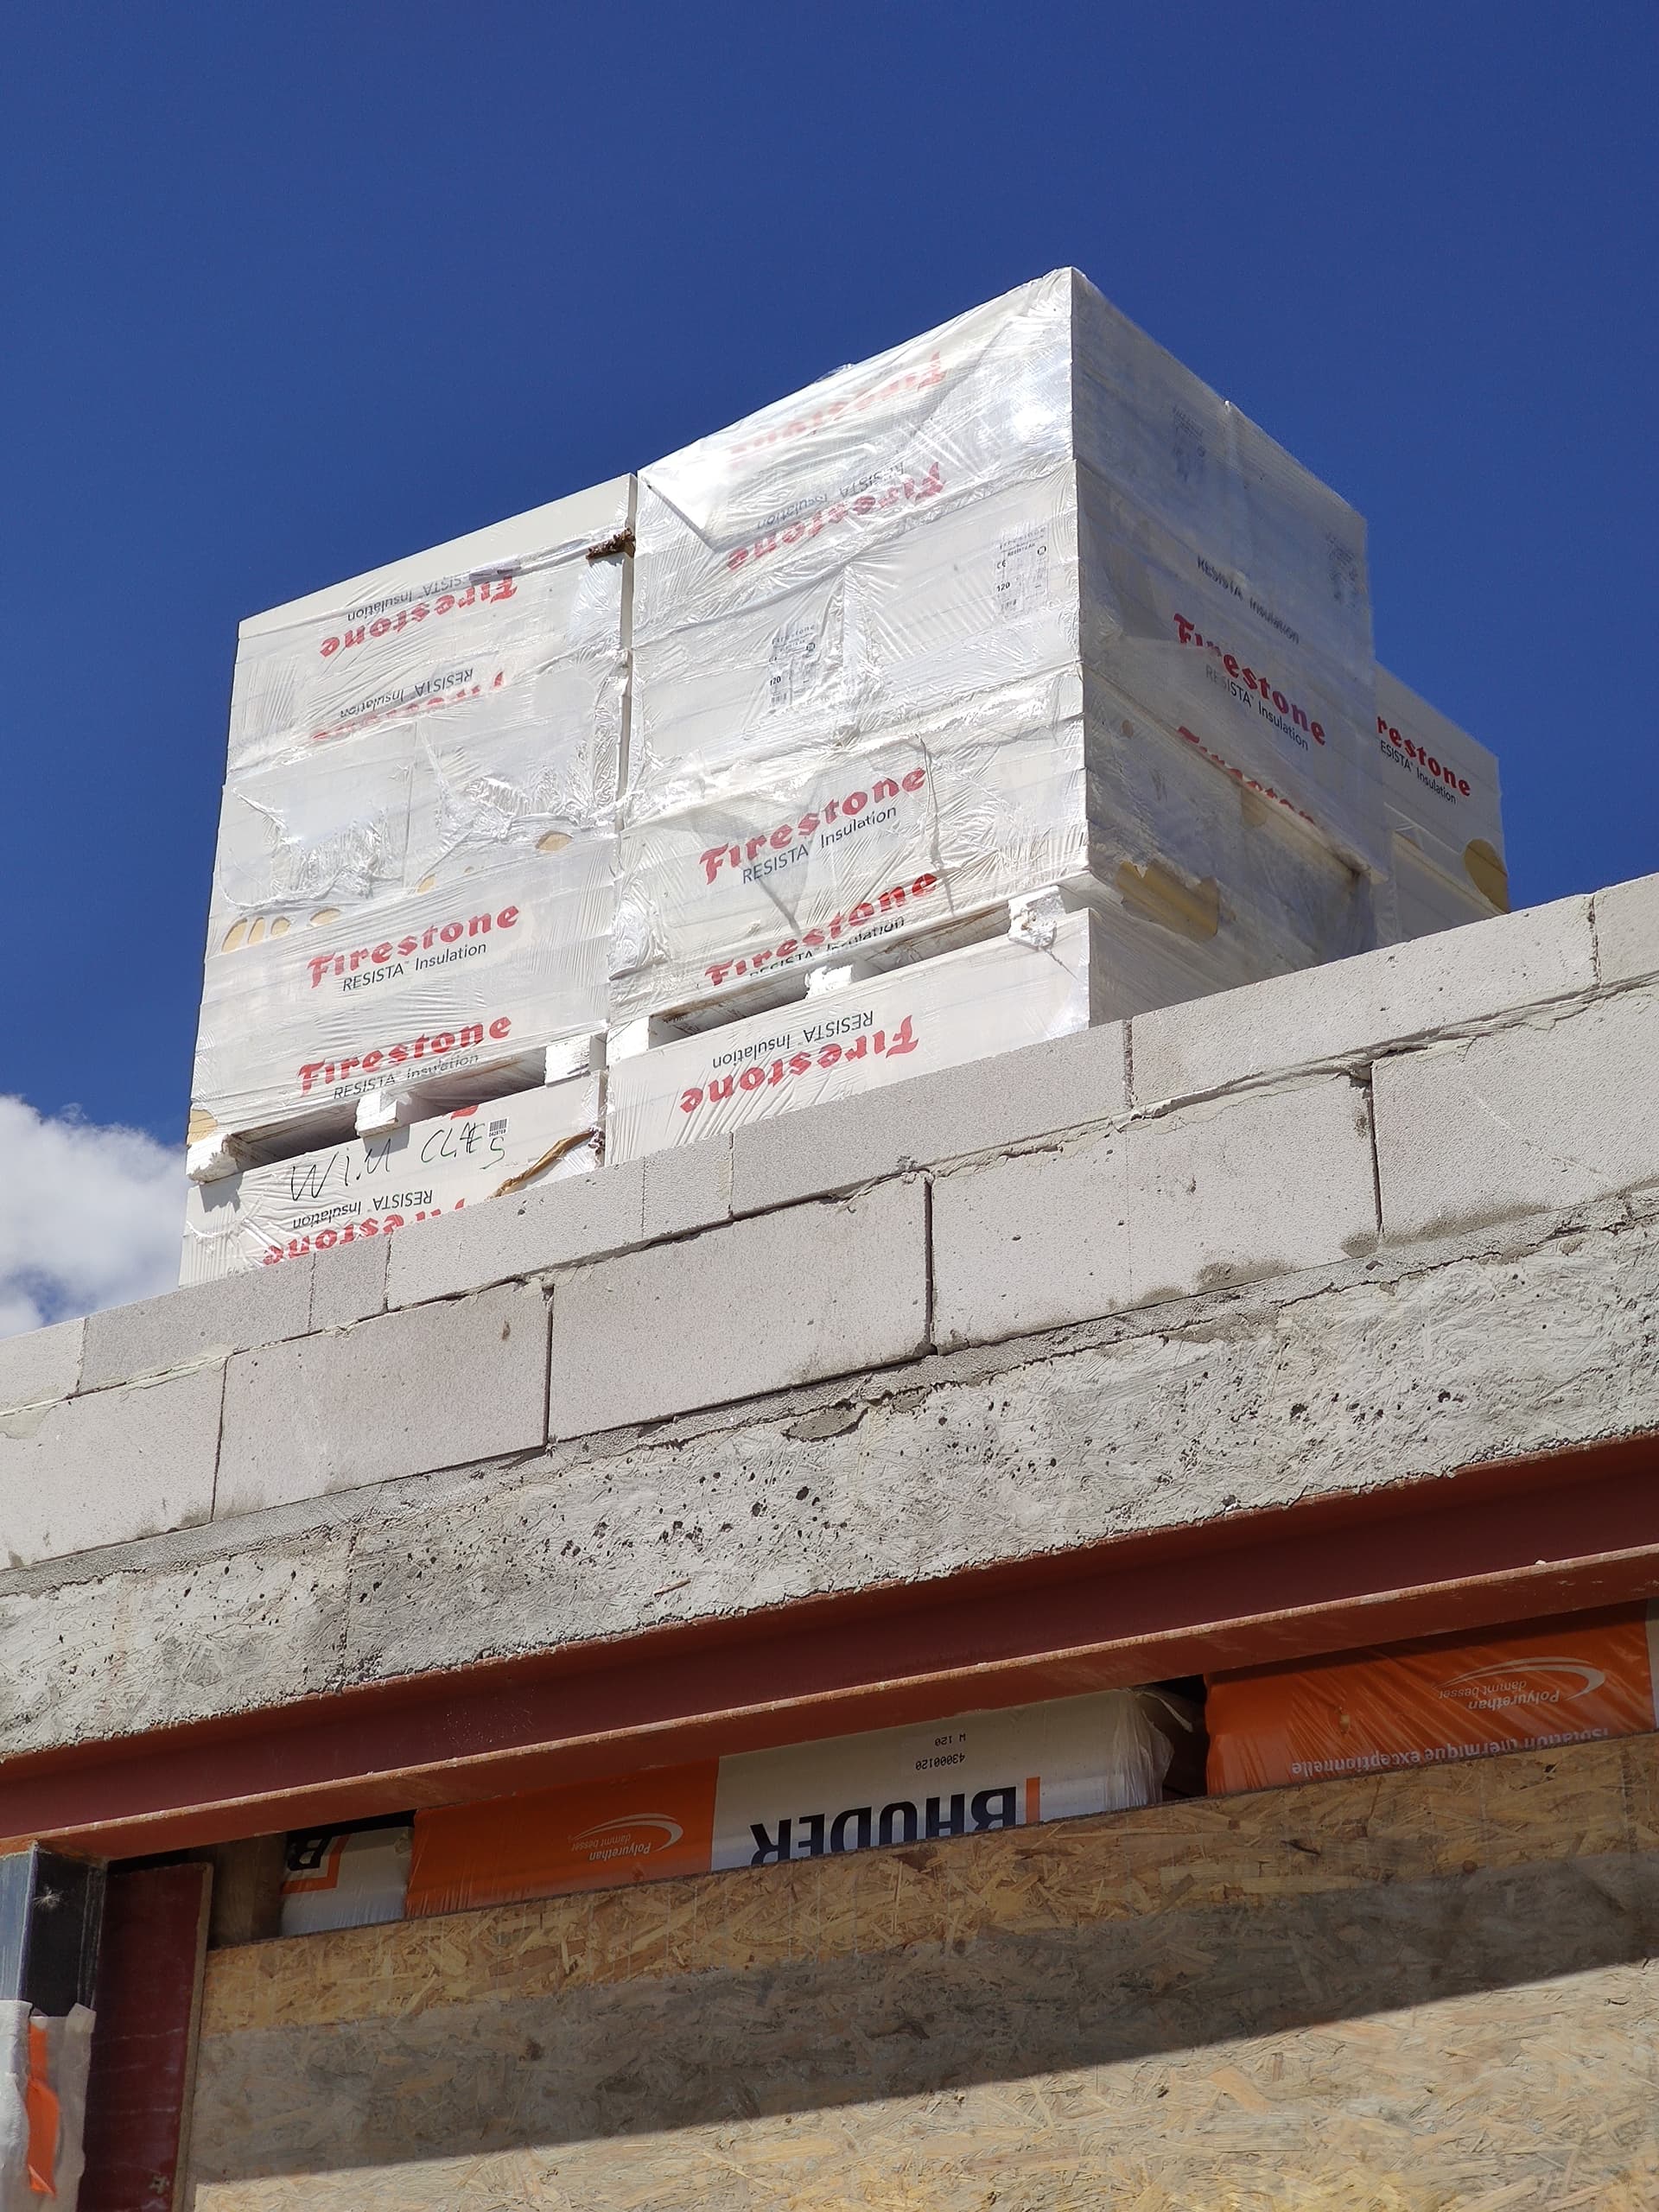
Then EPDM installation with isolation (yes from Firestone both :rofl: funny)


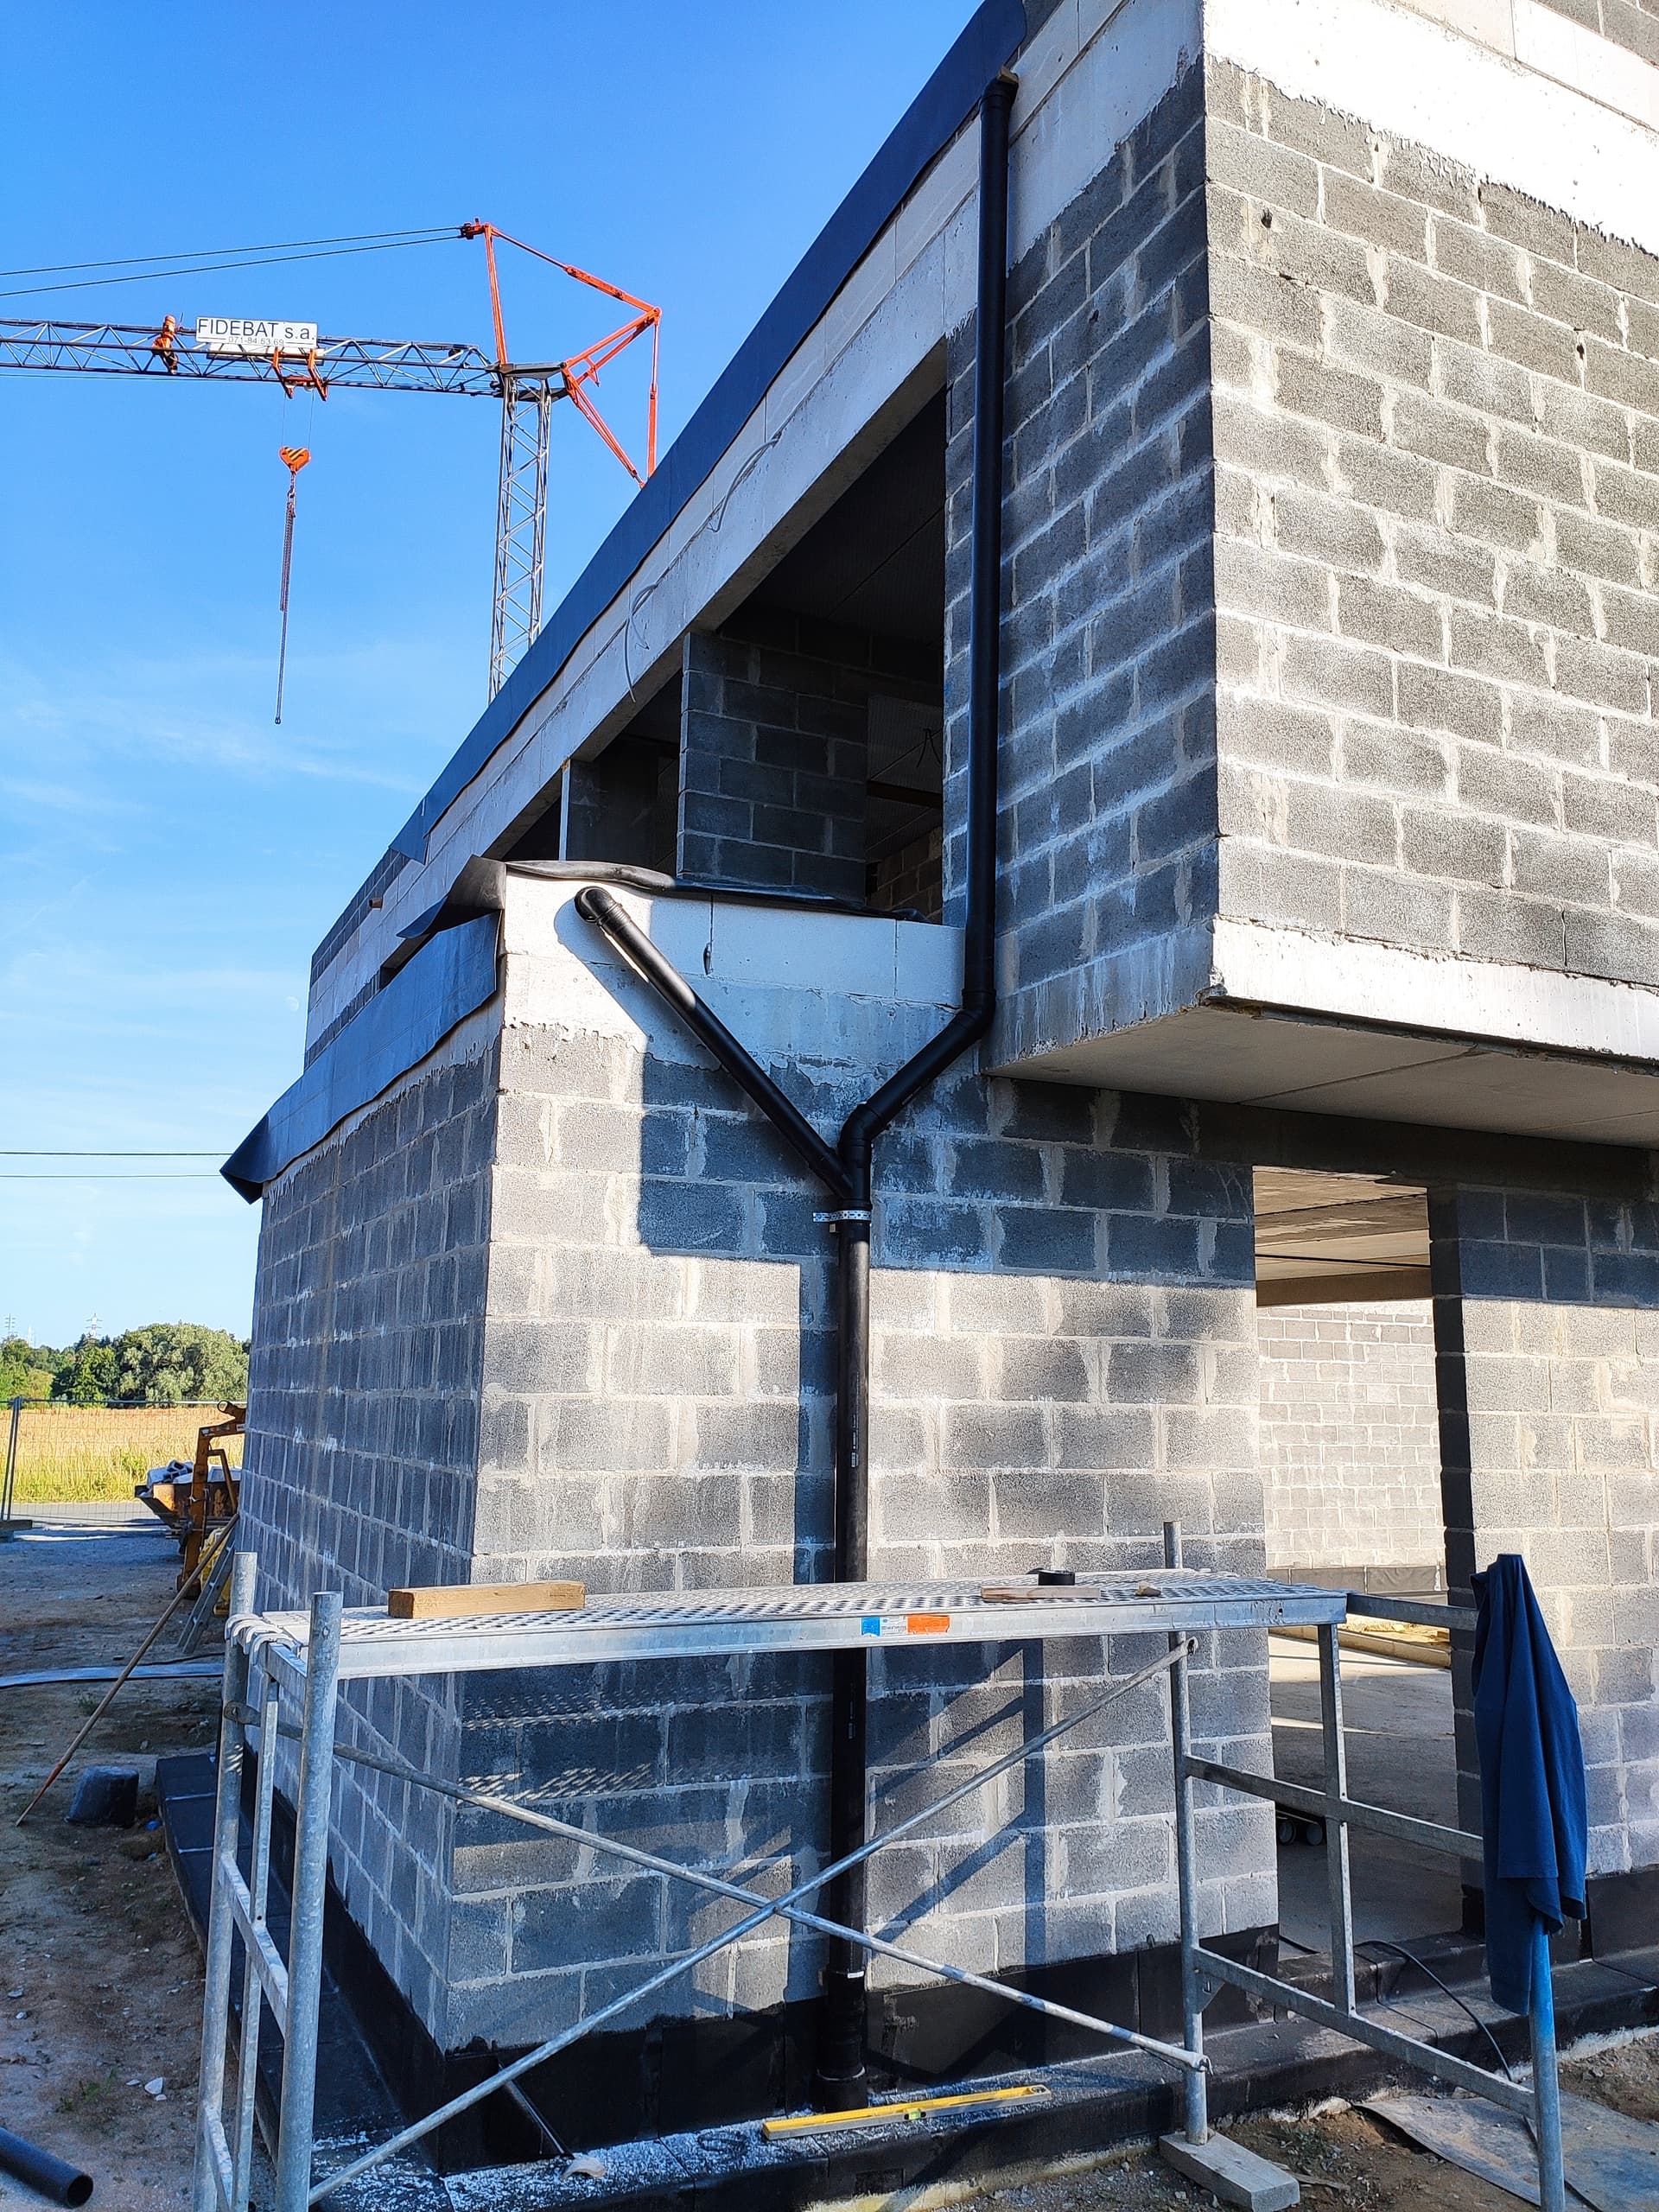
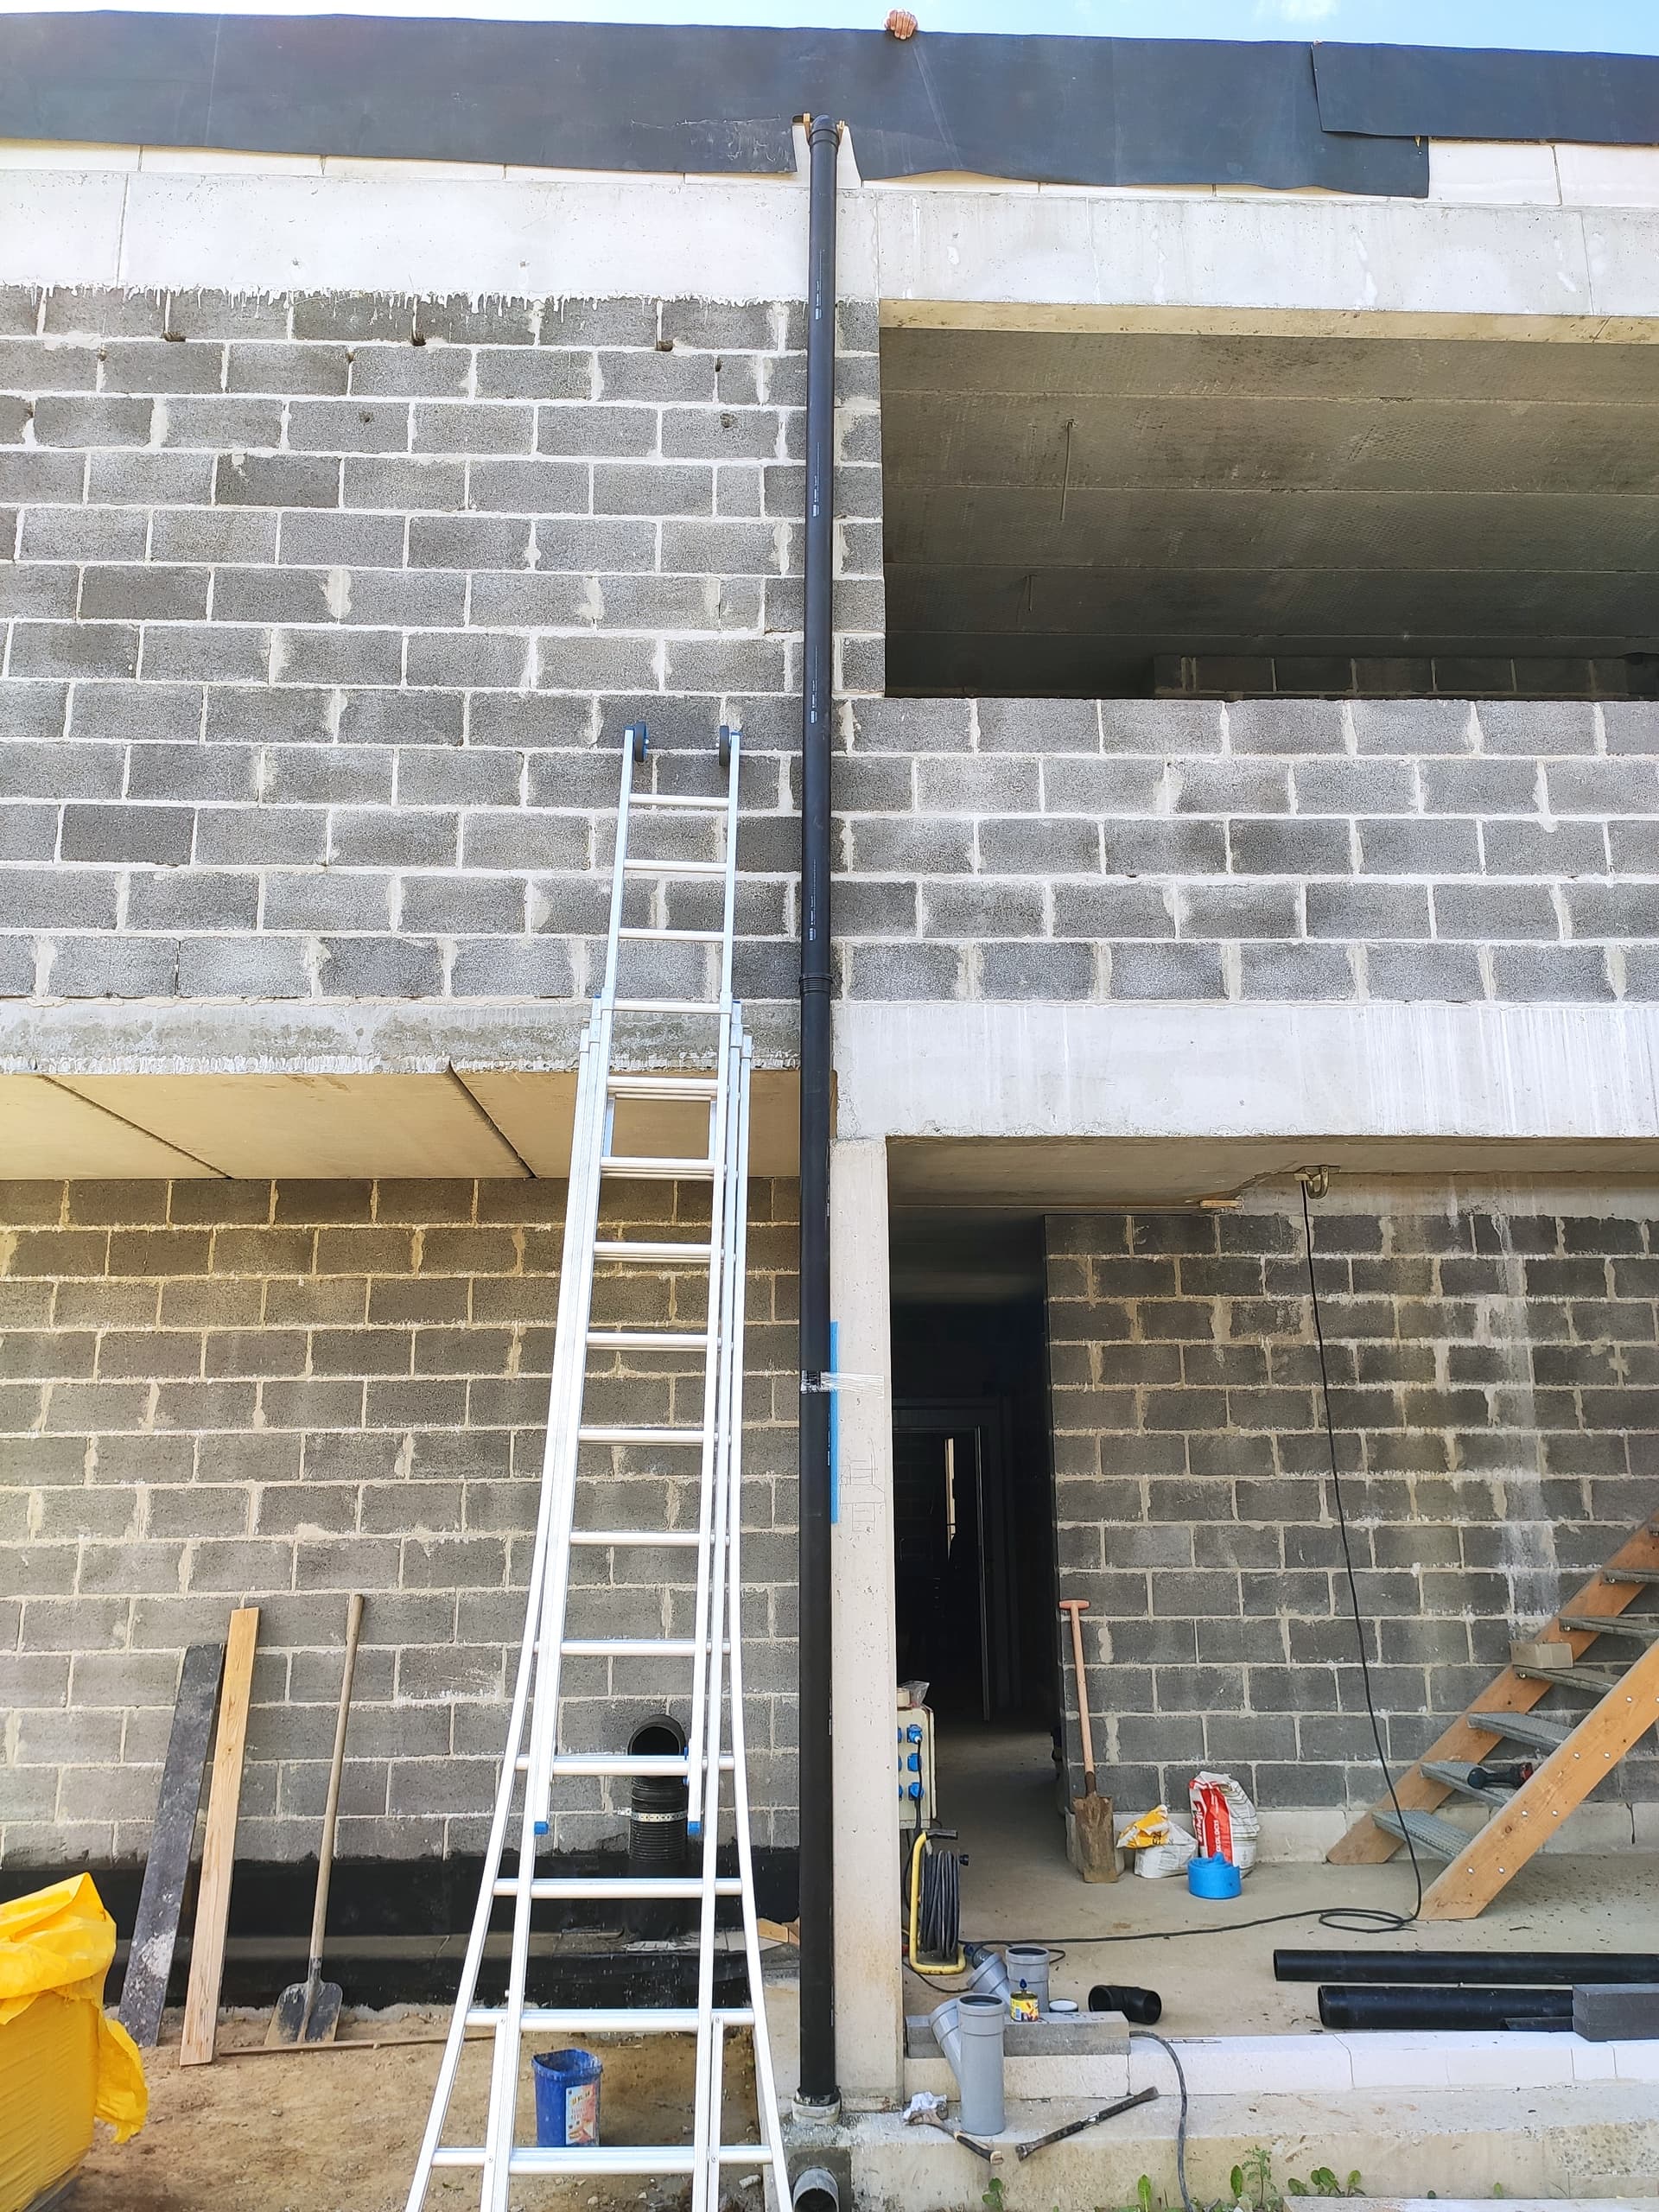
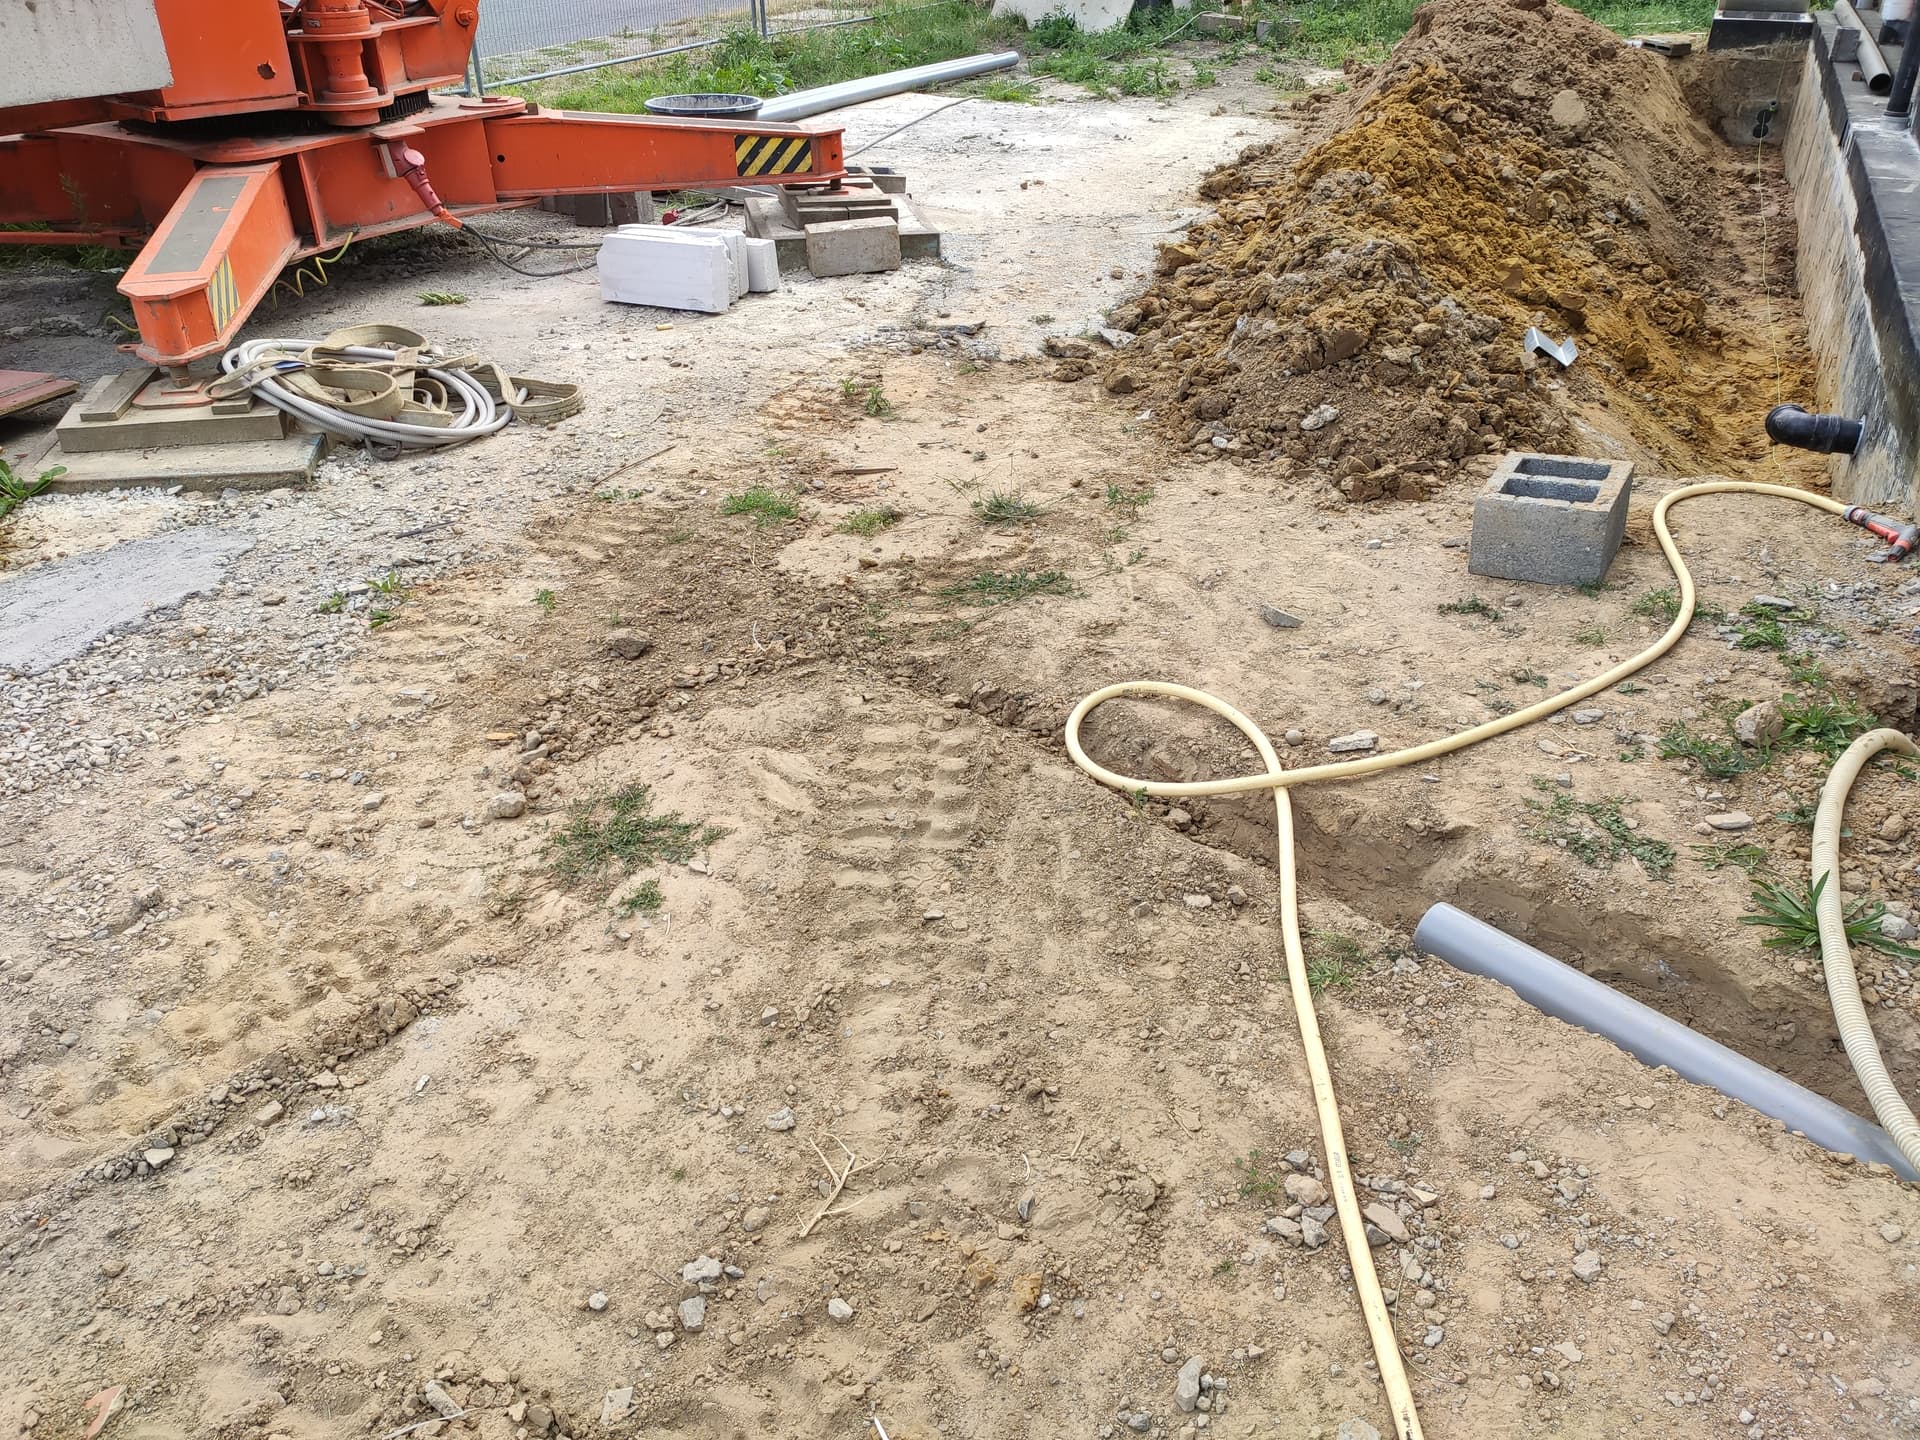
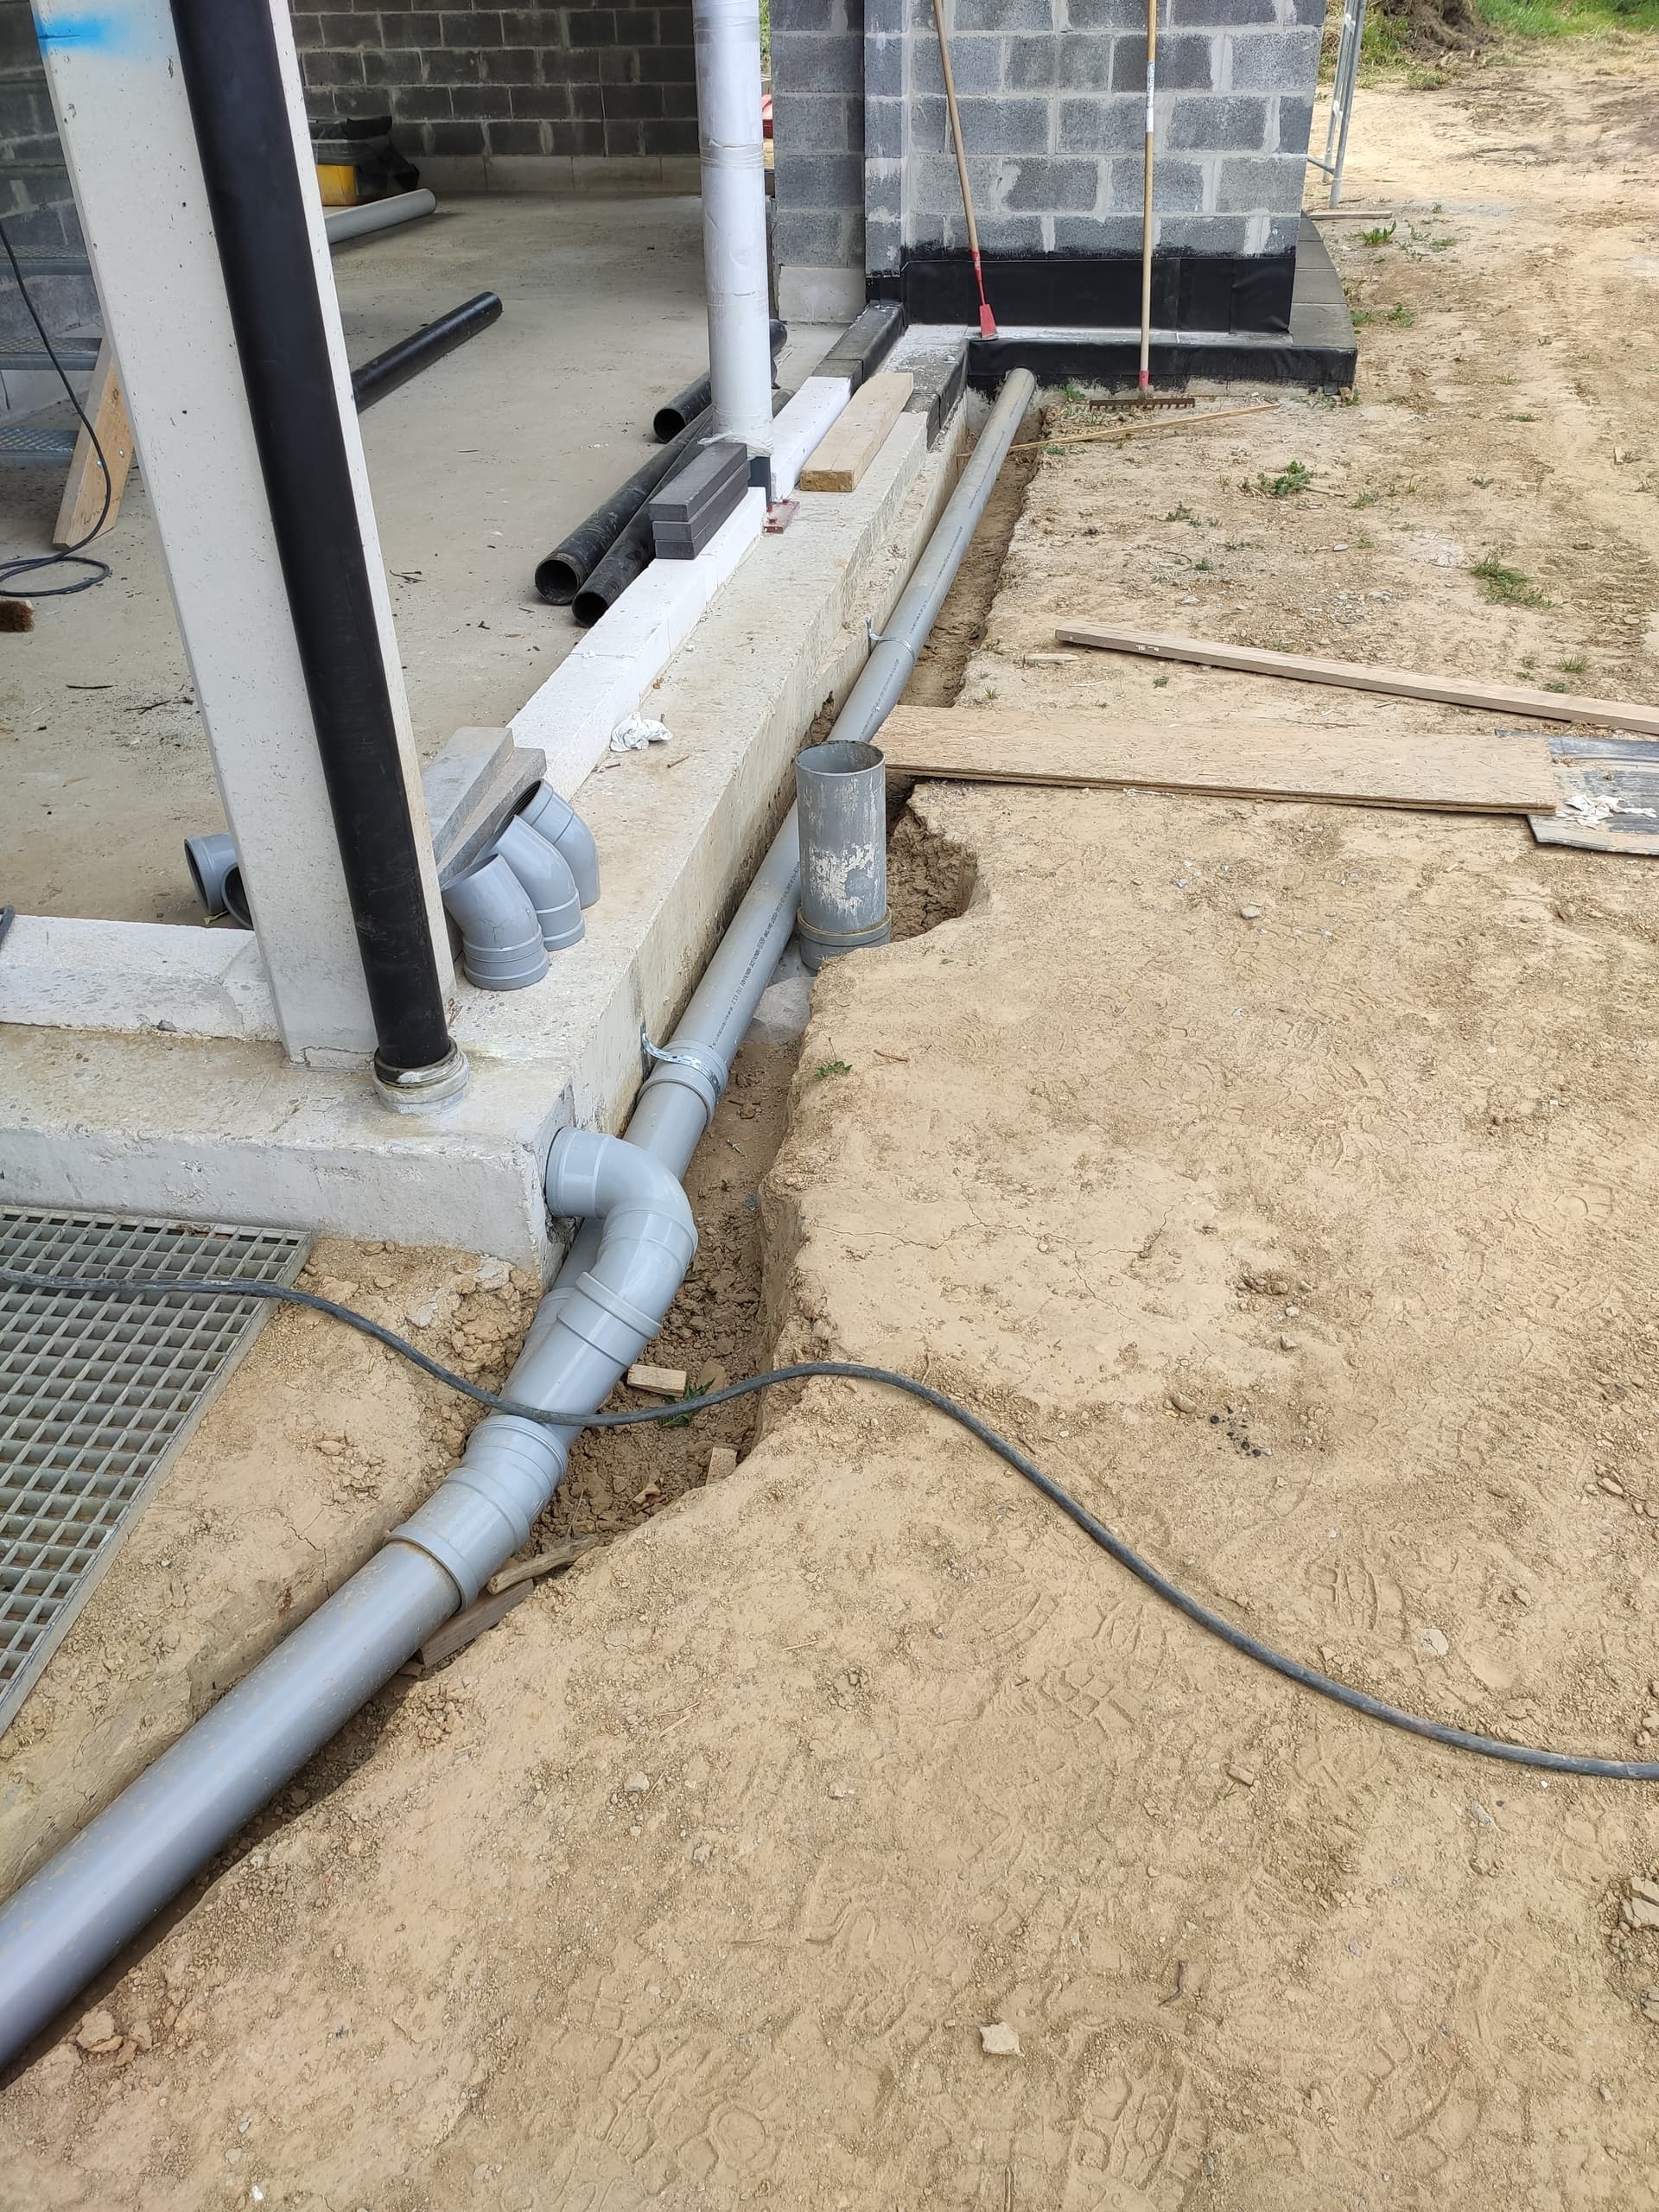
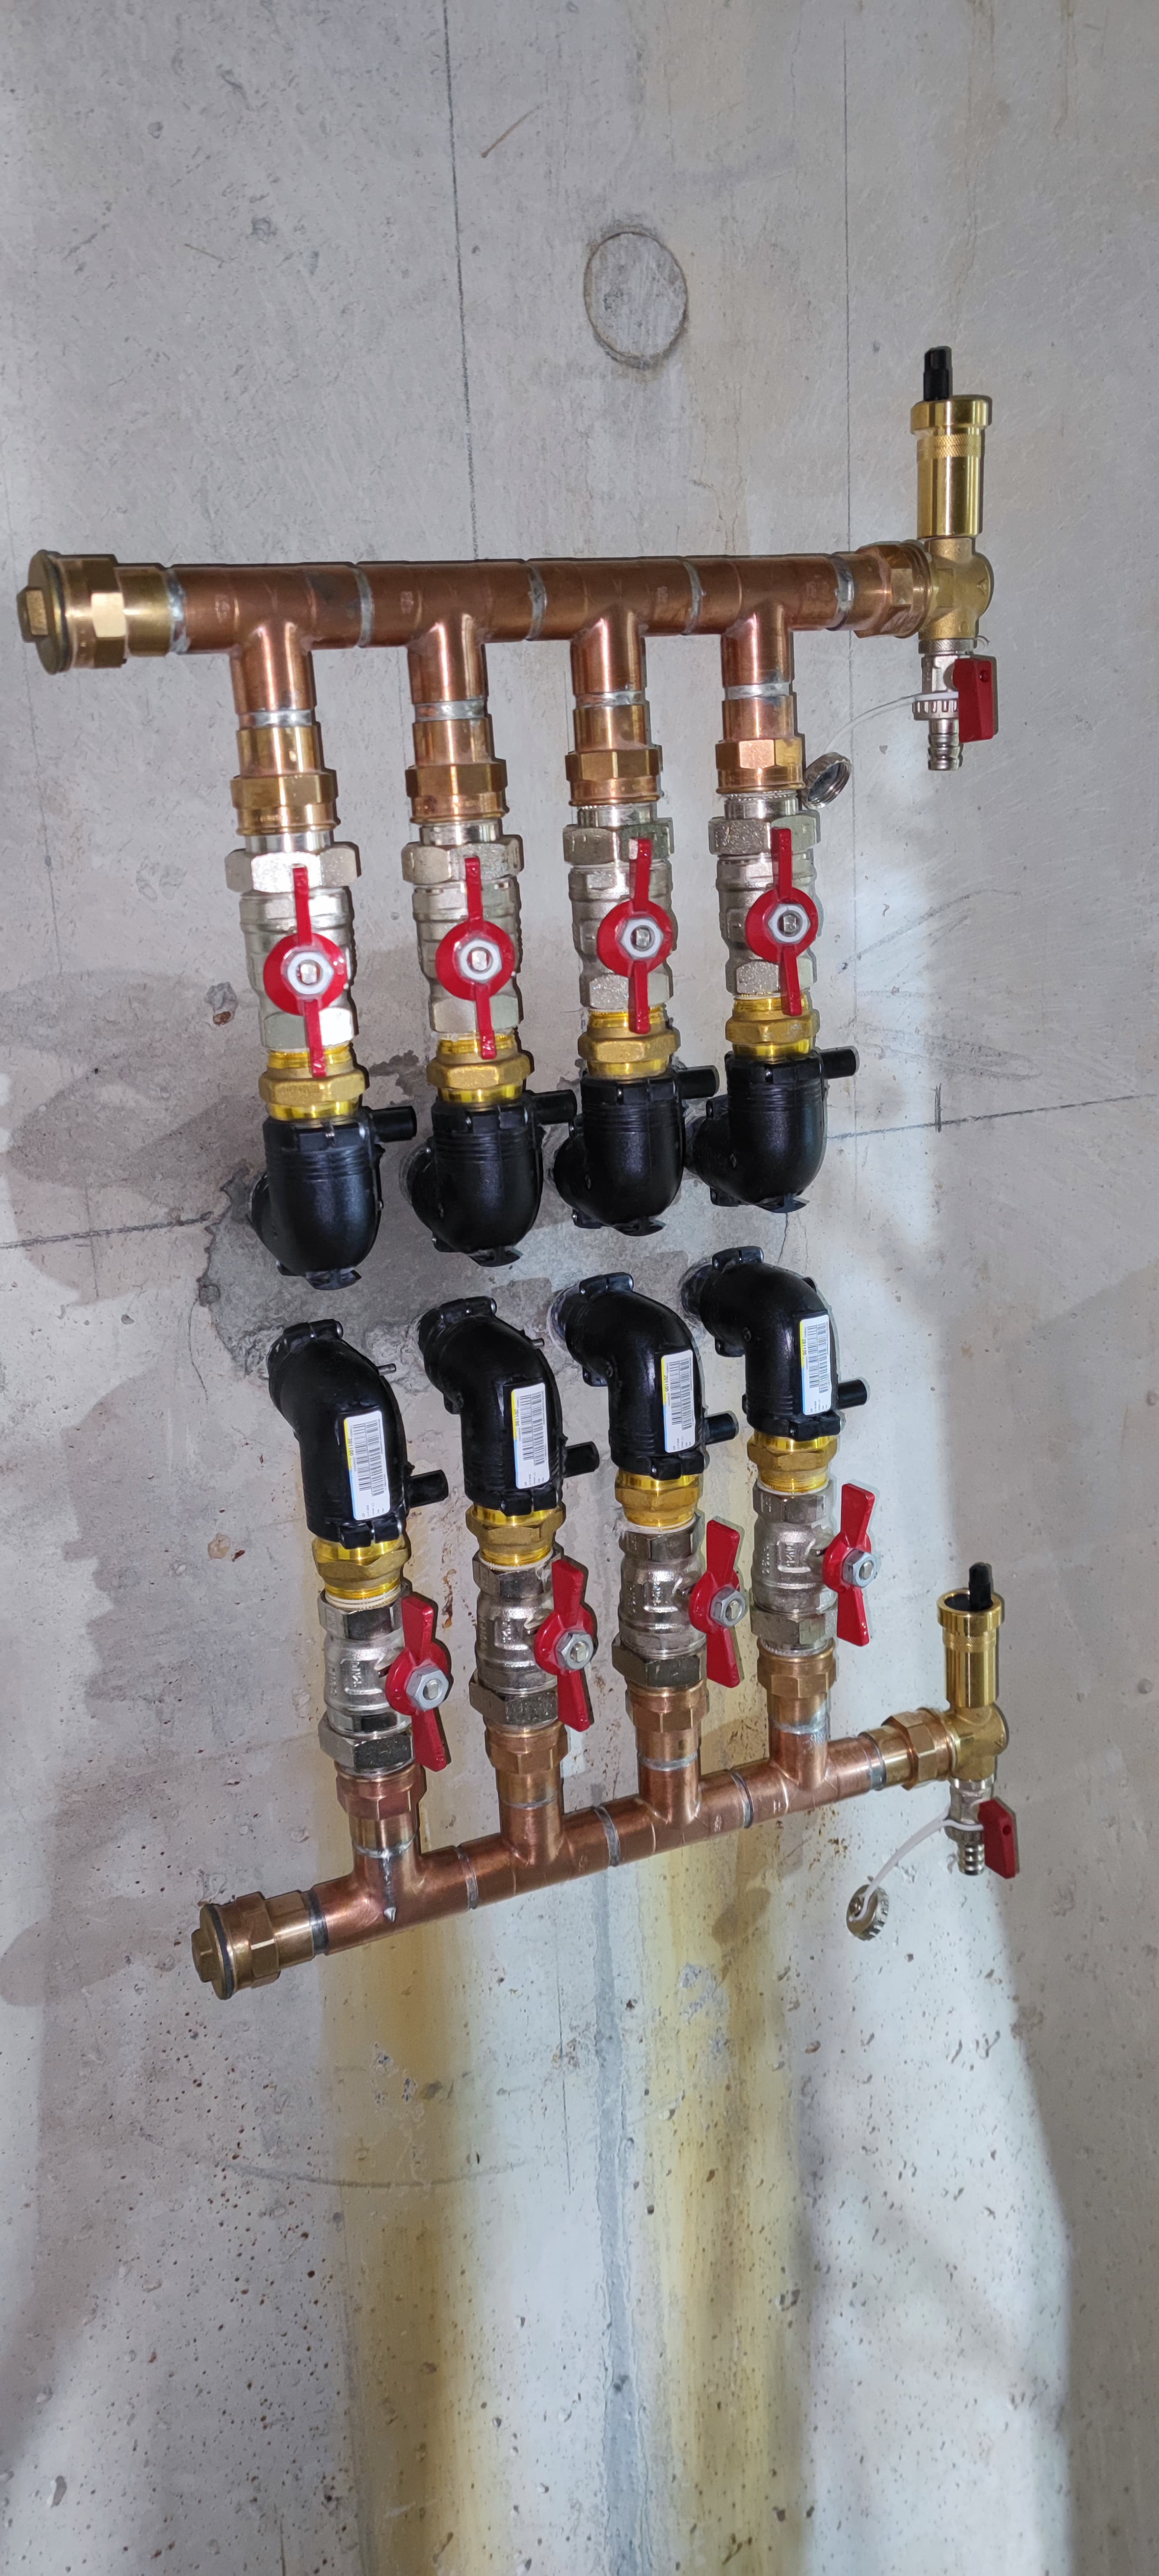
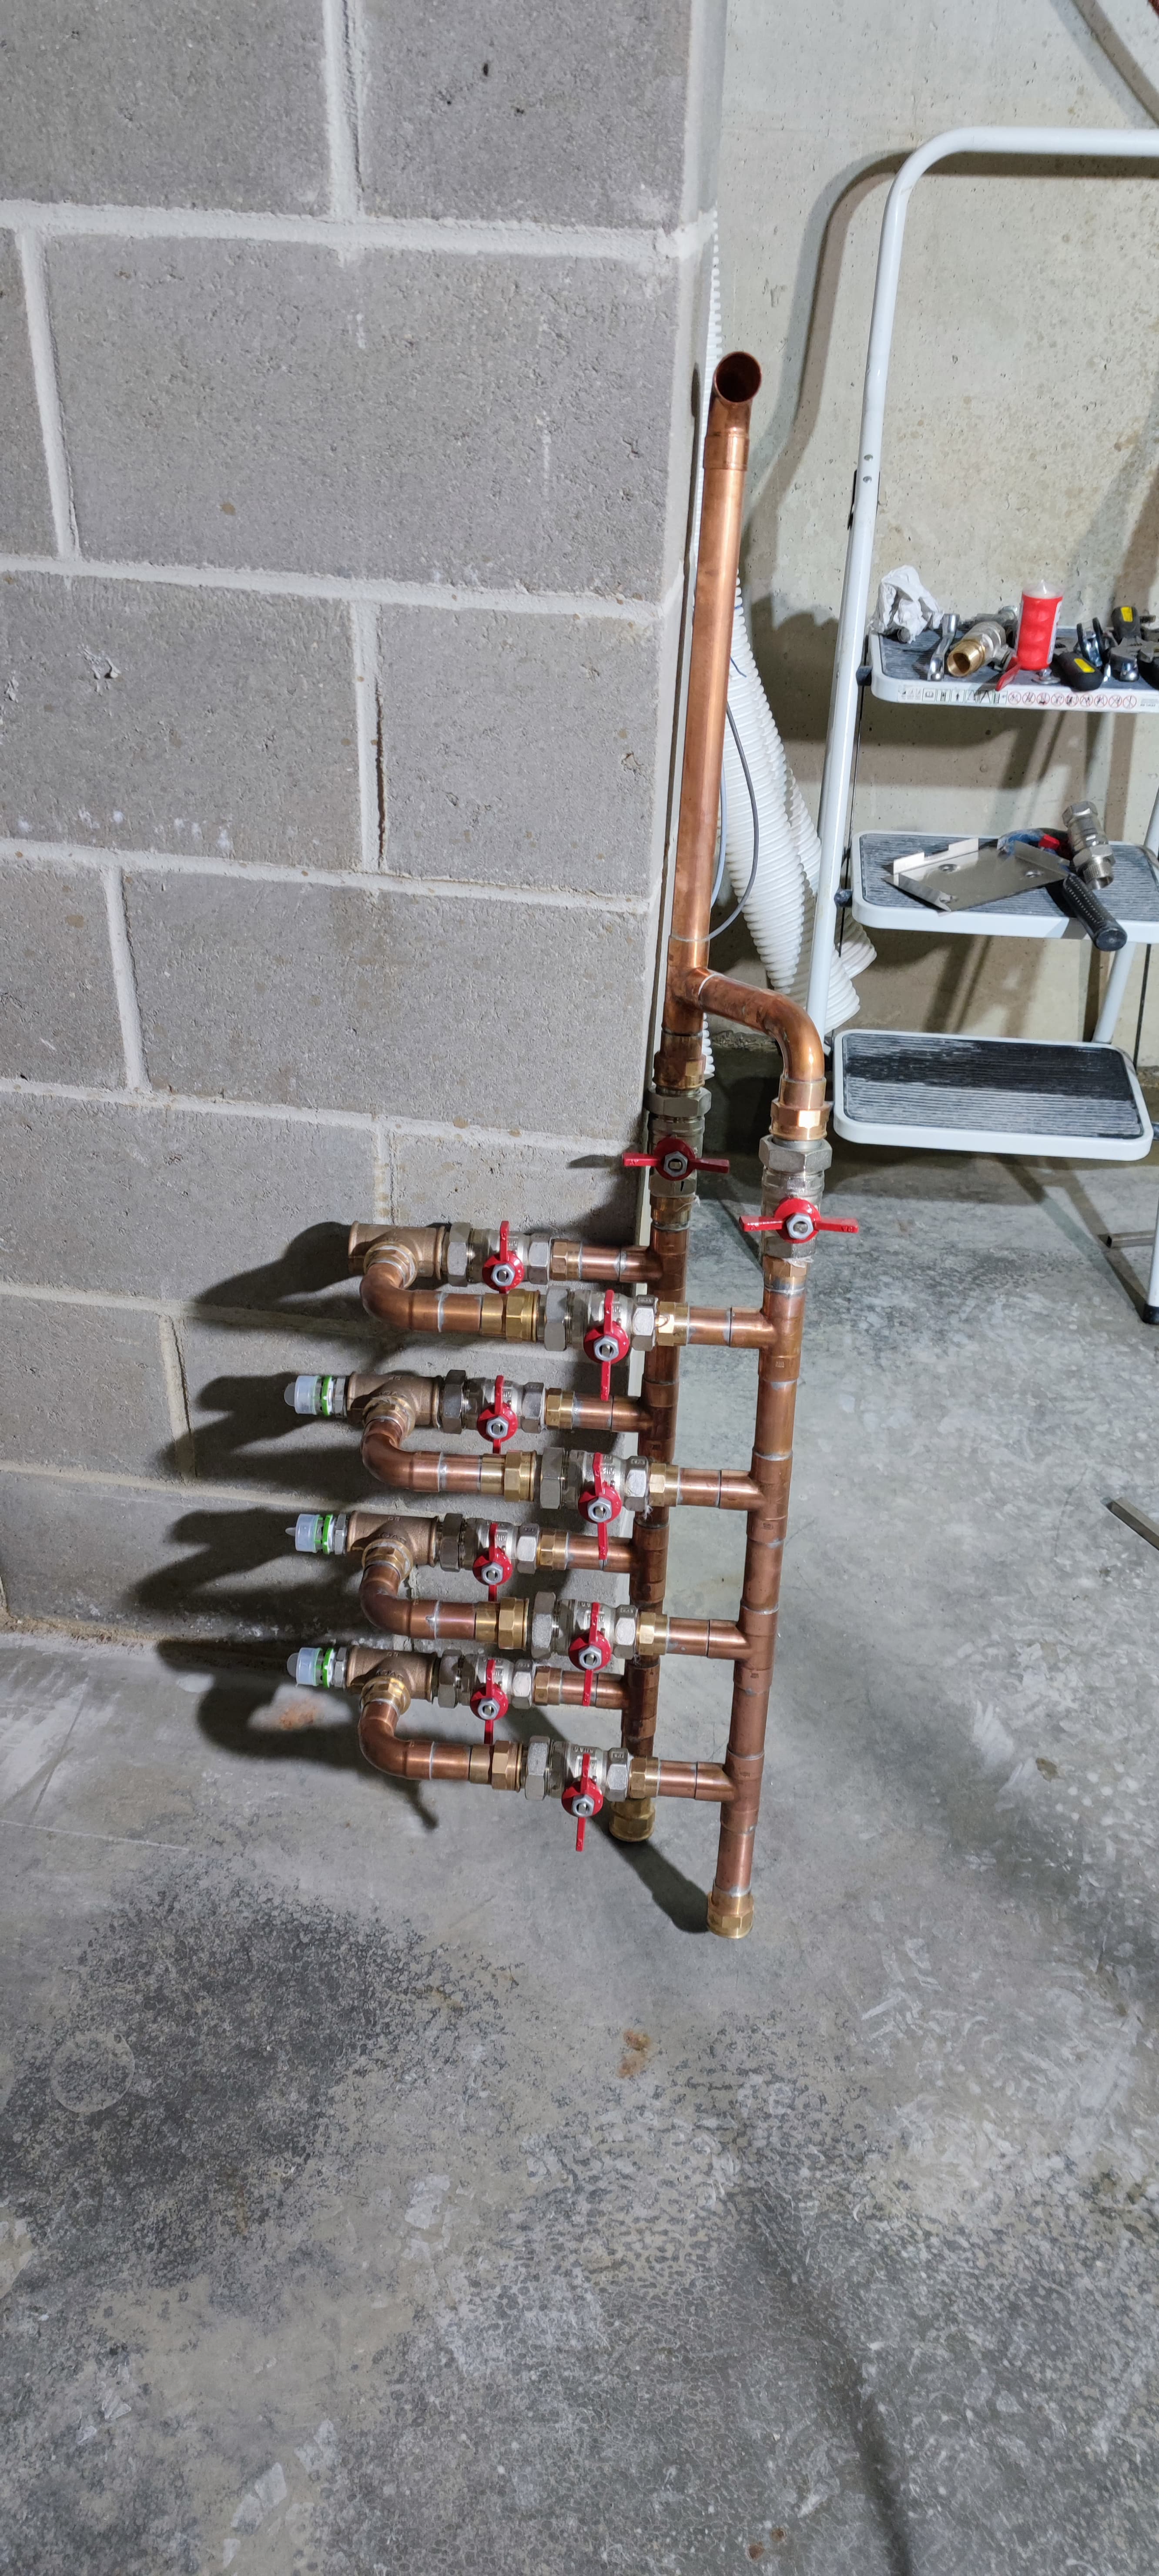
Then water pipes from the roof, as you can see, we installed them in a way that they will be hidden behind the facade bricks. Then we just left them waiting the water tank installation.


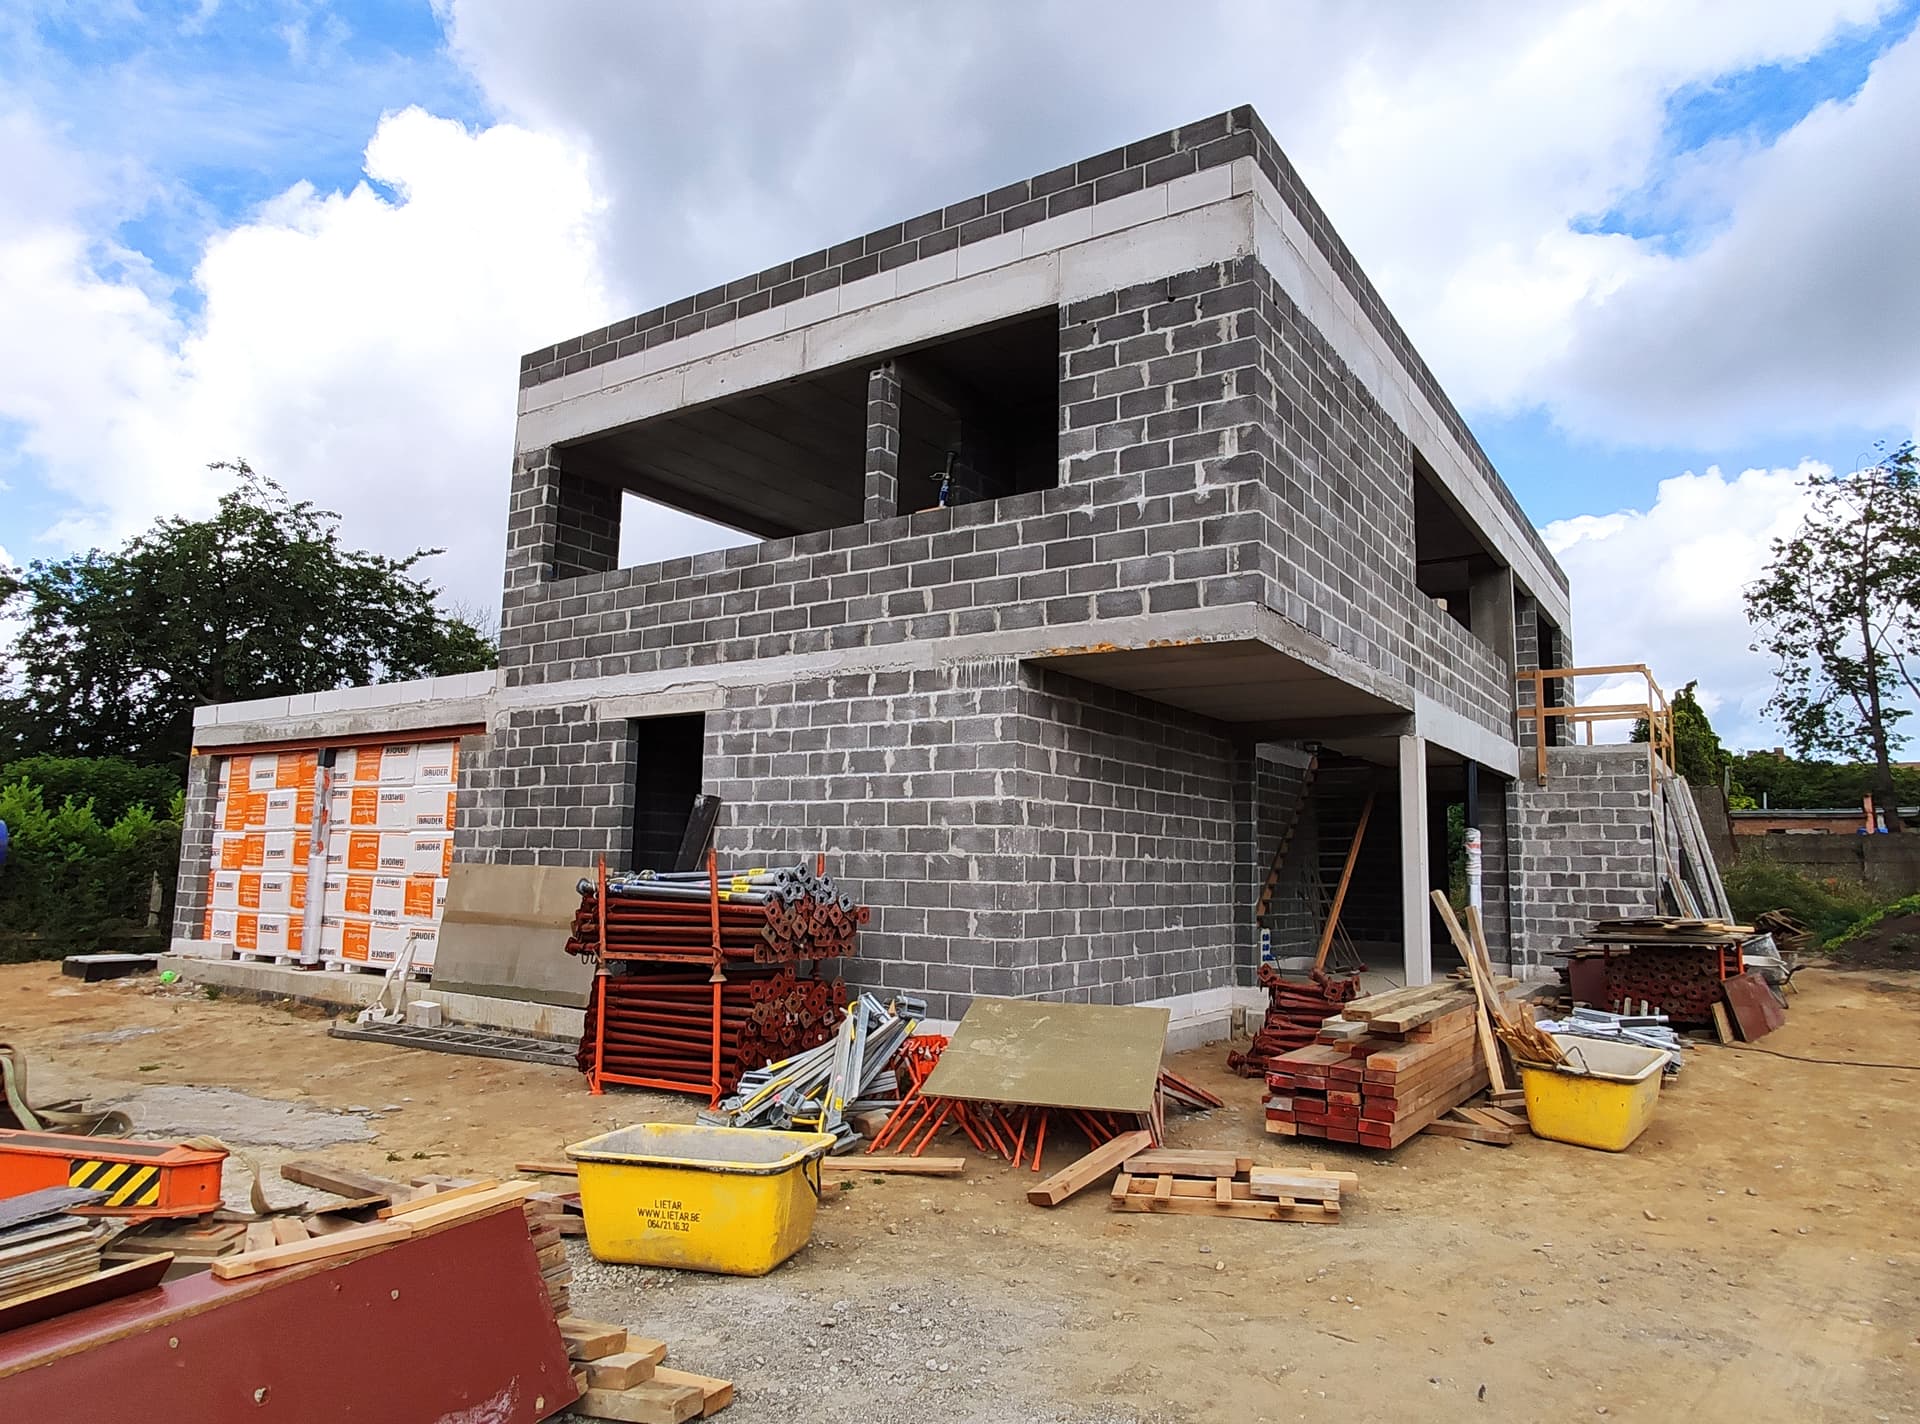
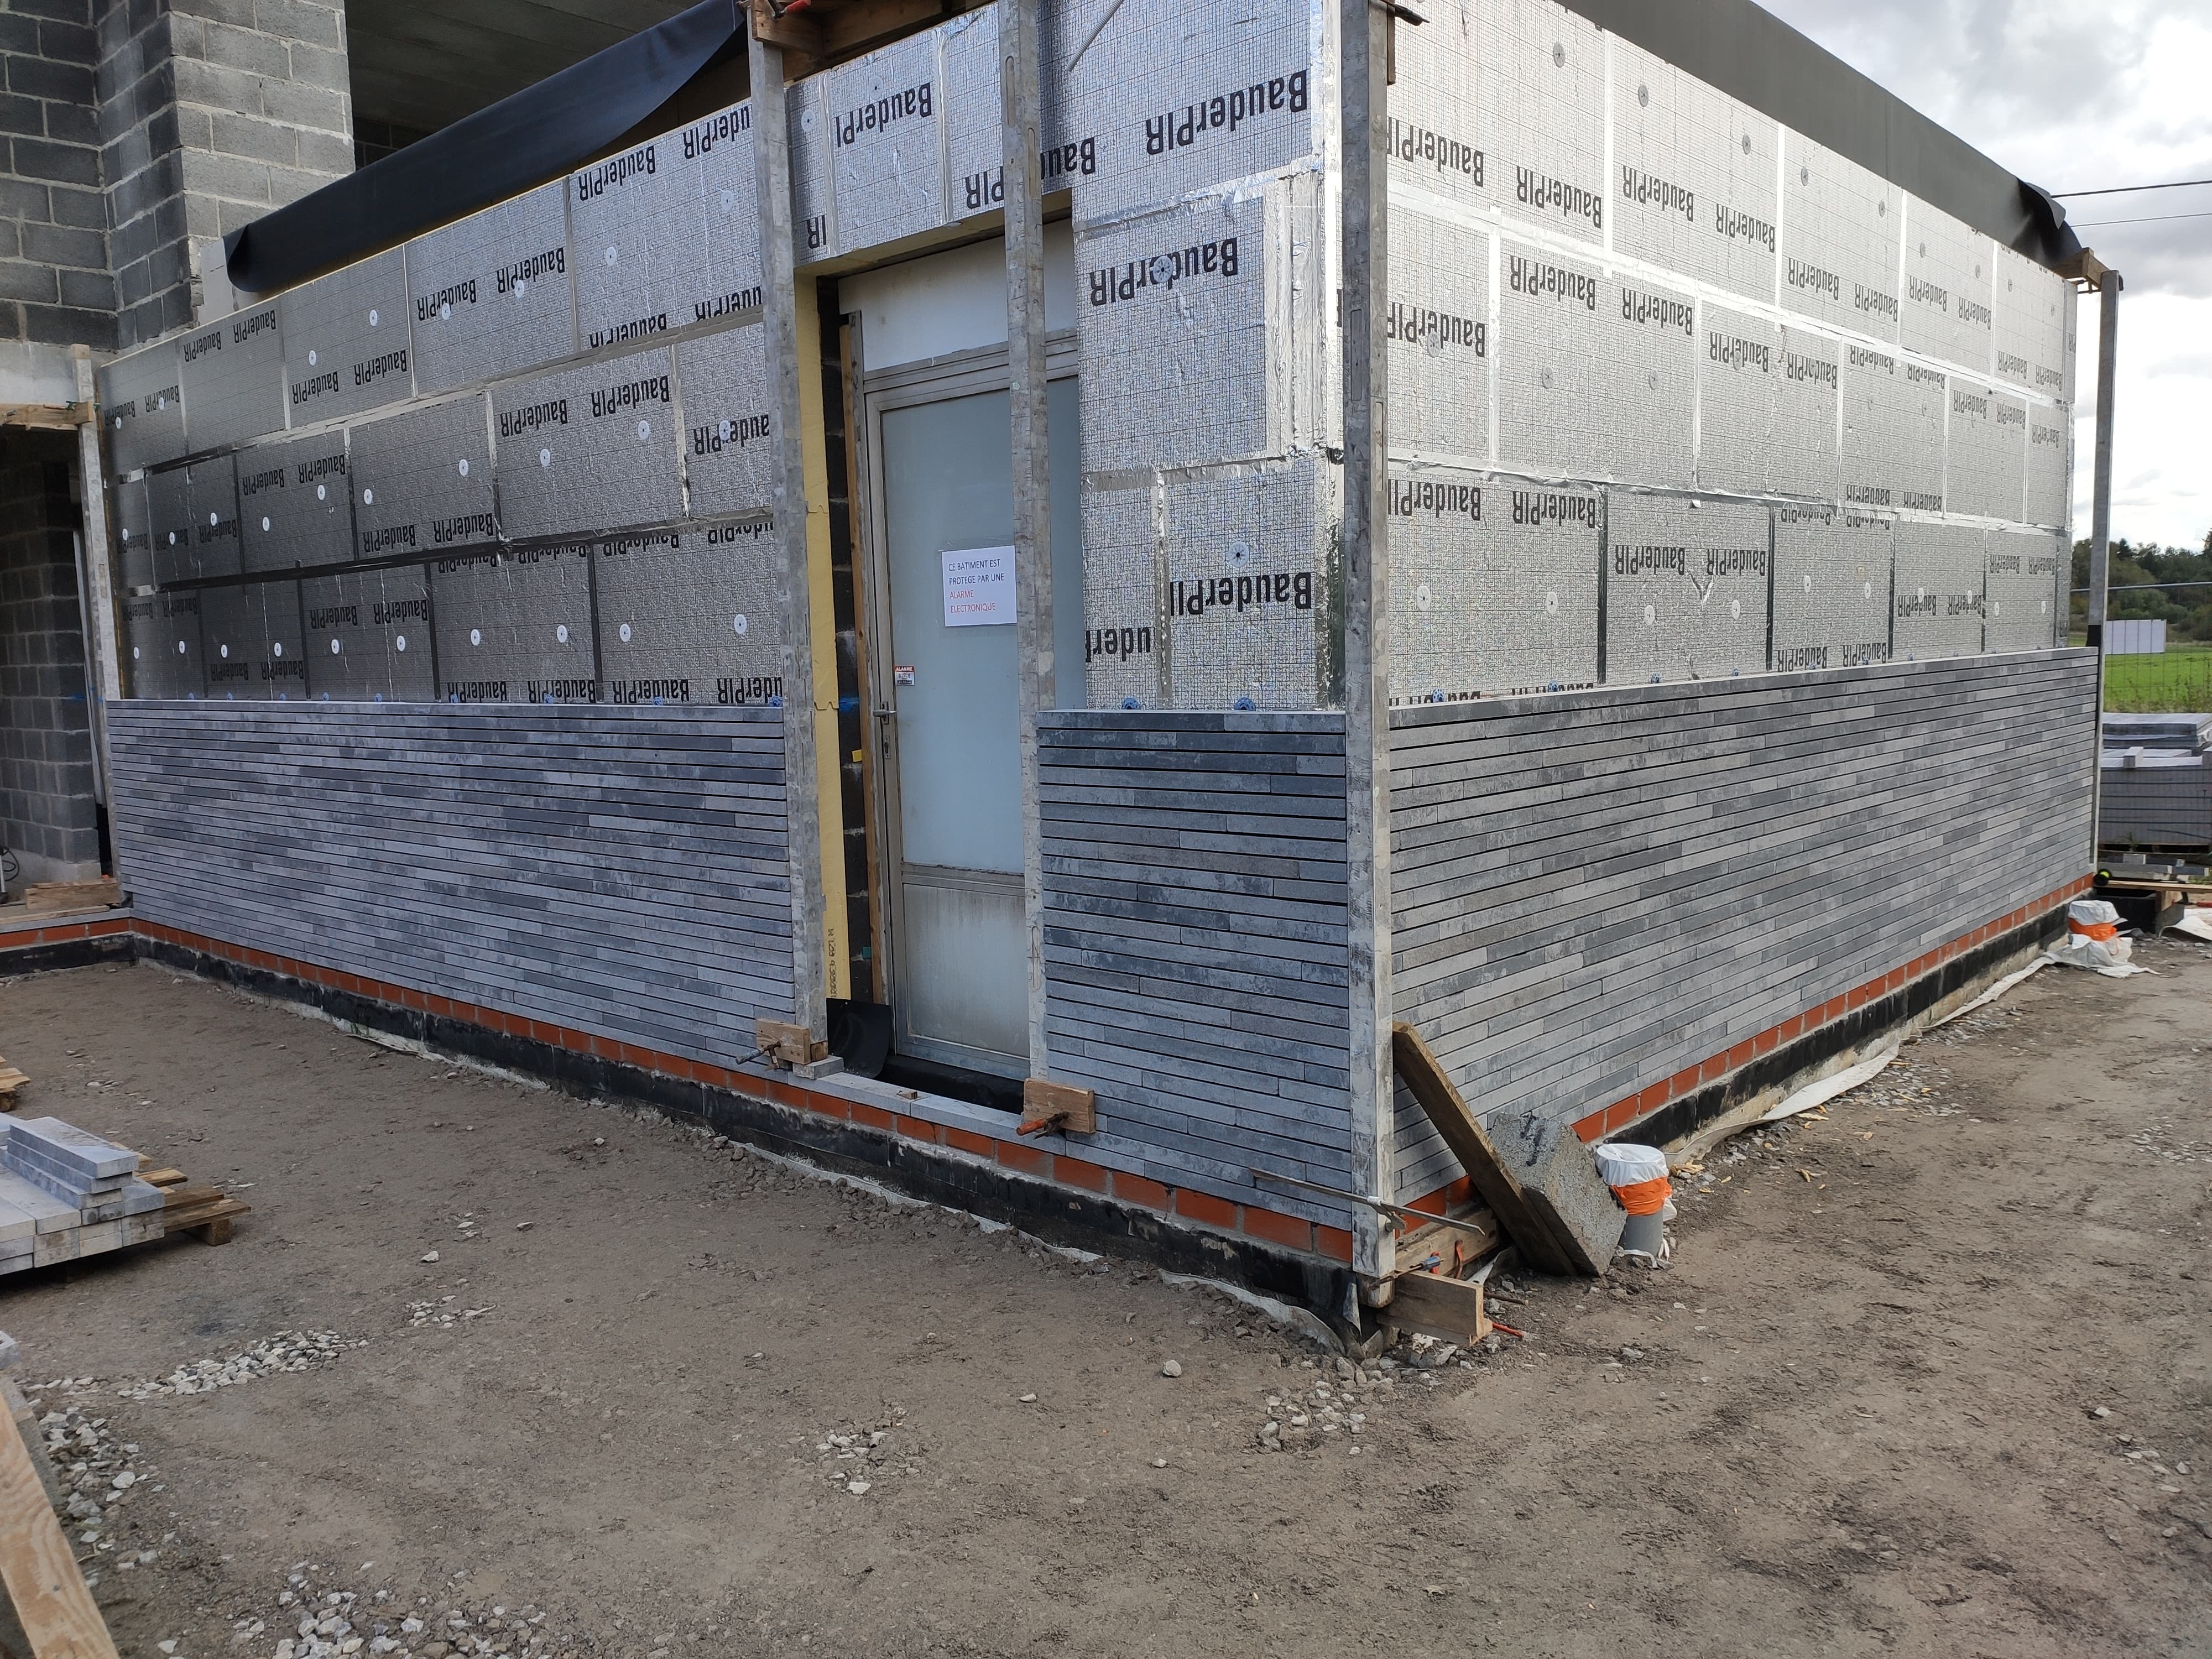
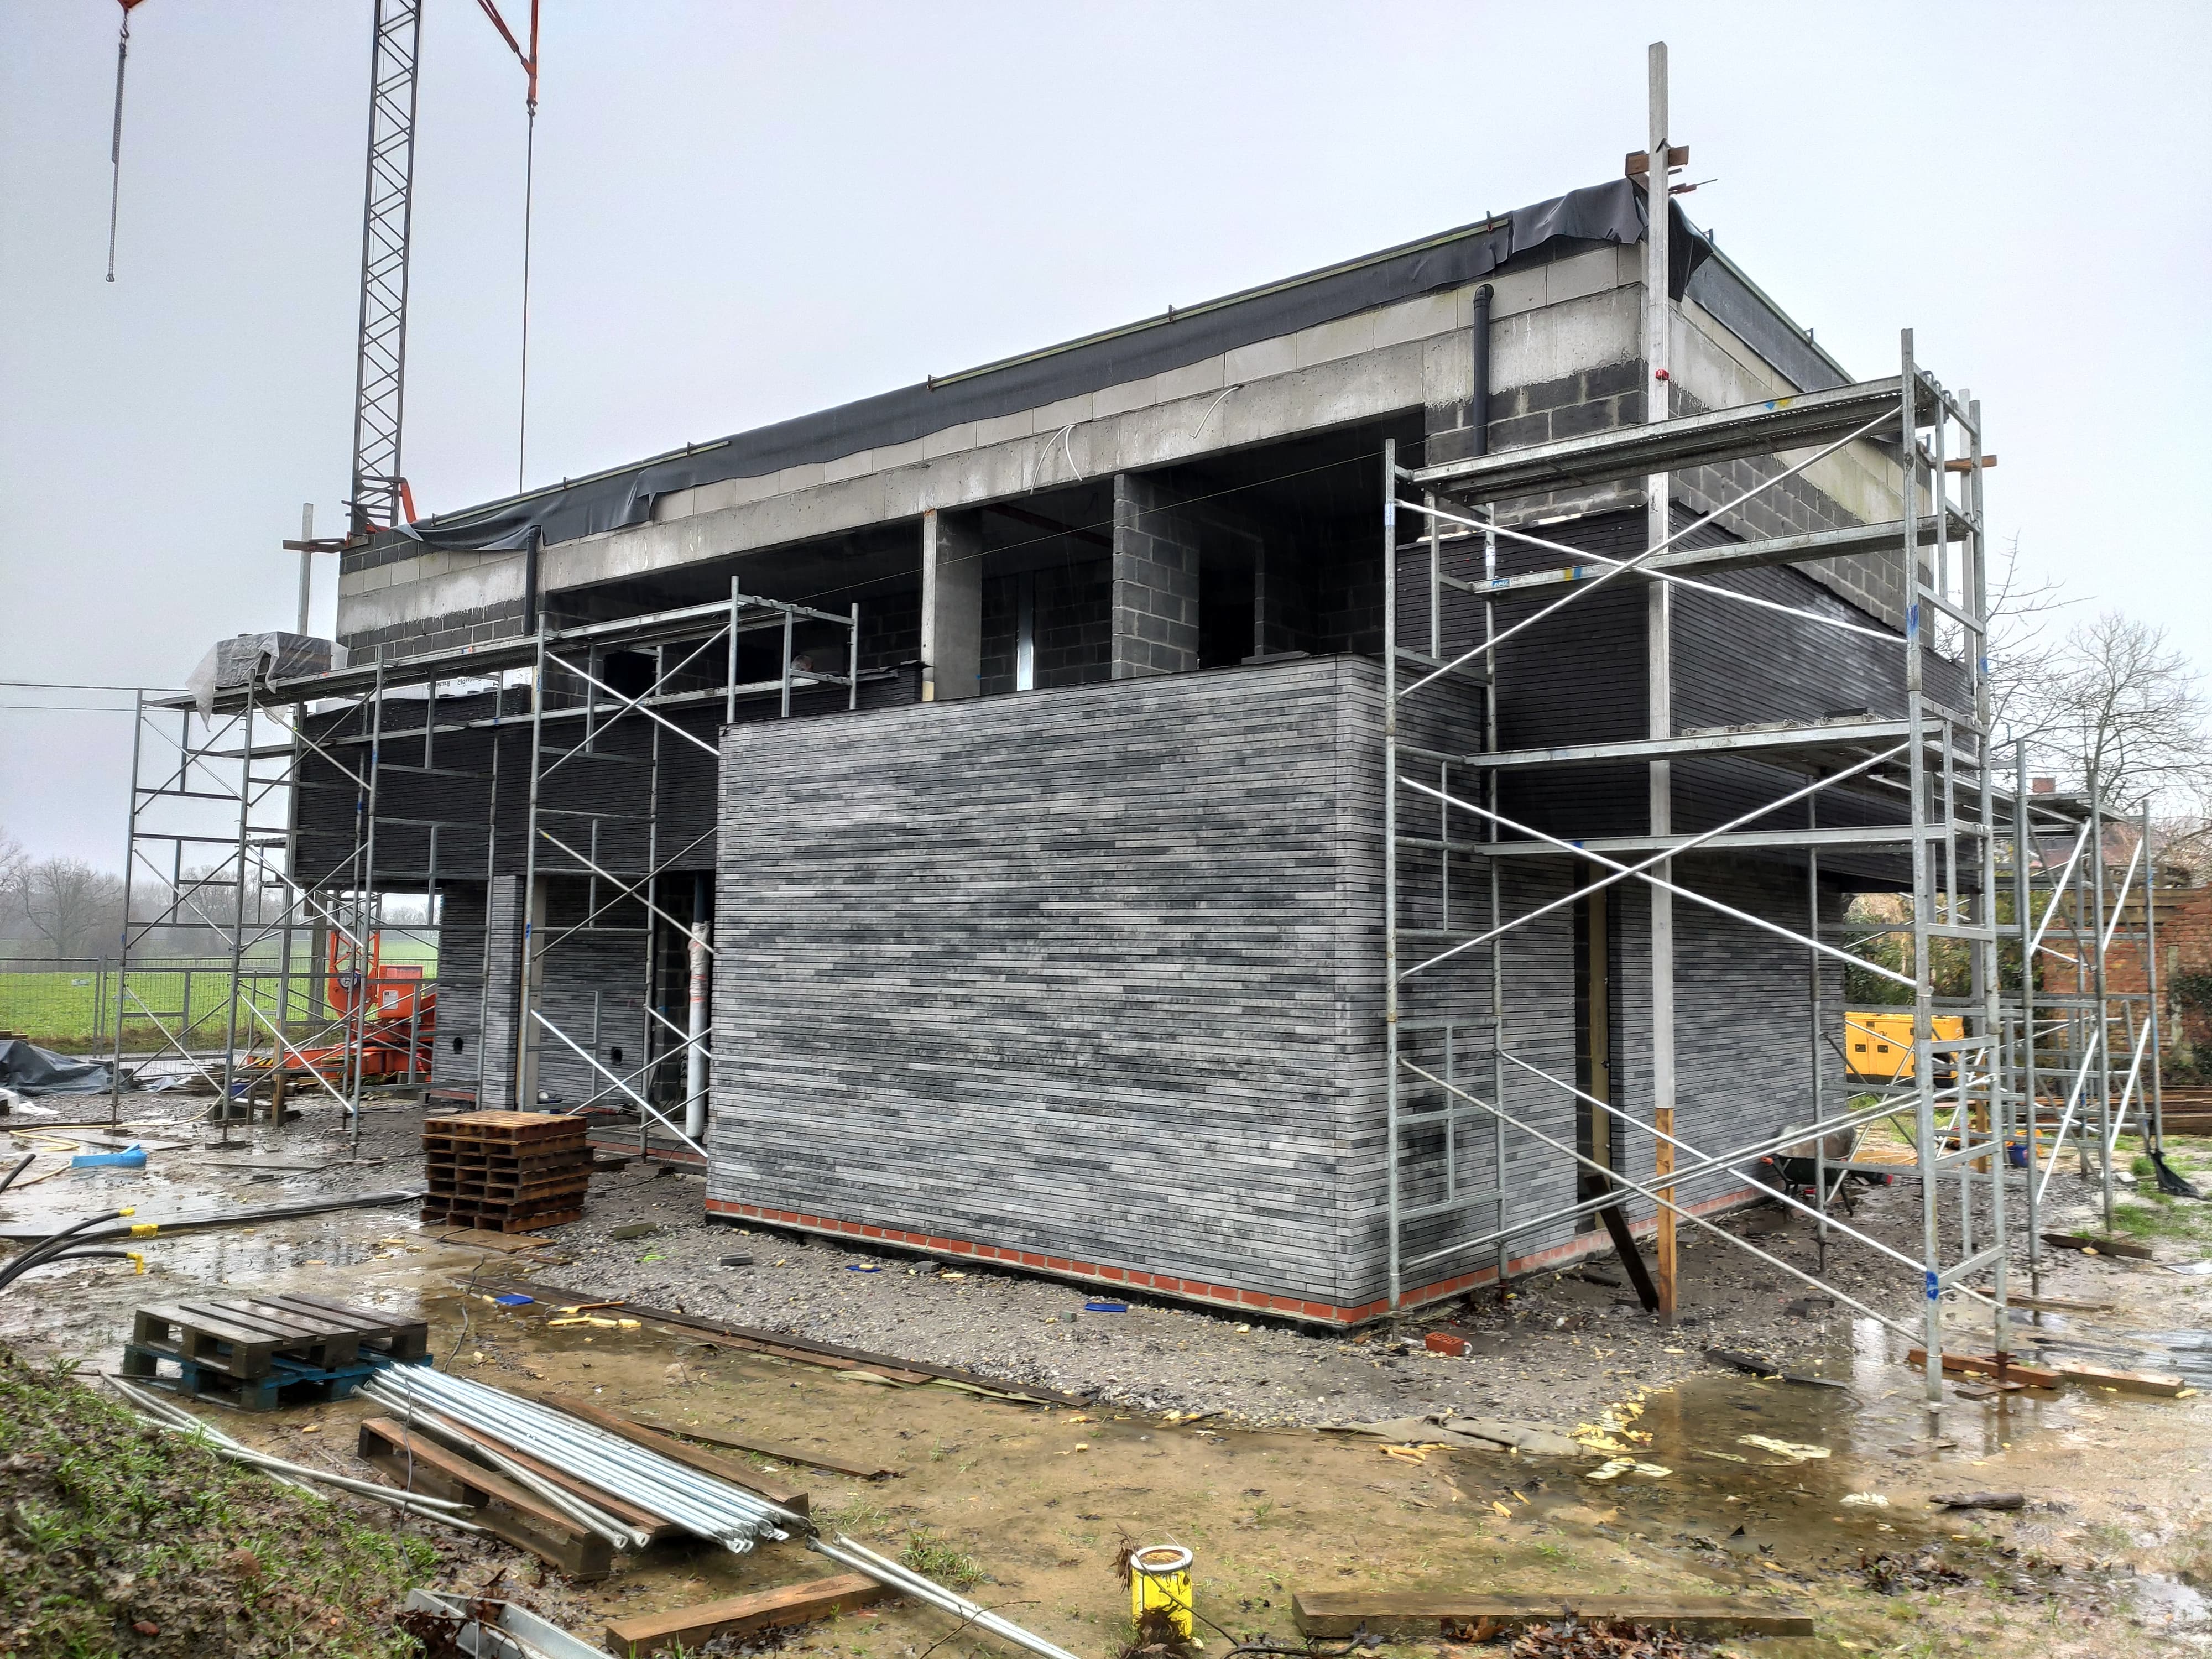
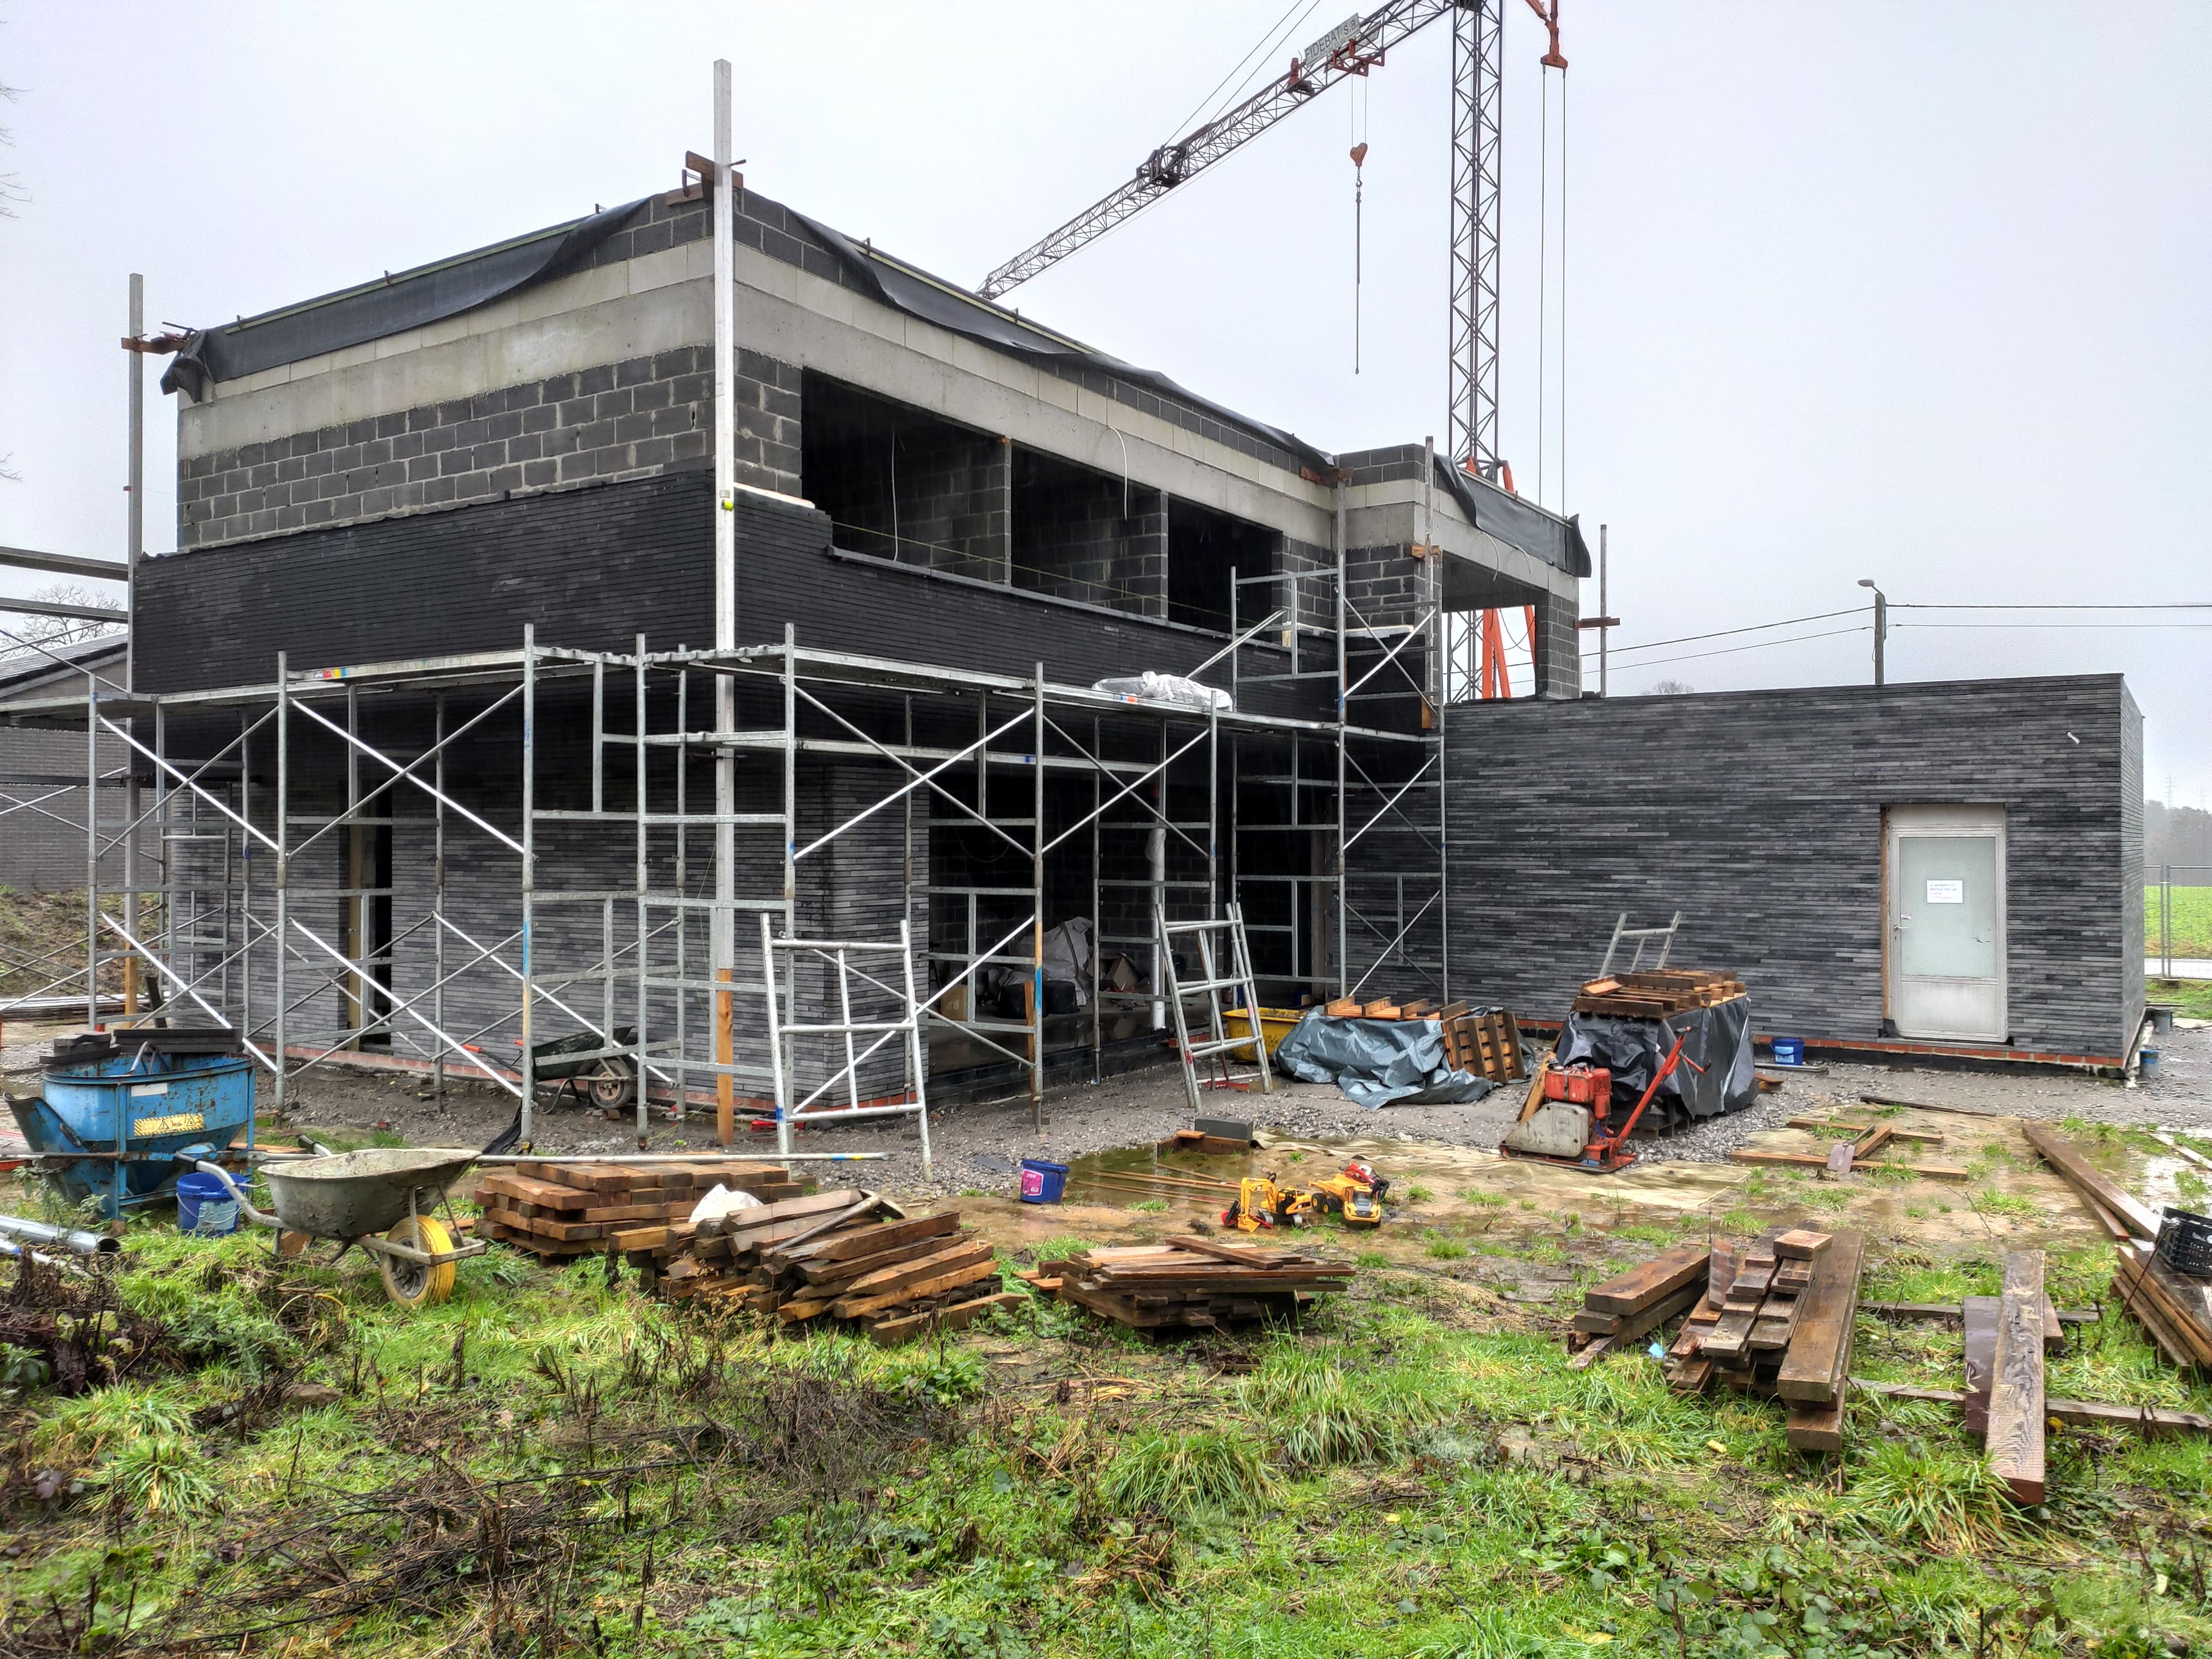
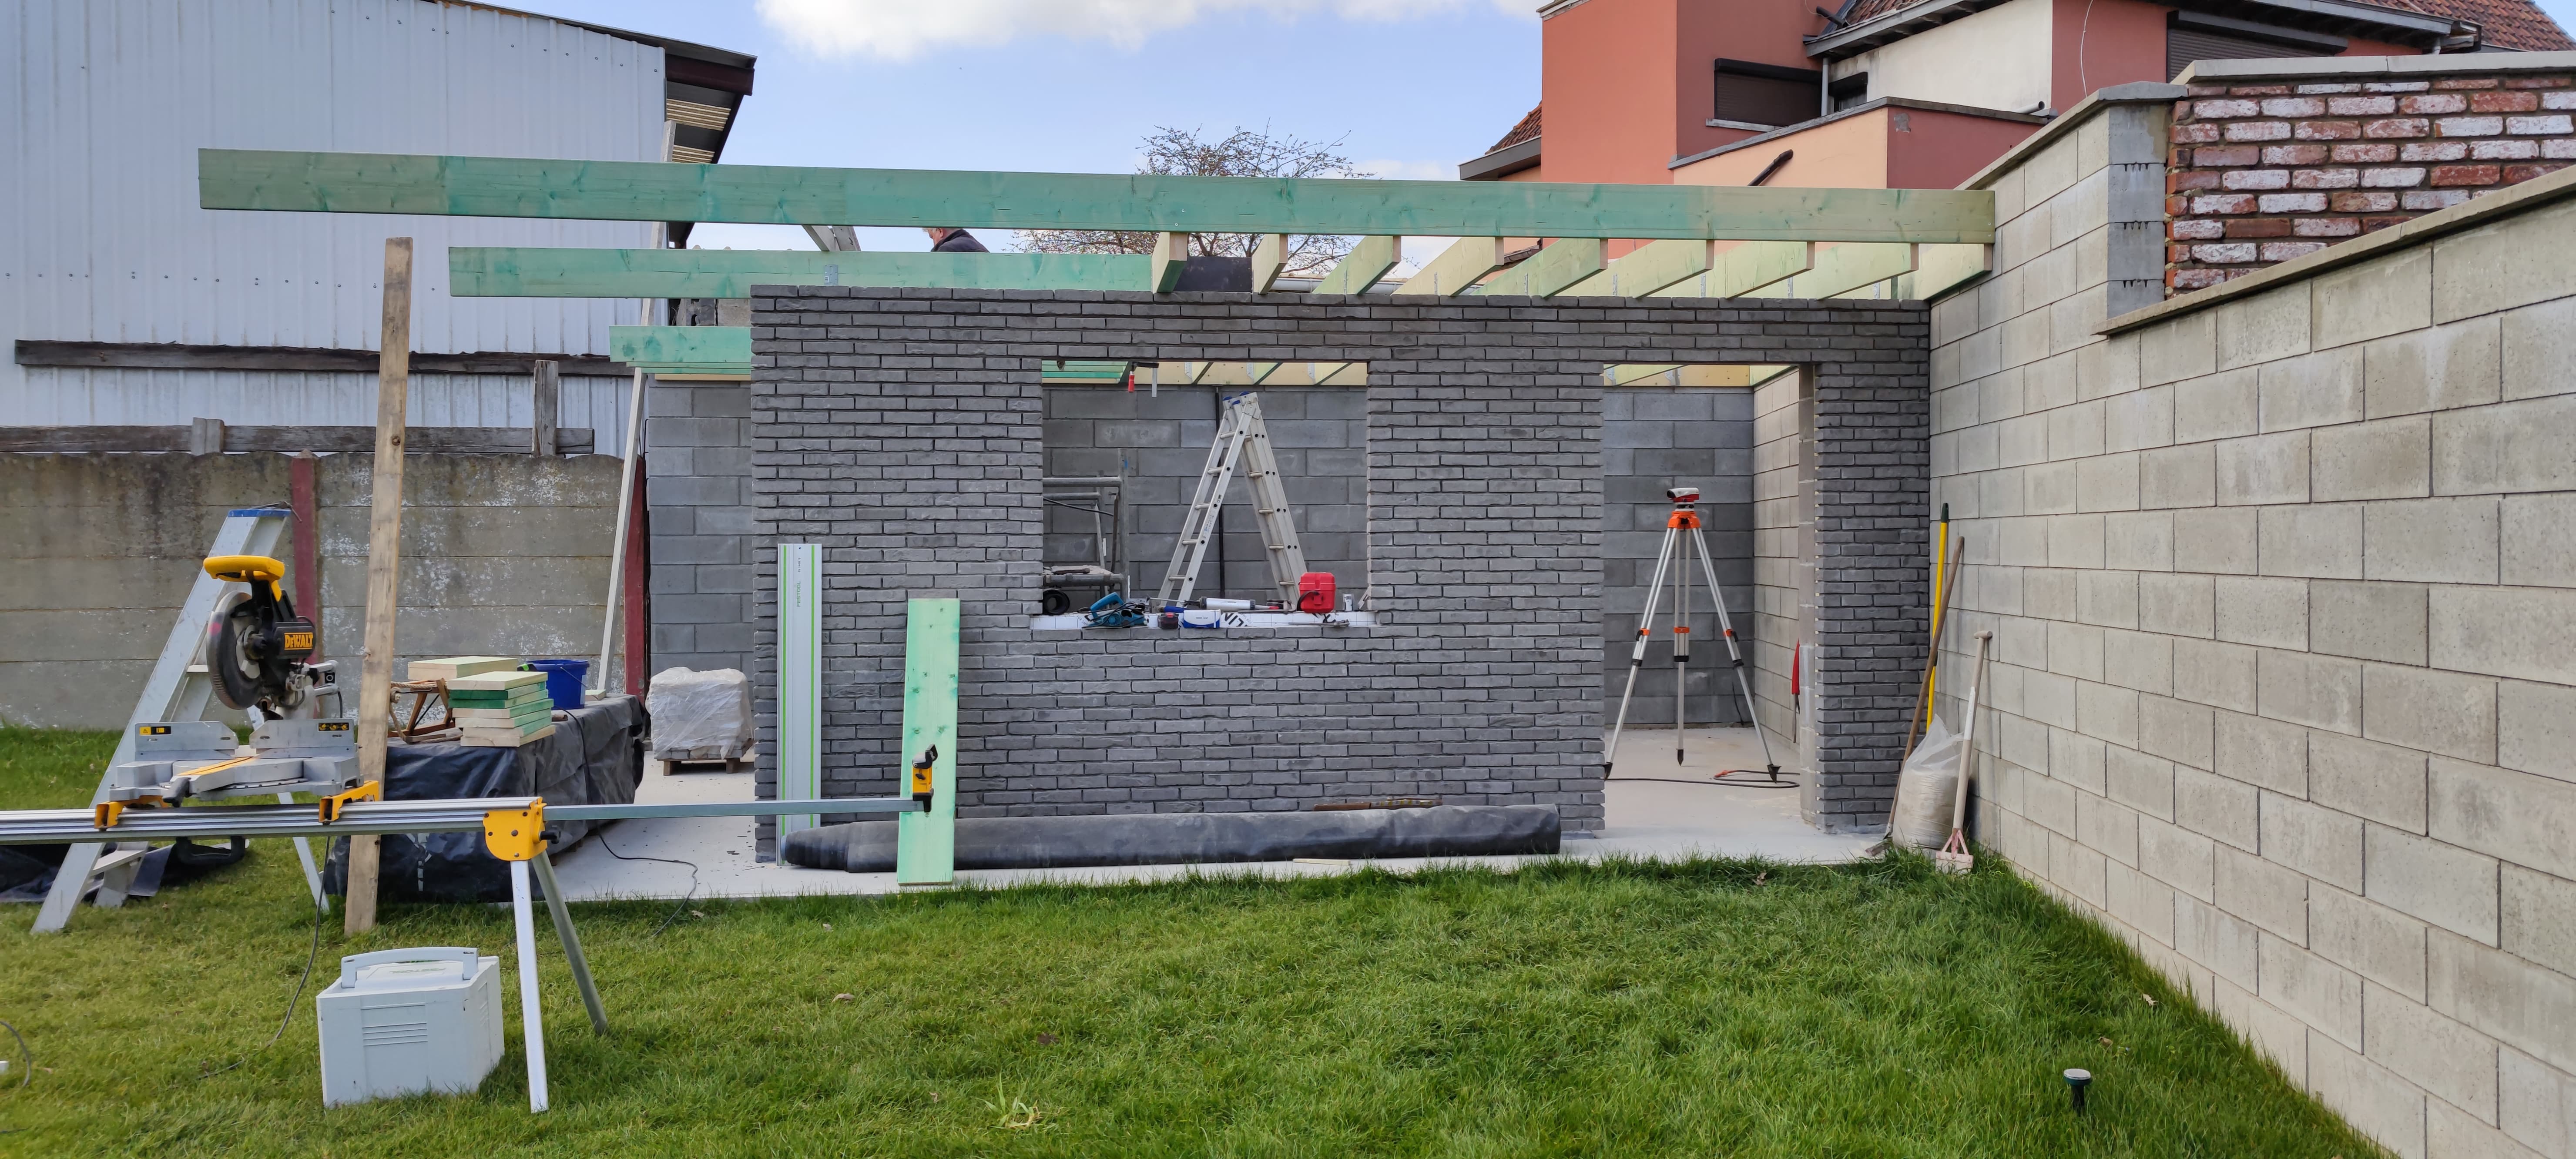
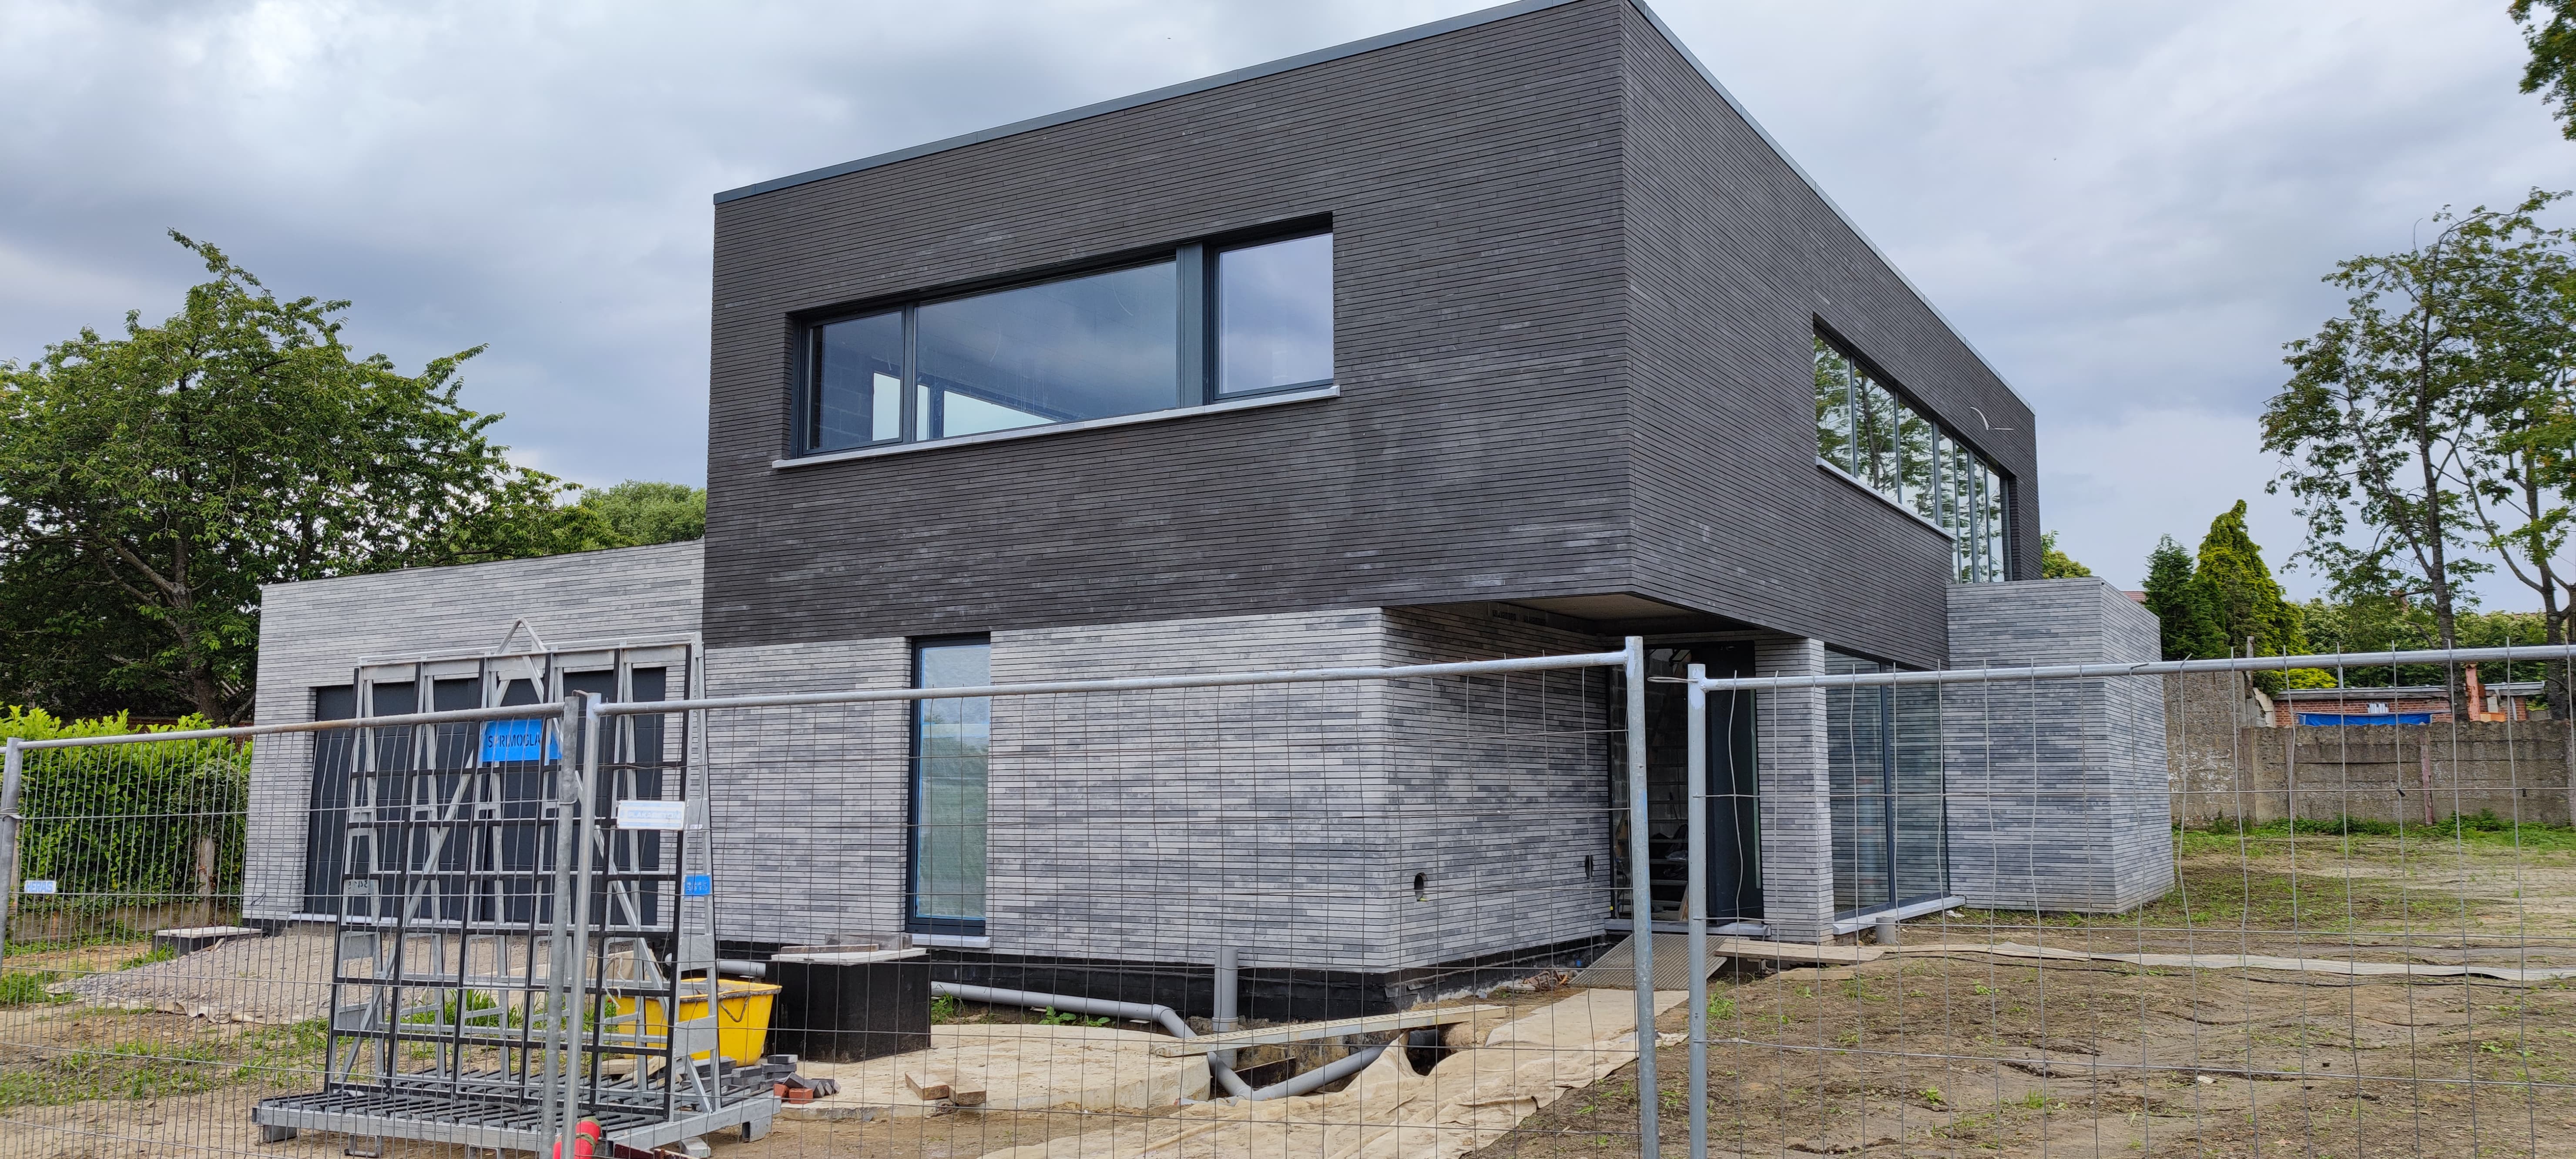
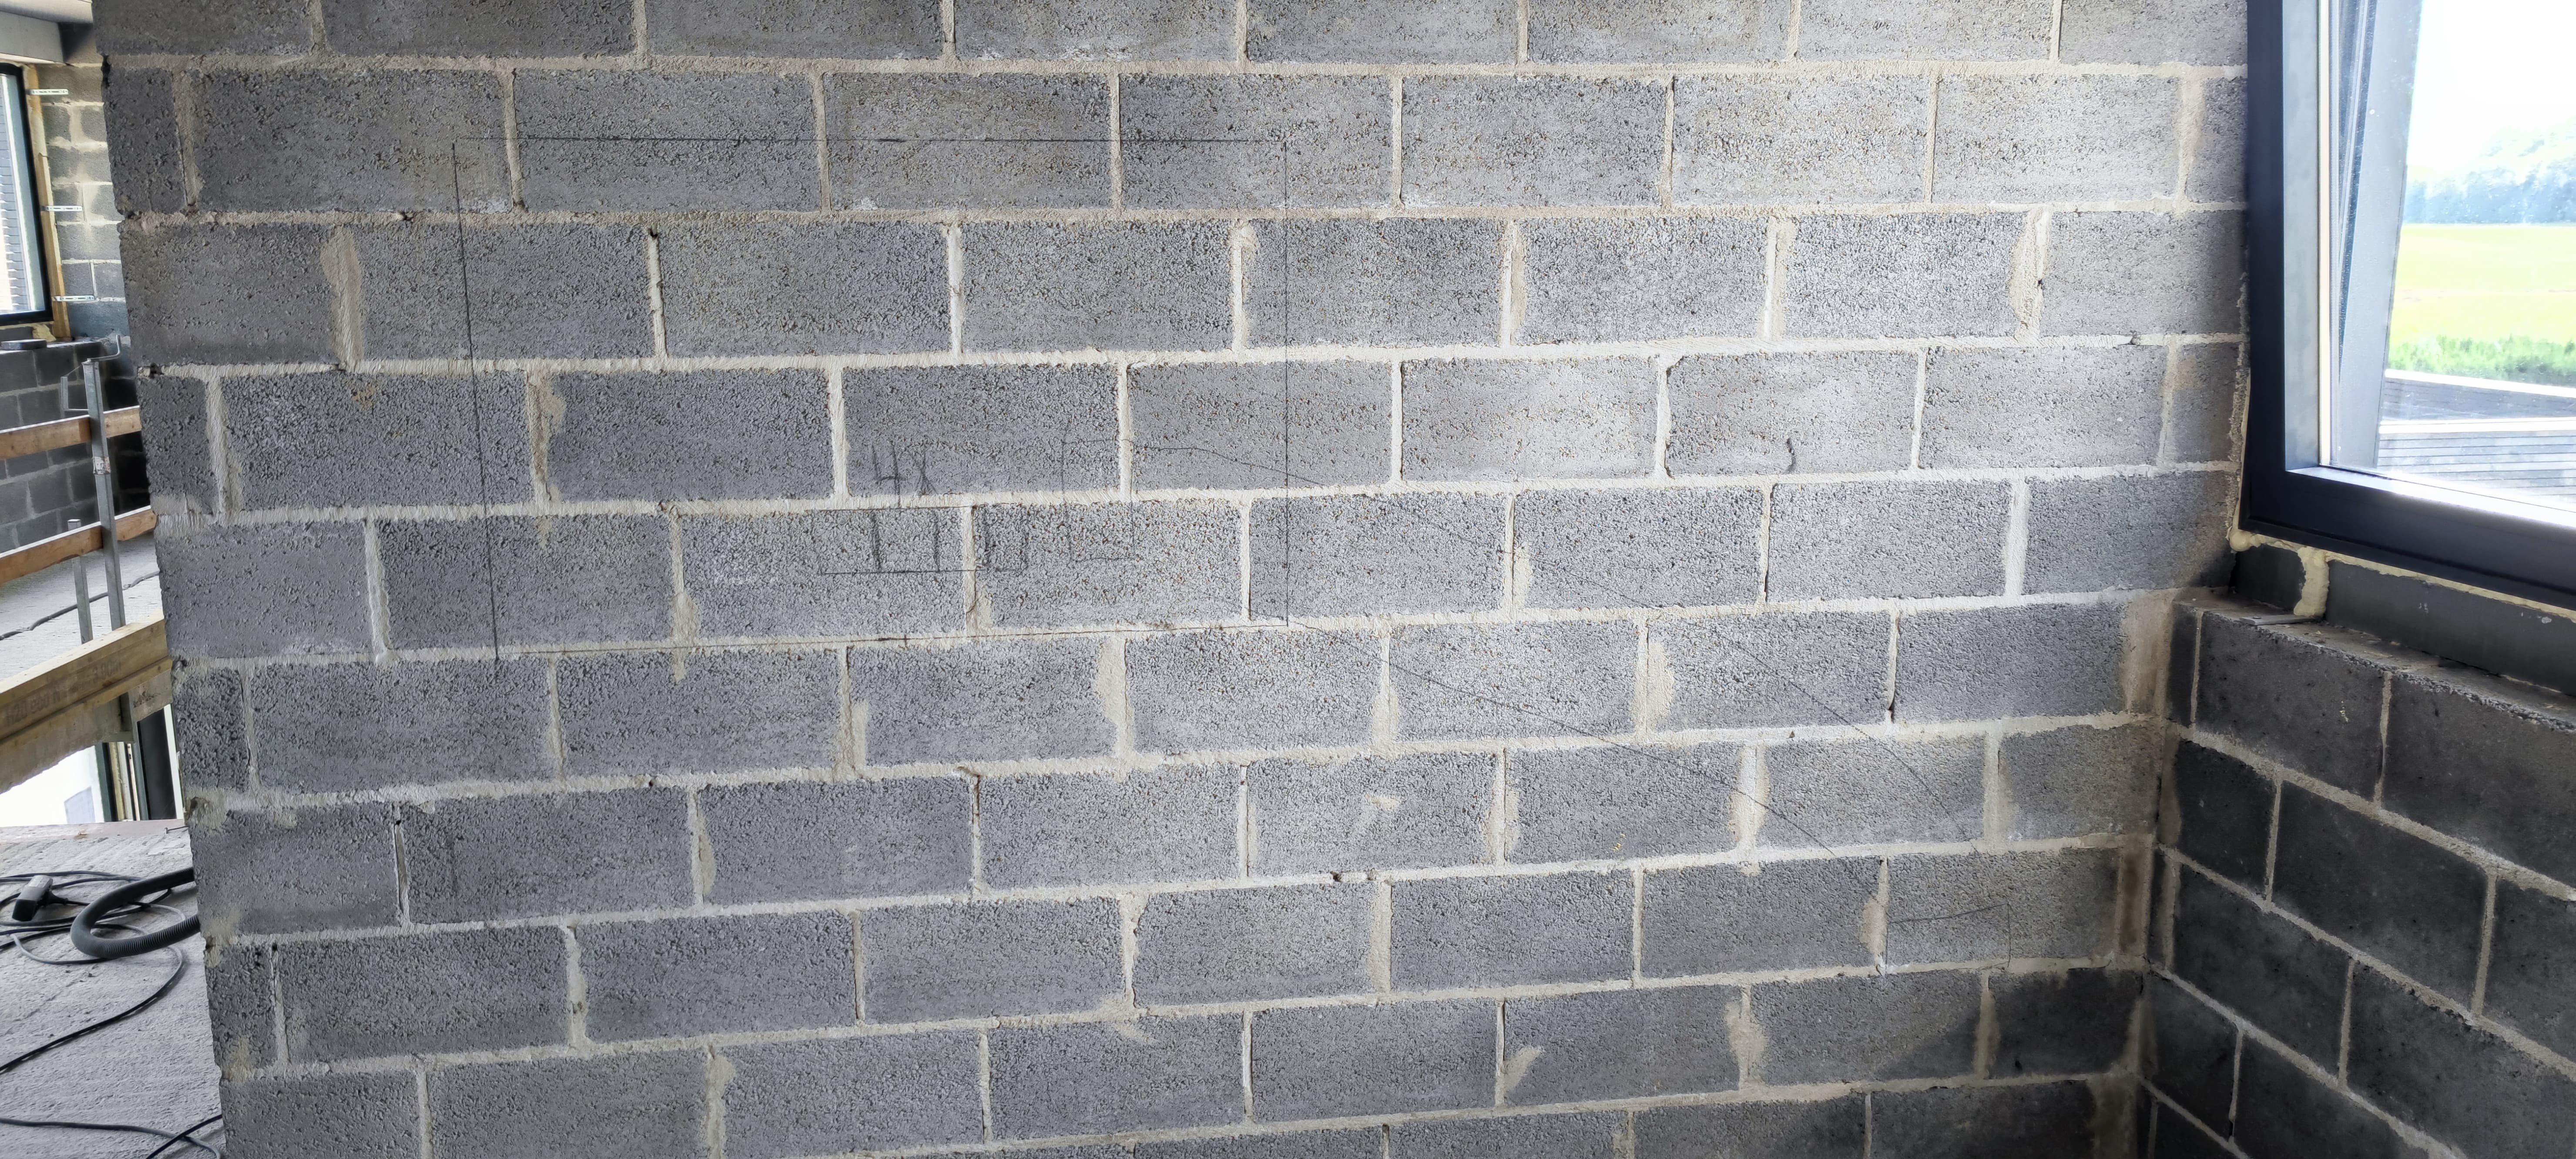
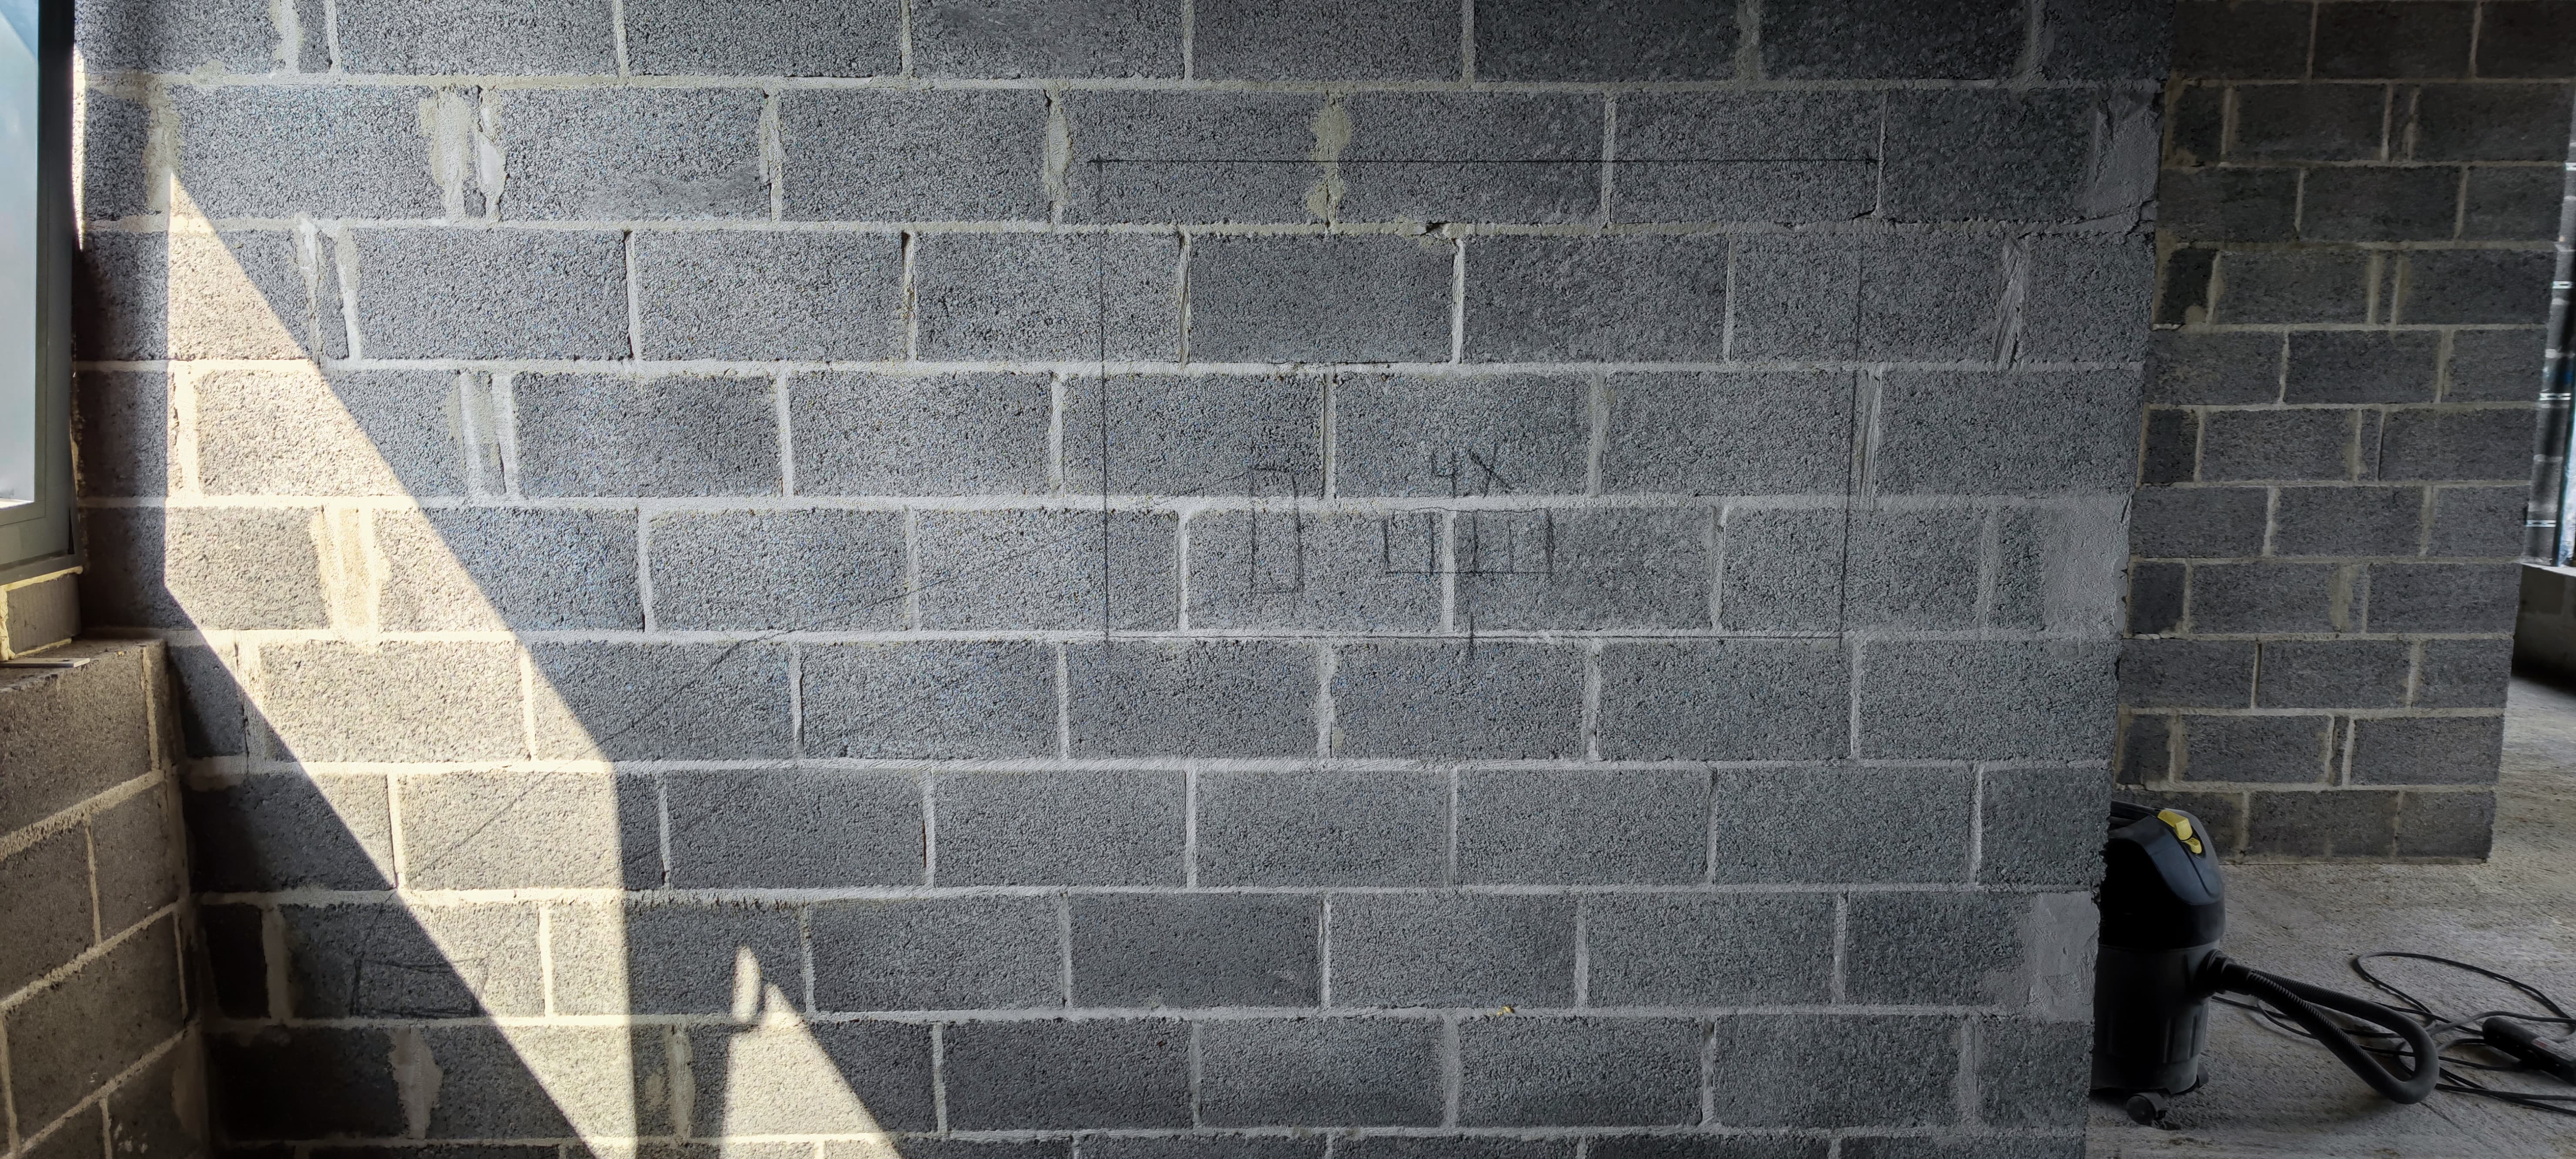
Then starting the bricks


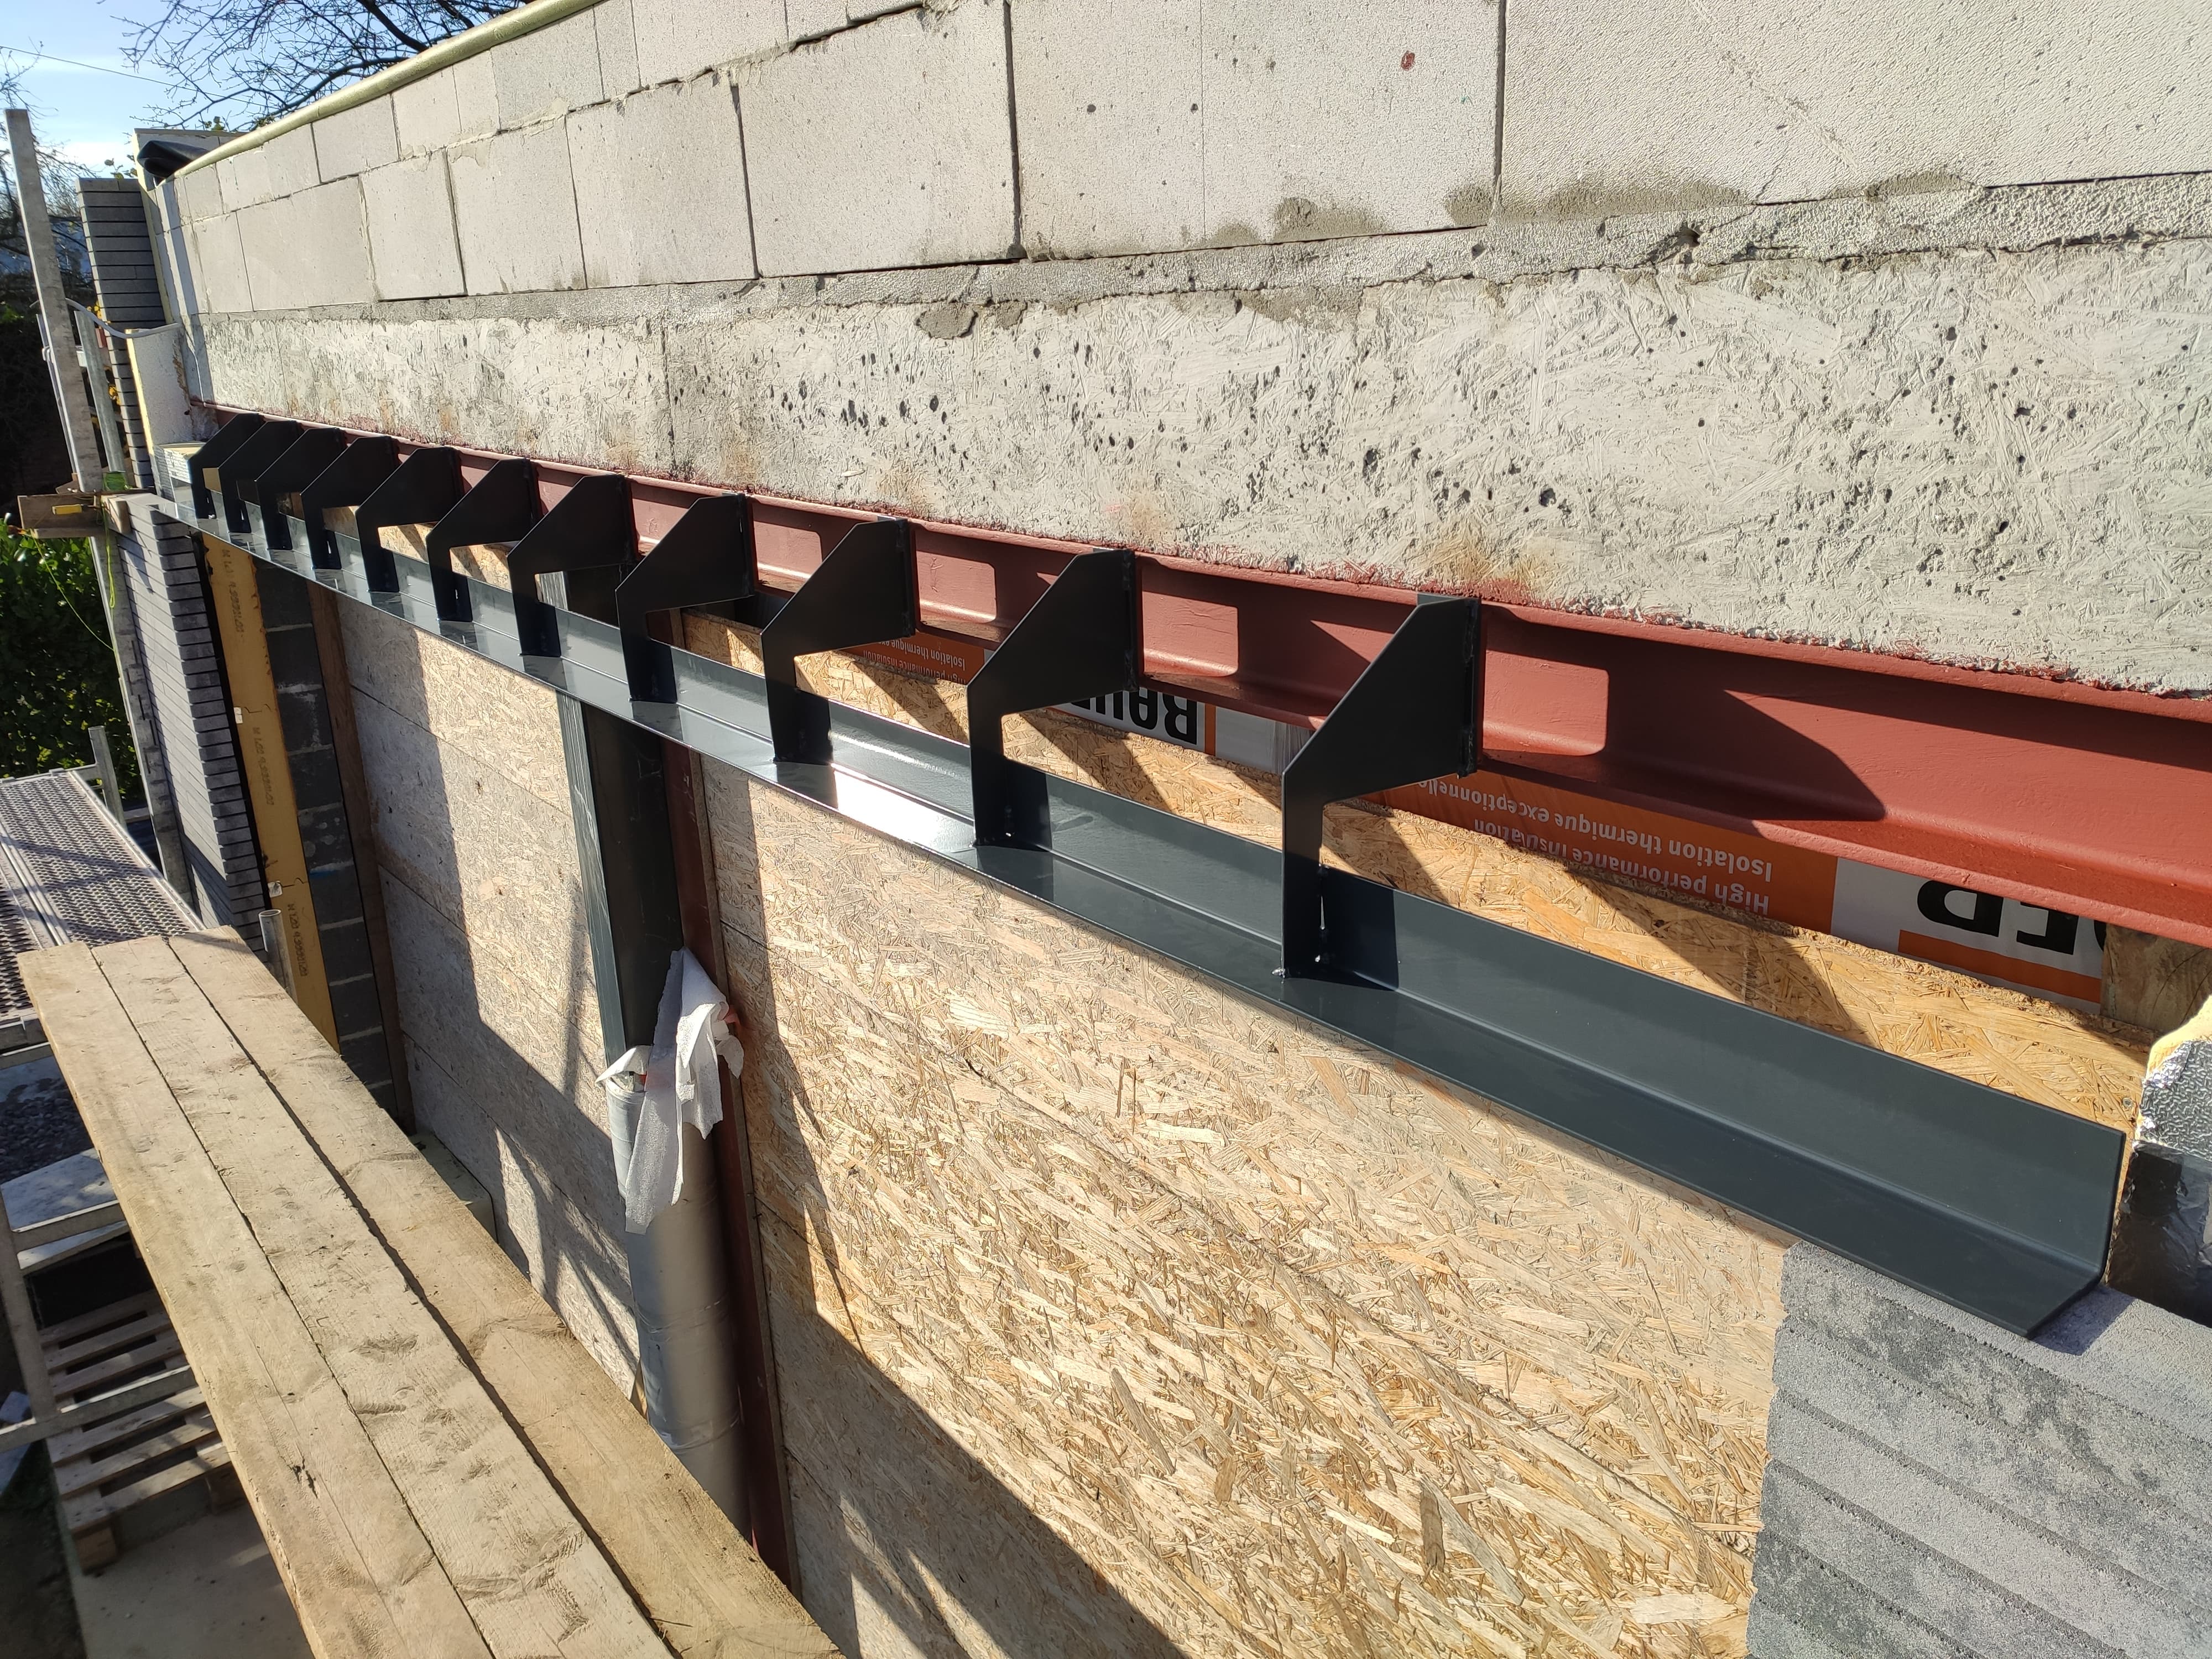
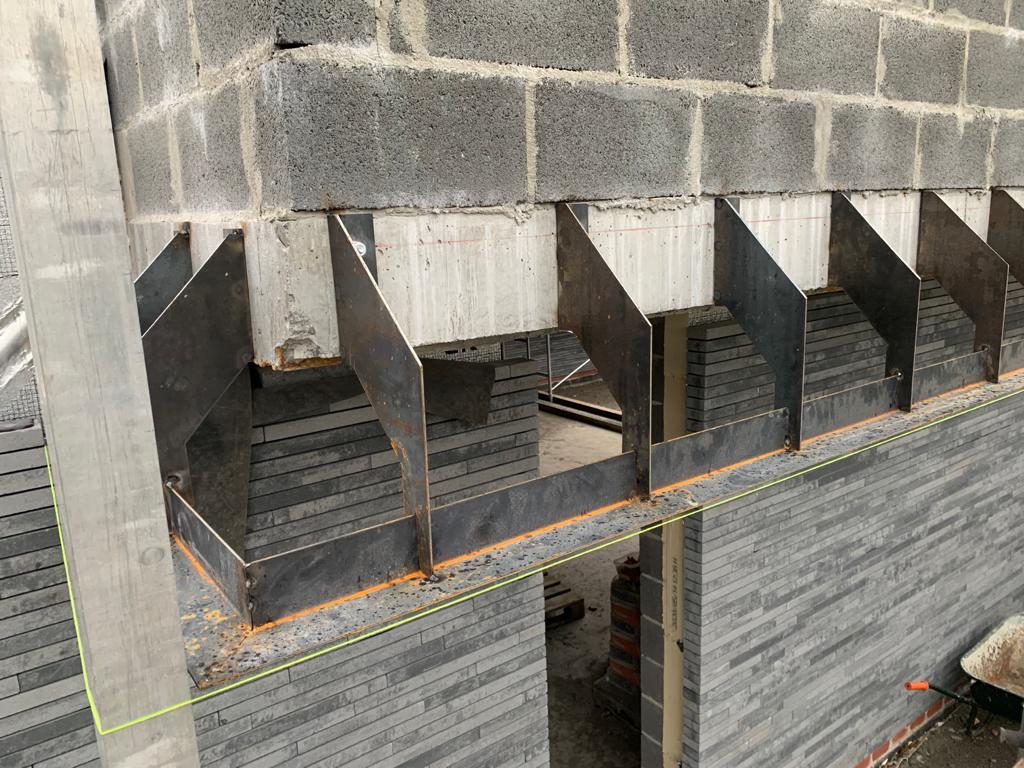
First floor, restarting to weld what we call here “Corbel angle iron”, it is what will support bricks above the window in a very discrete manner, no visible concrete support from bottom :


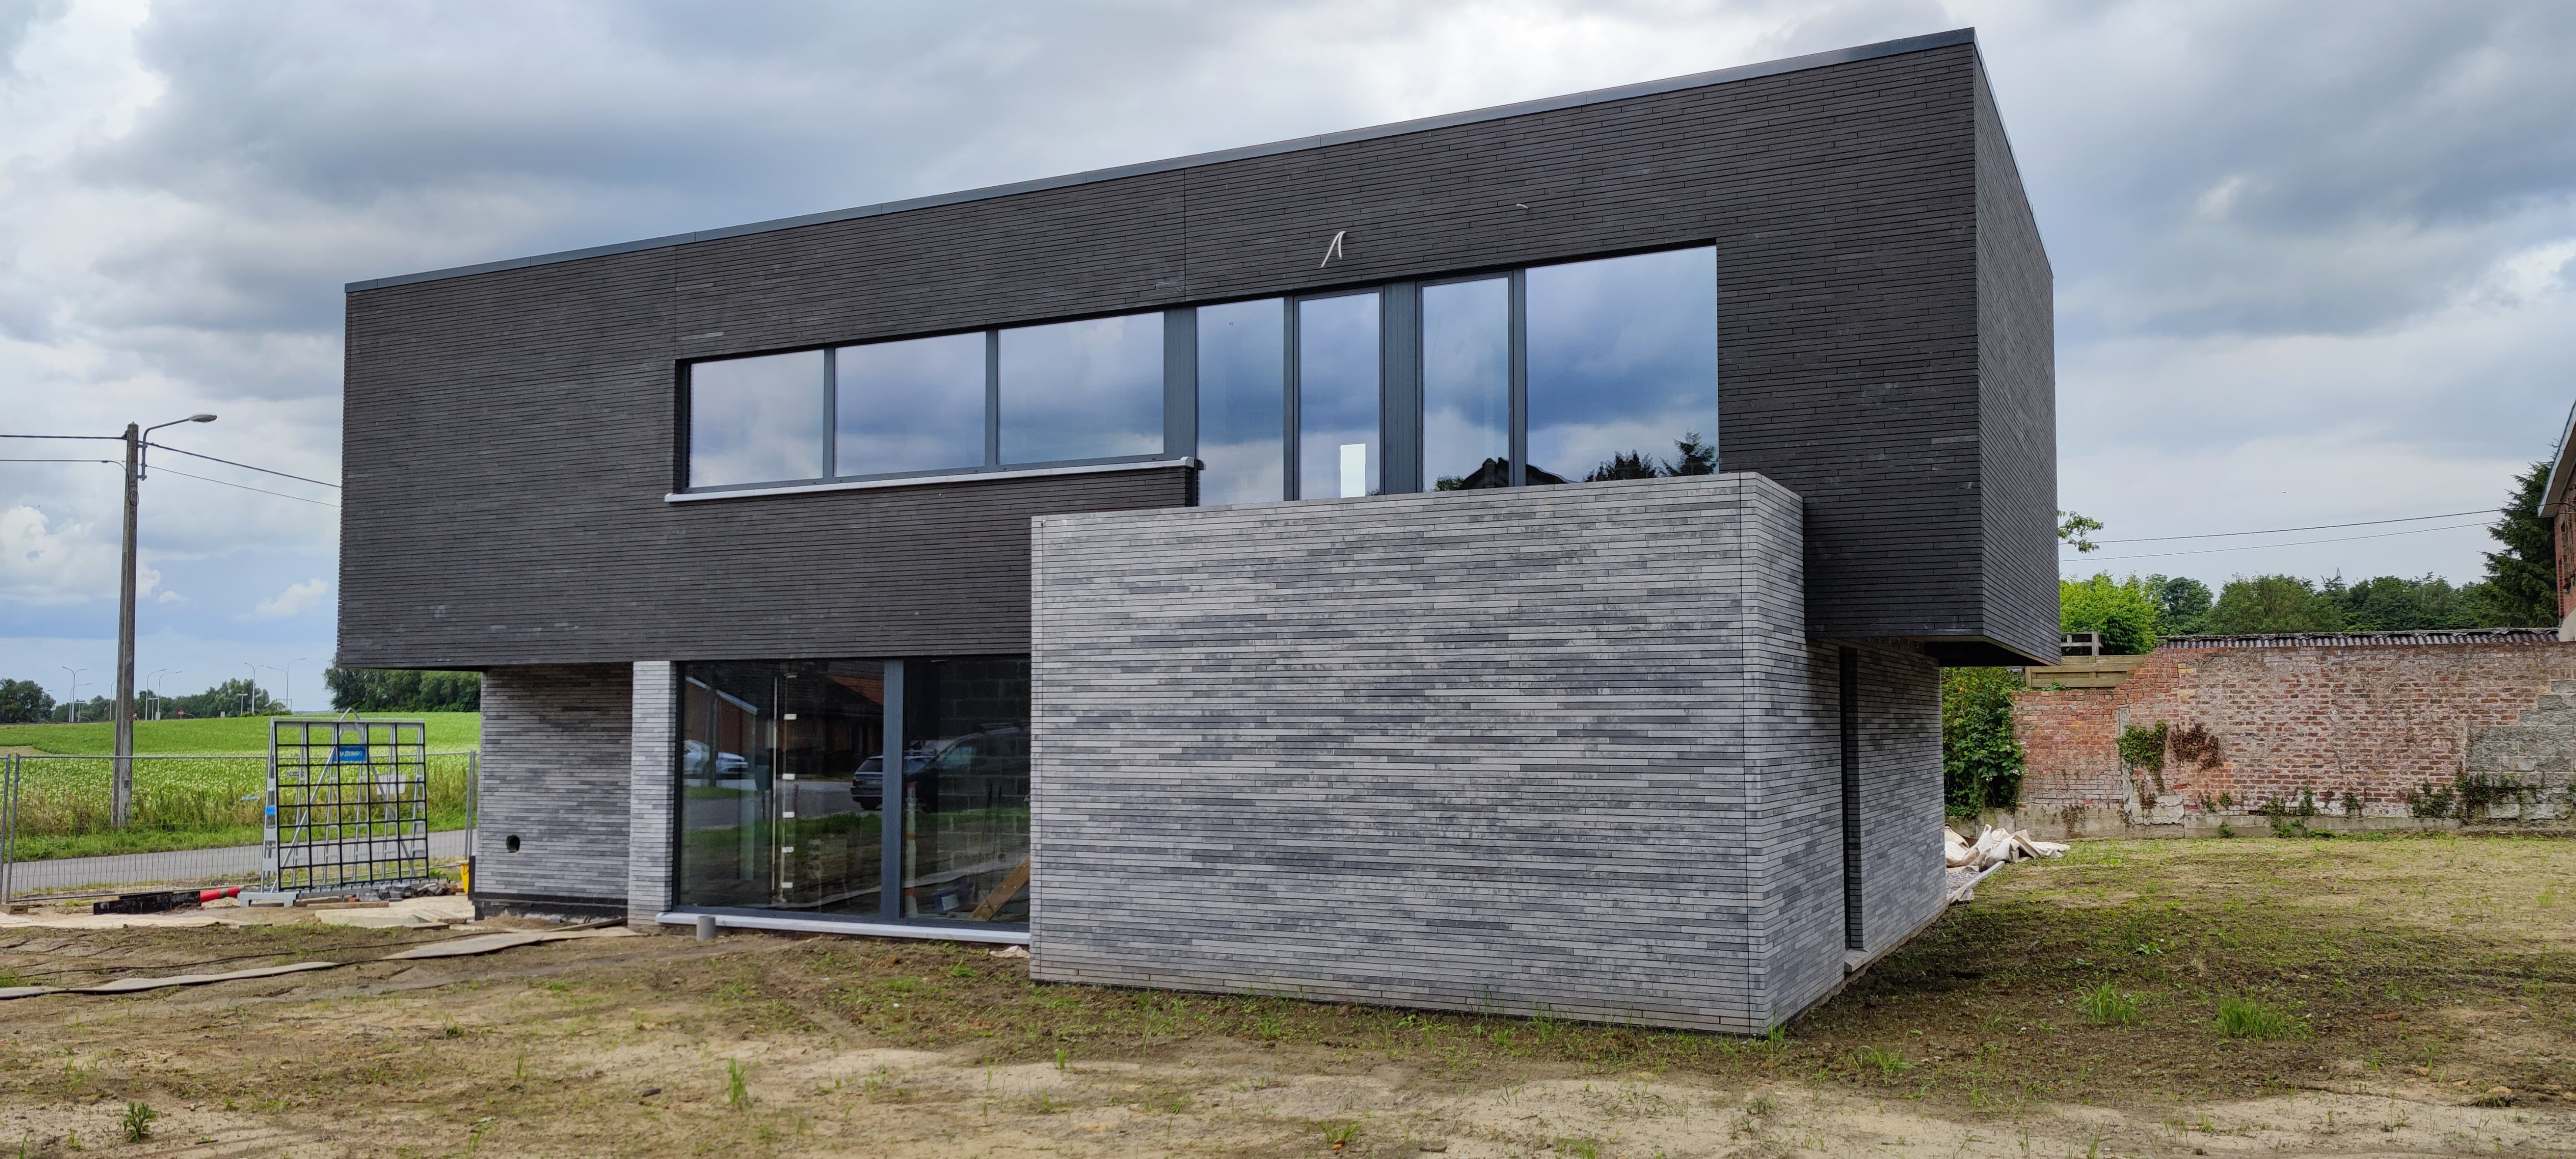
Then more bricks and more support for the second floor window


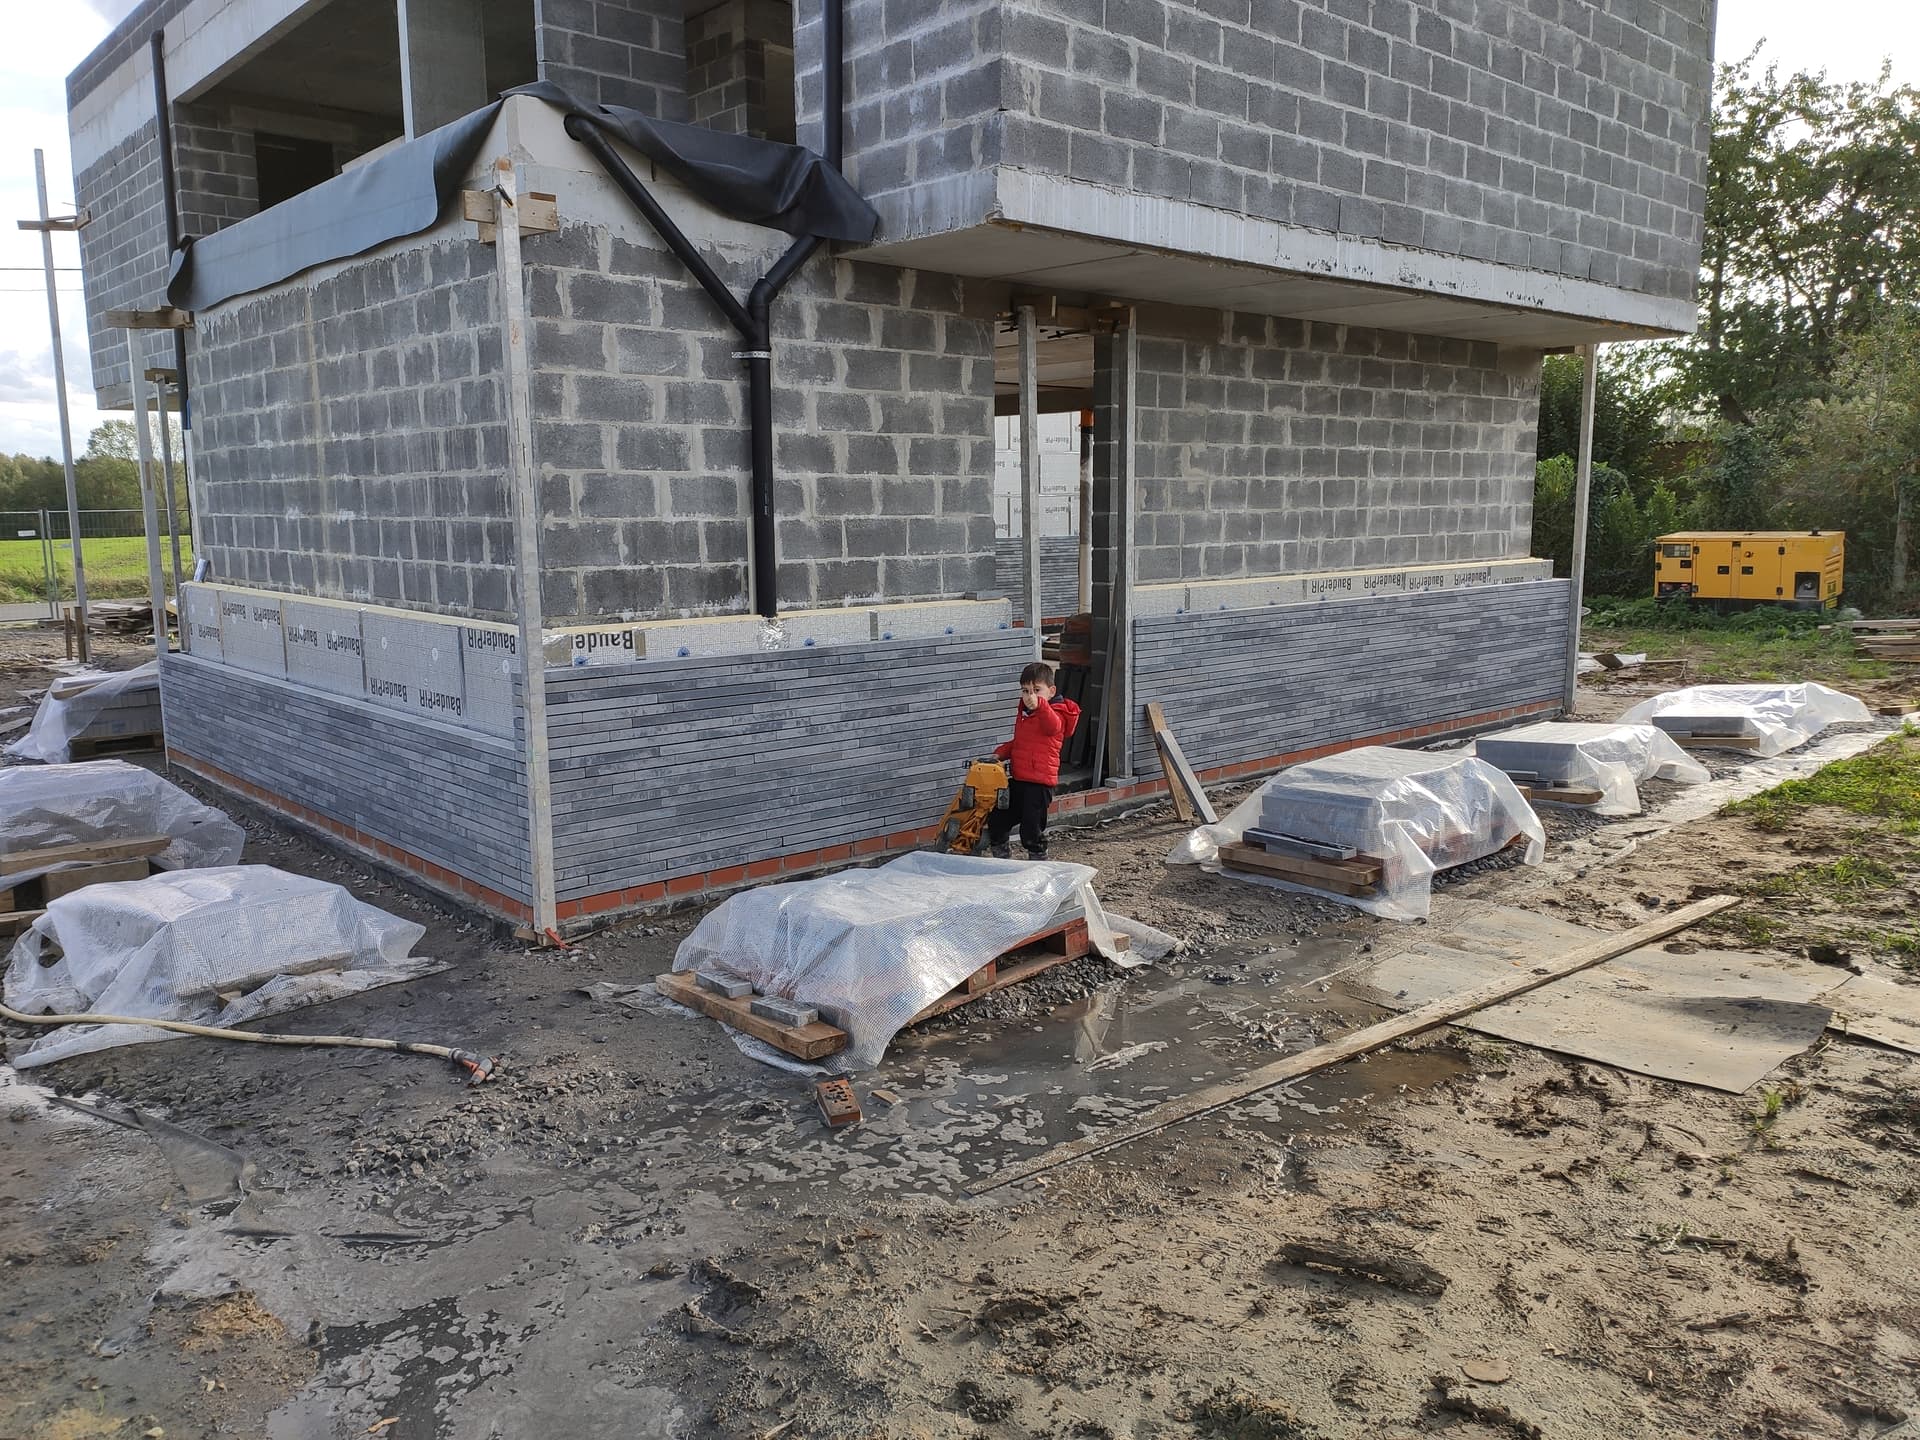
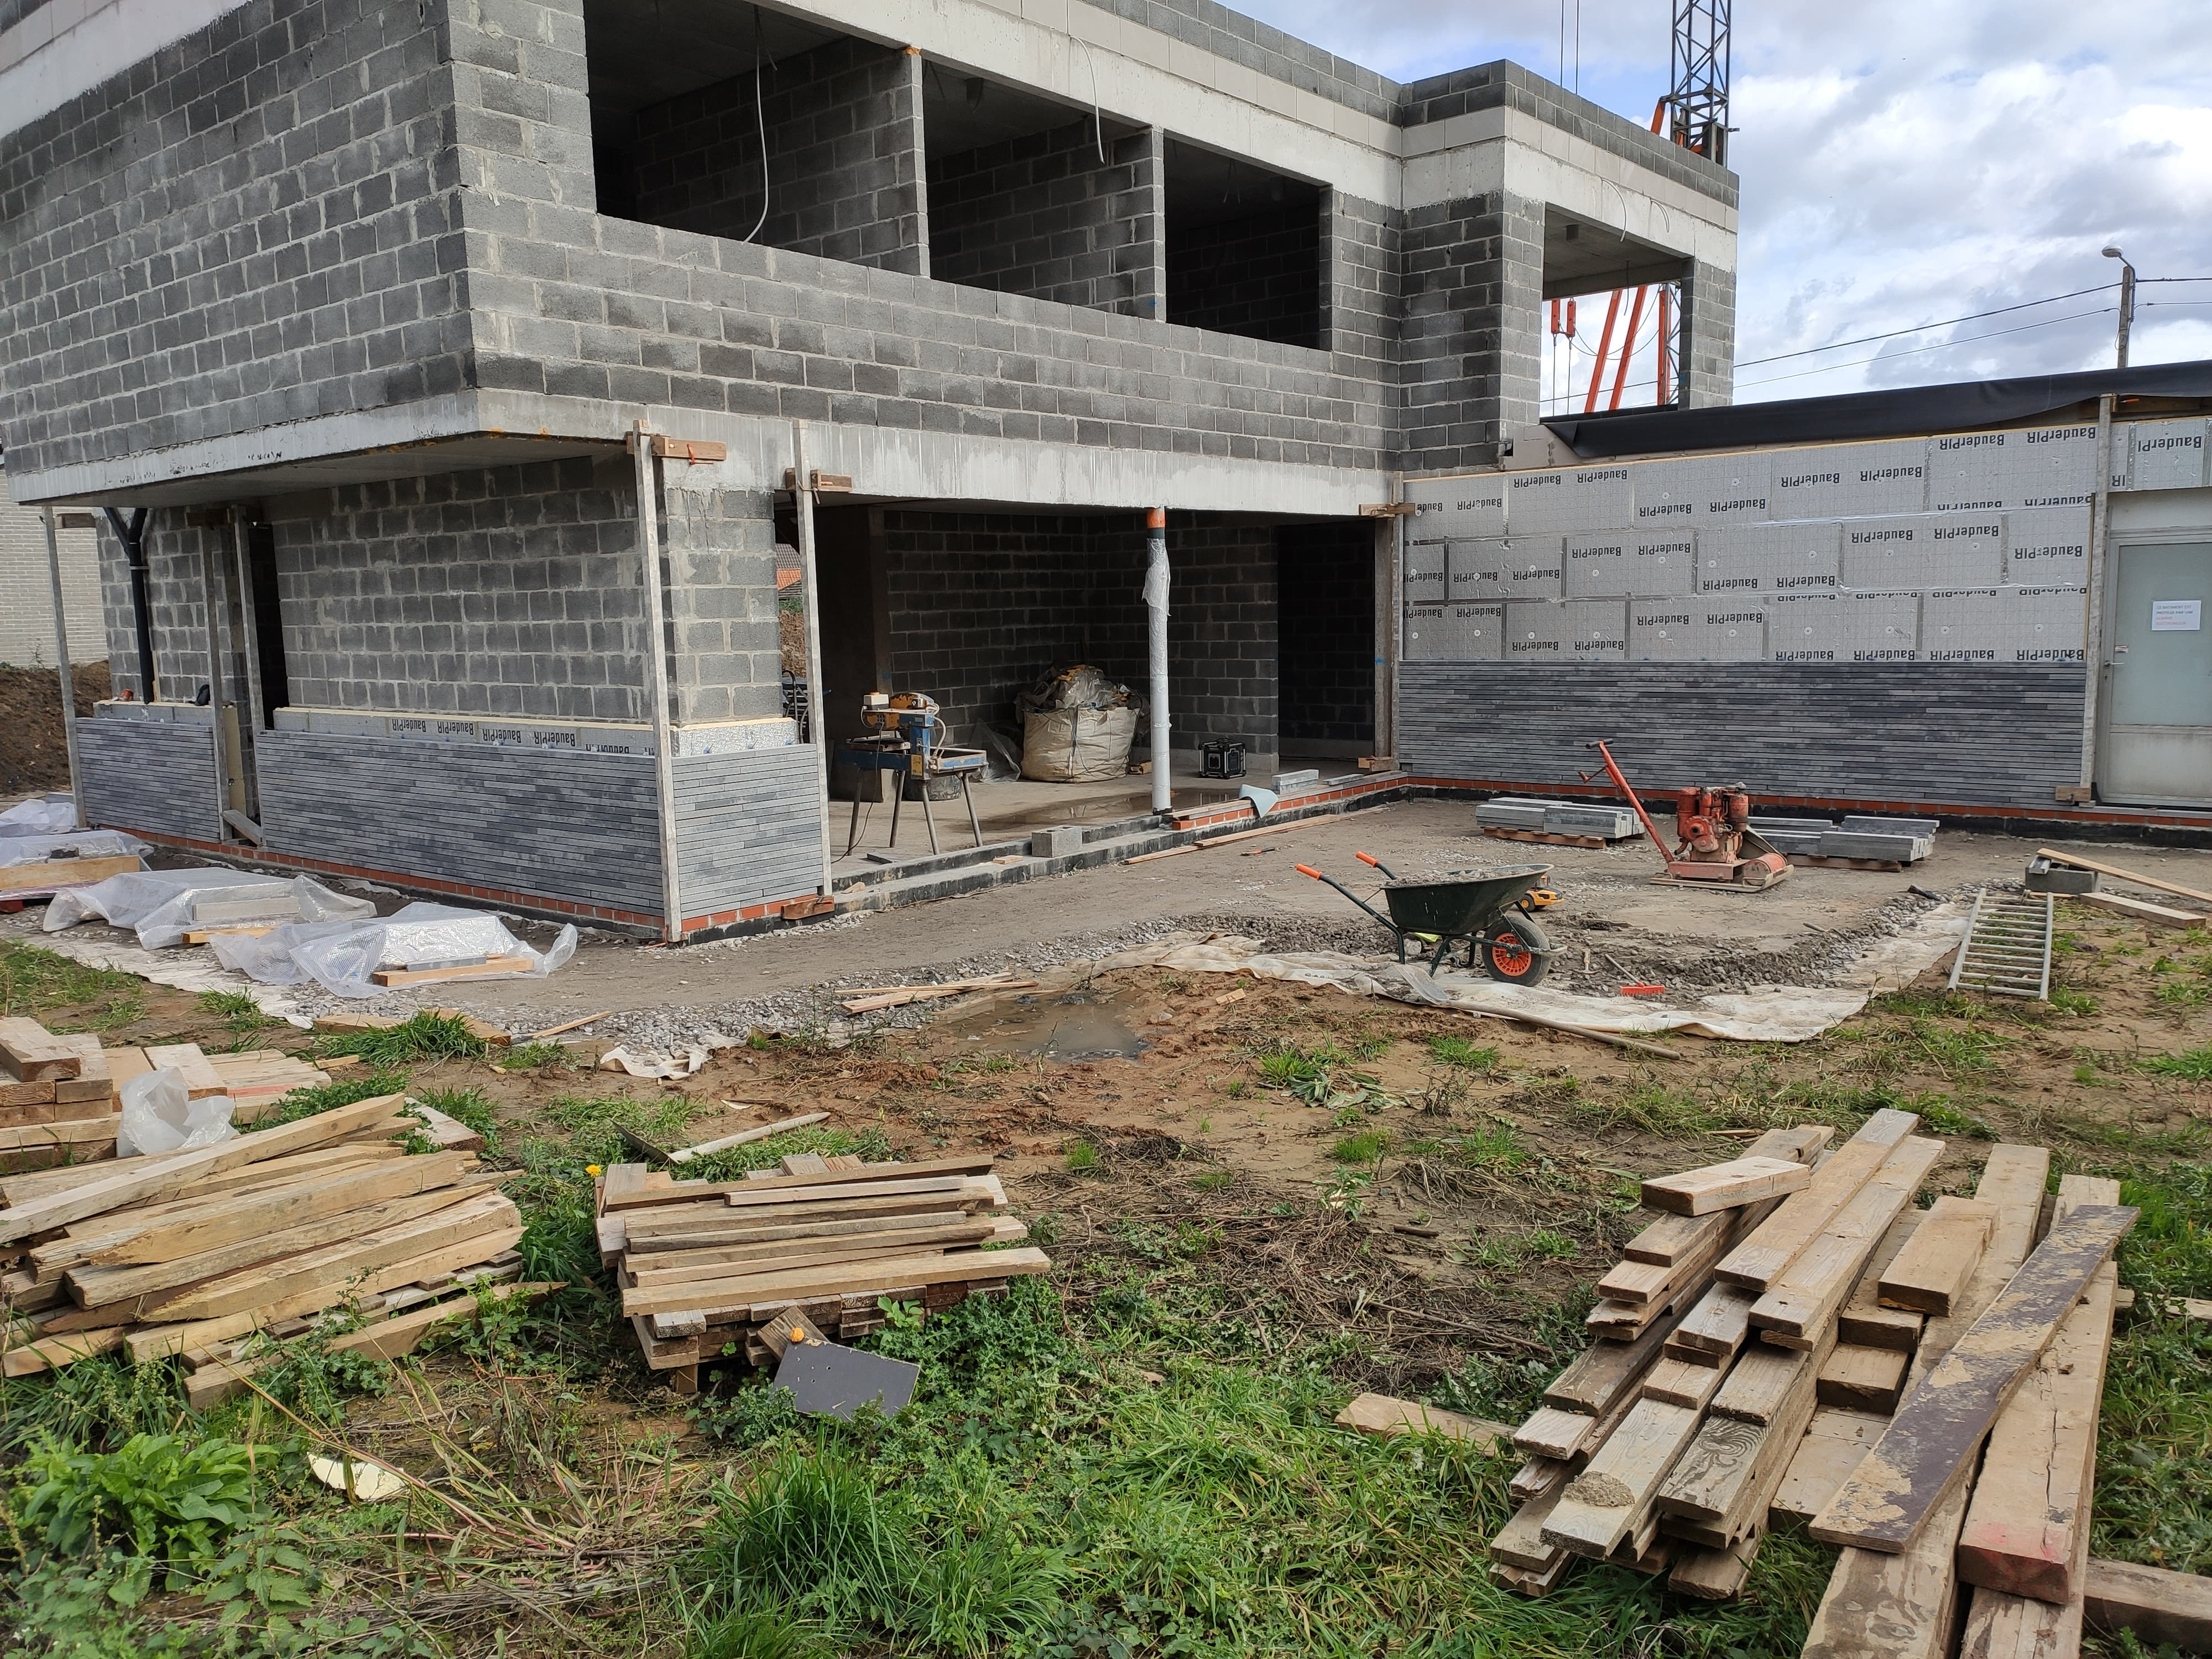
And this part finished


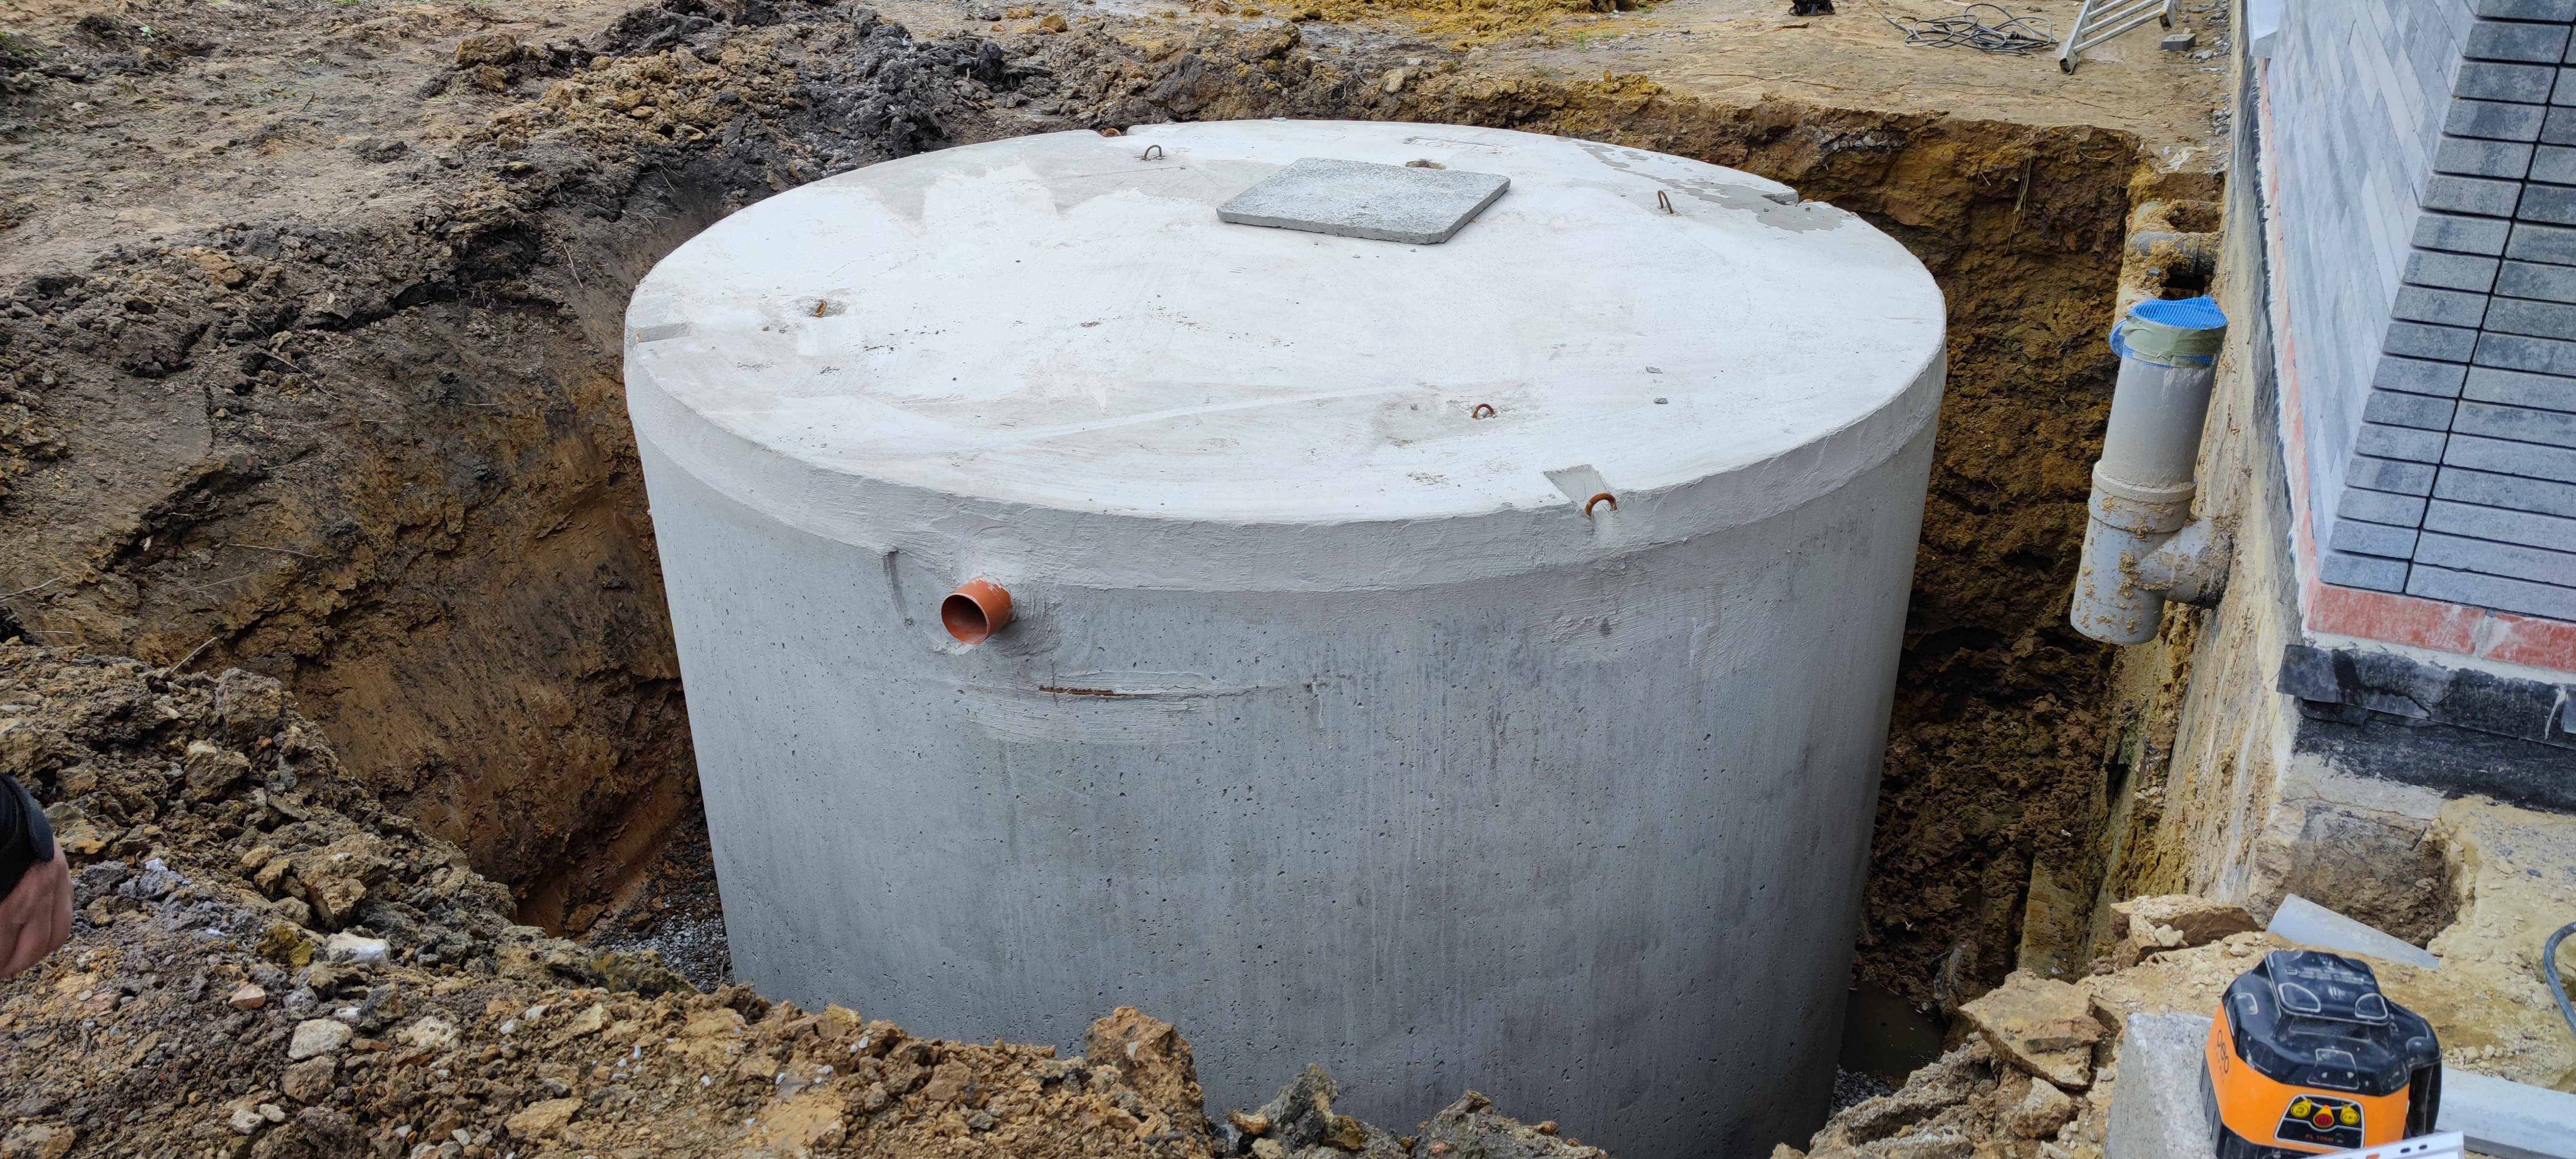
Now famous water tank installed, we can link the pipes from the roof to it:

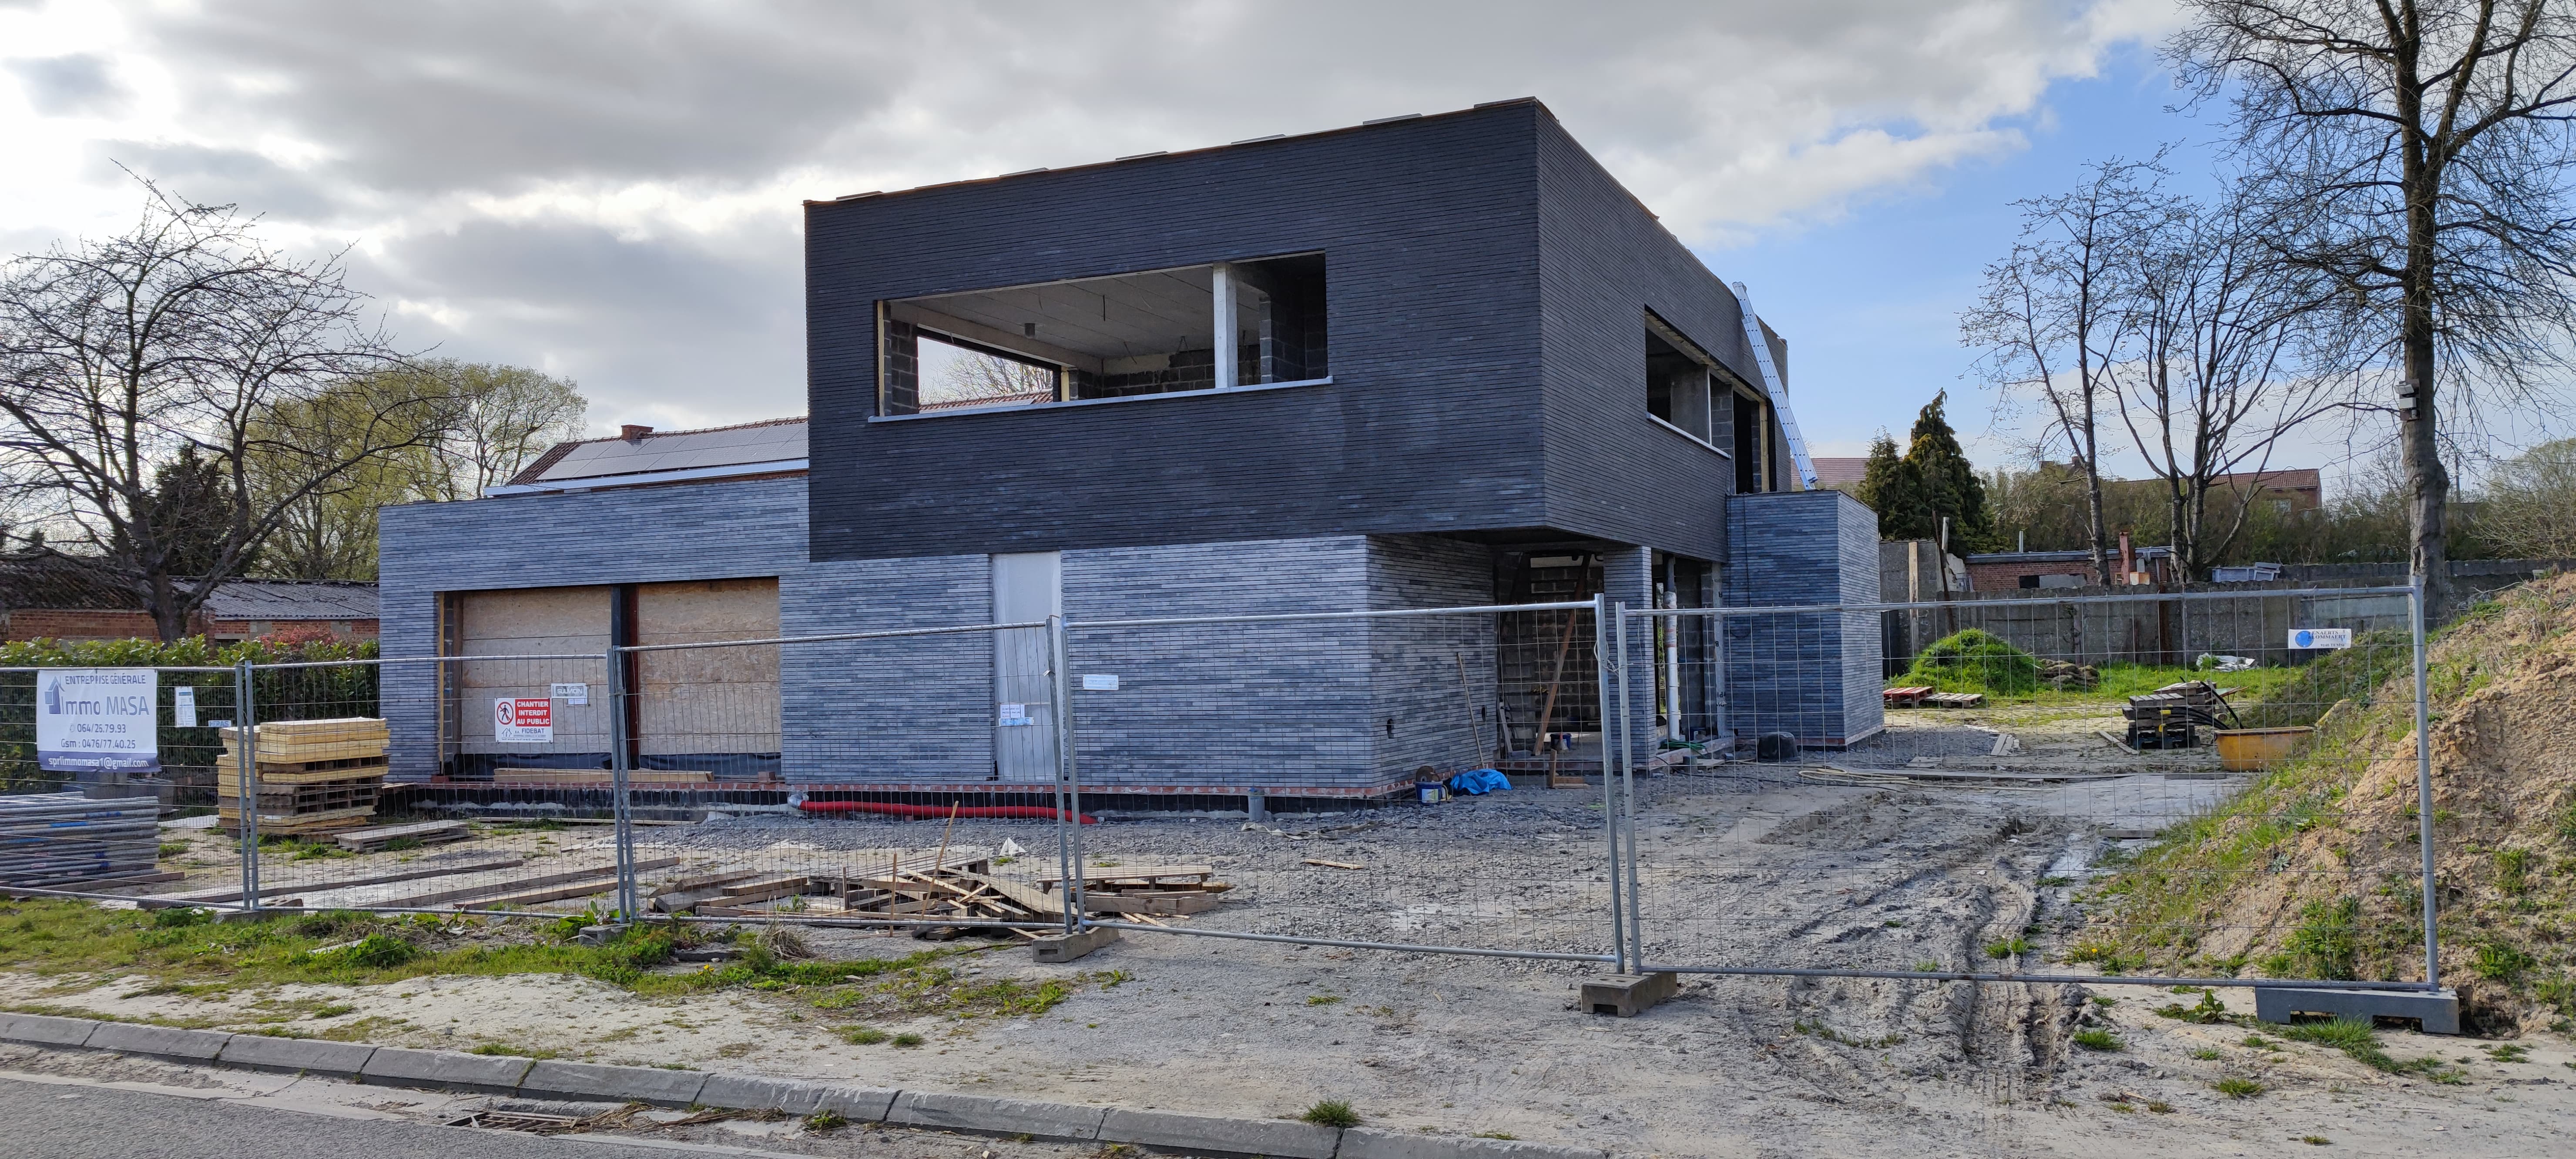
Now with Window installed


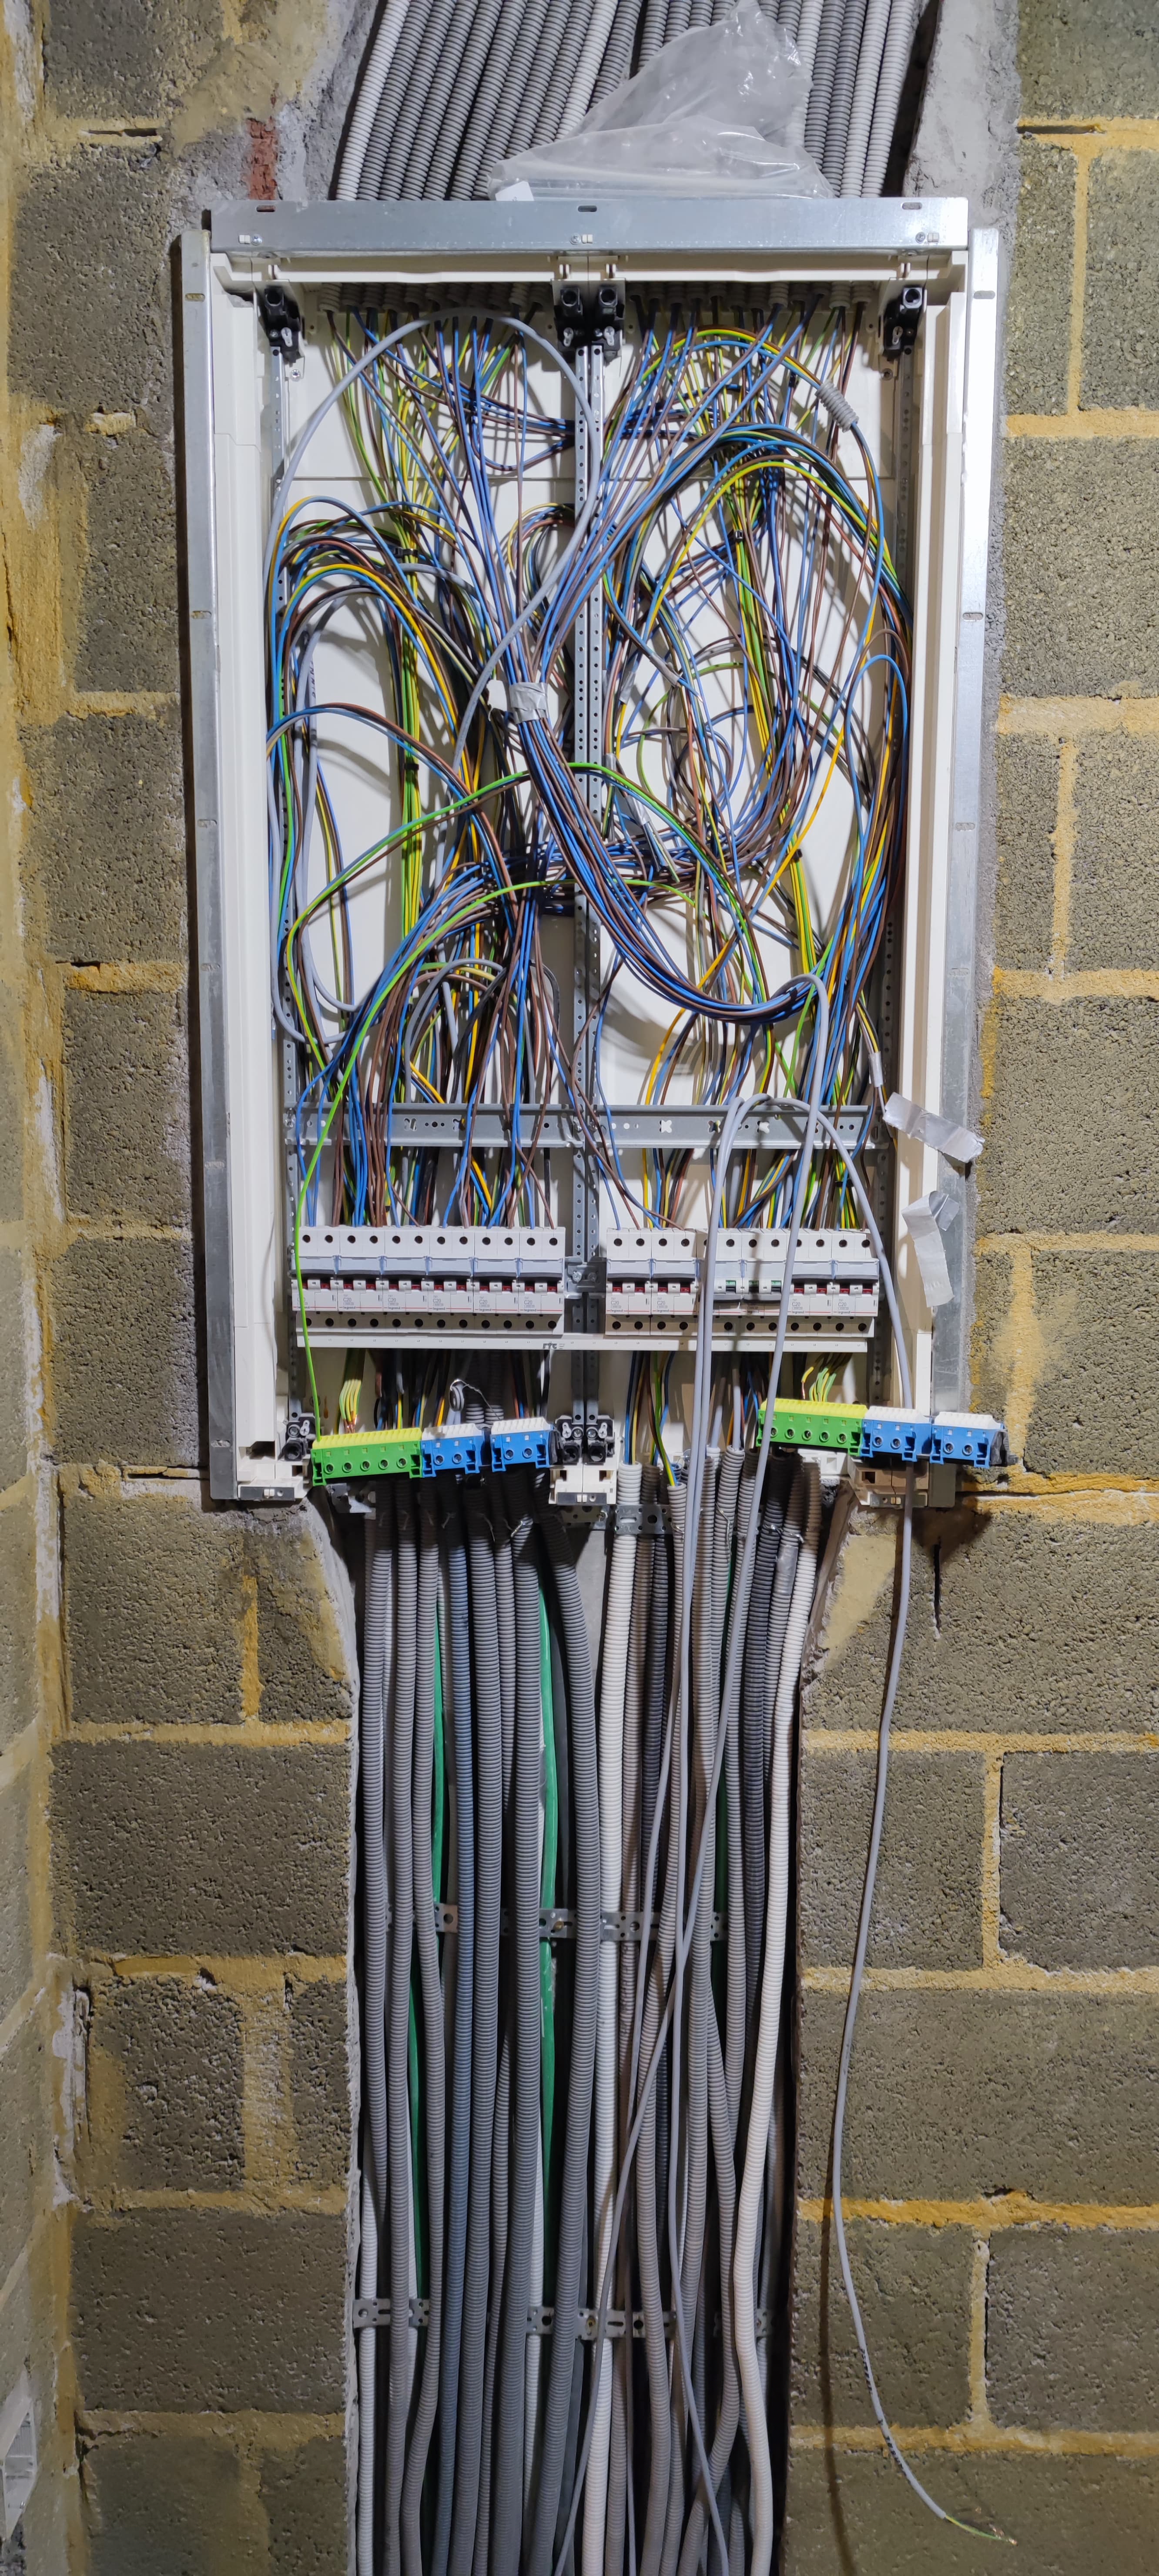
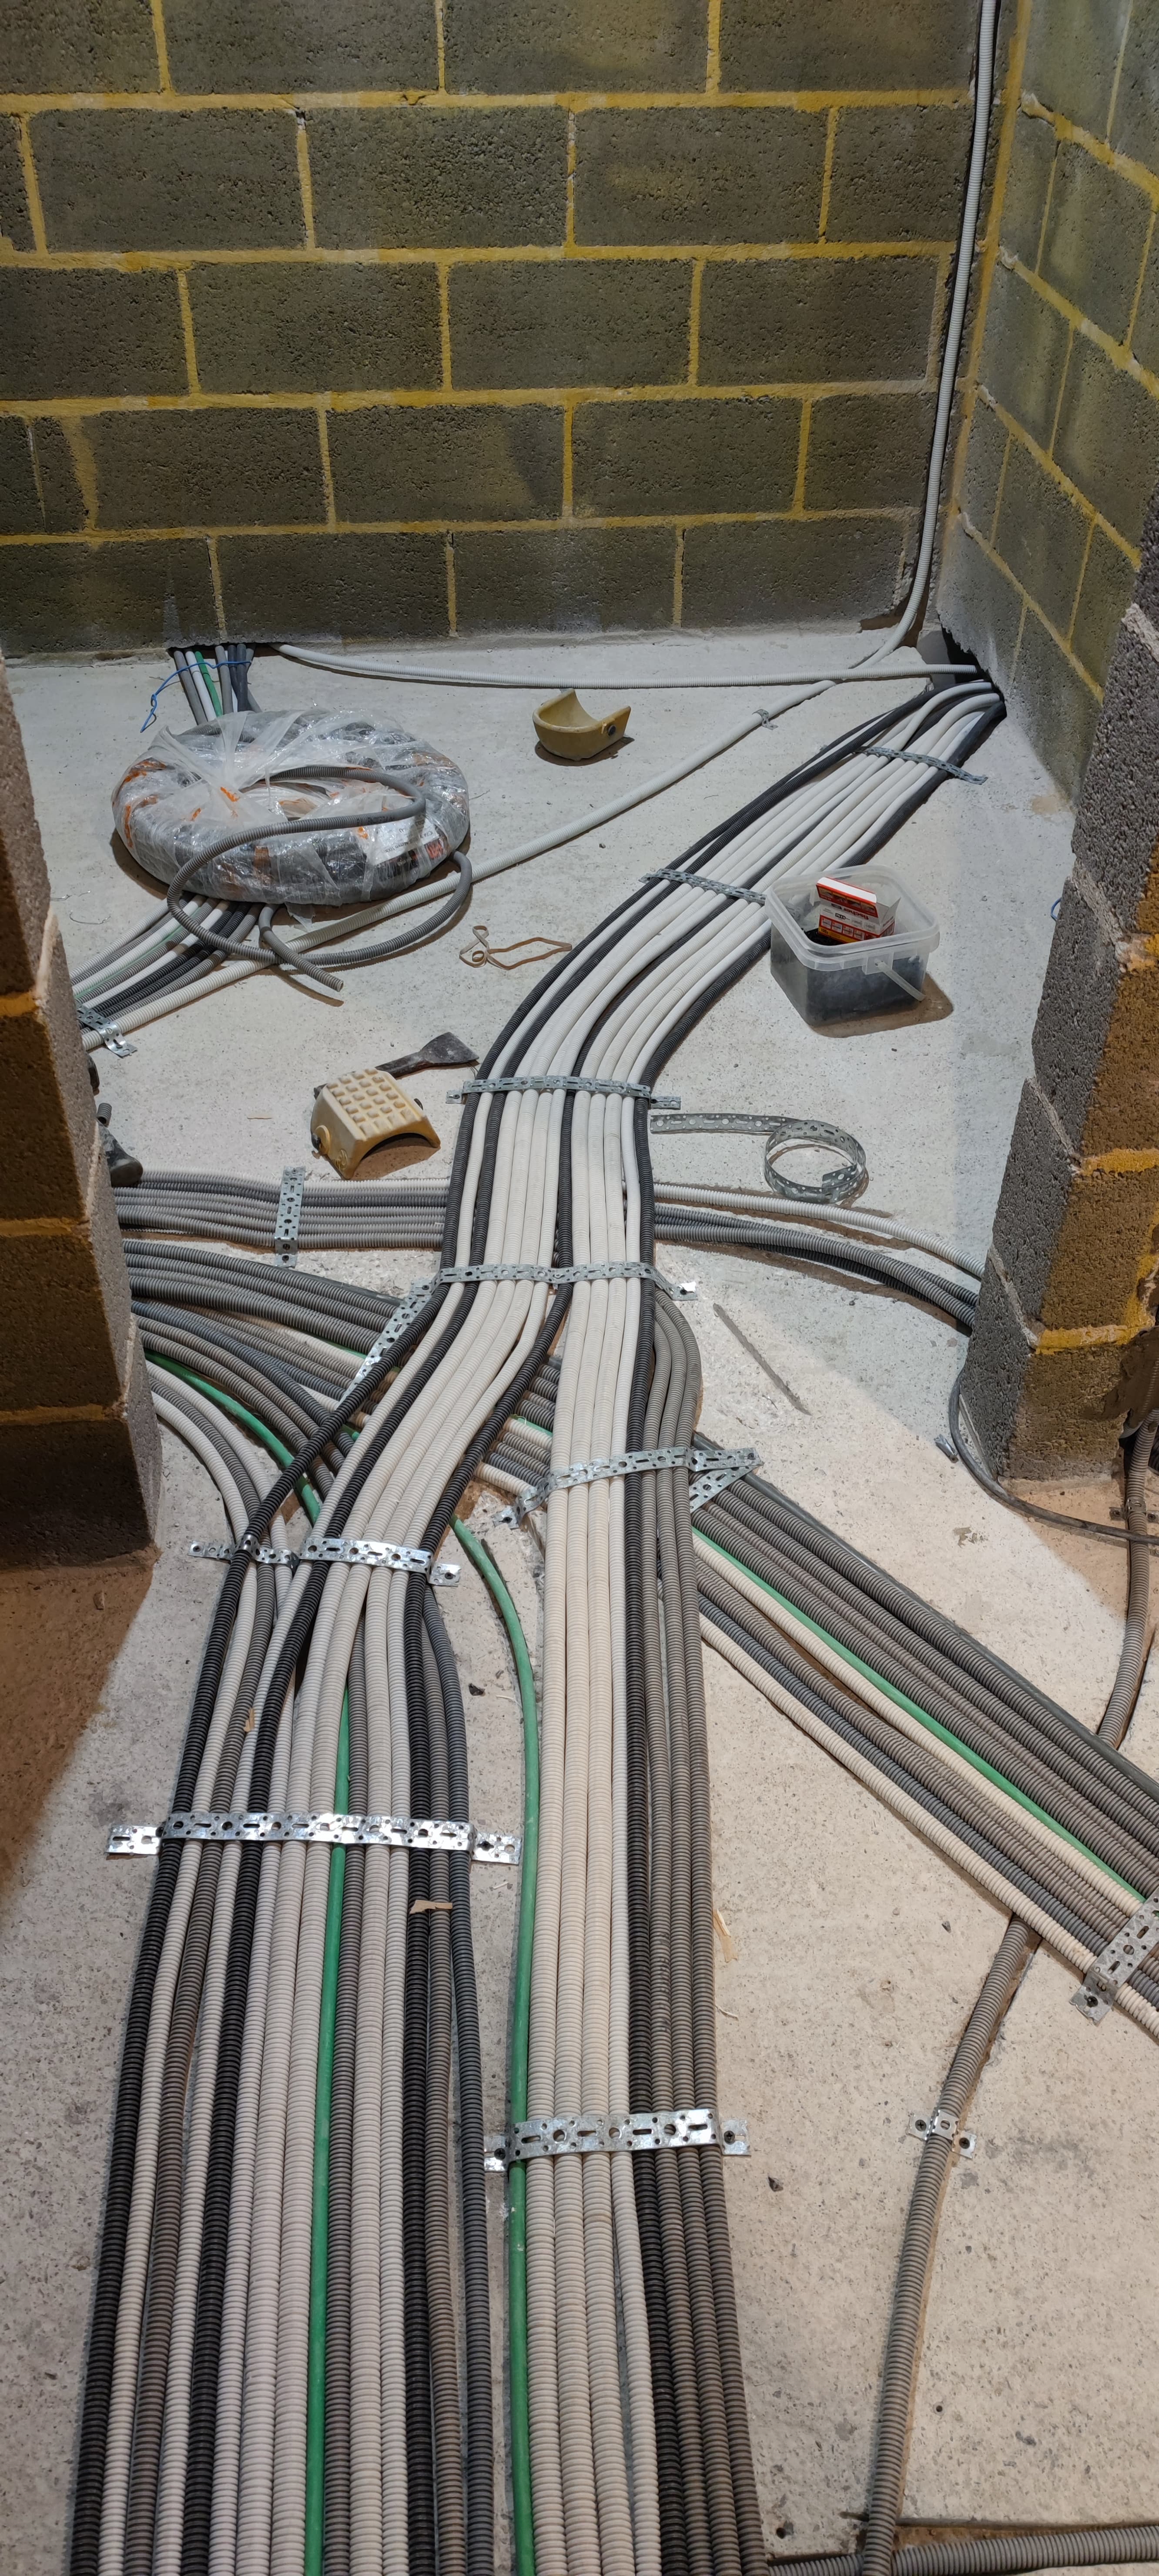
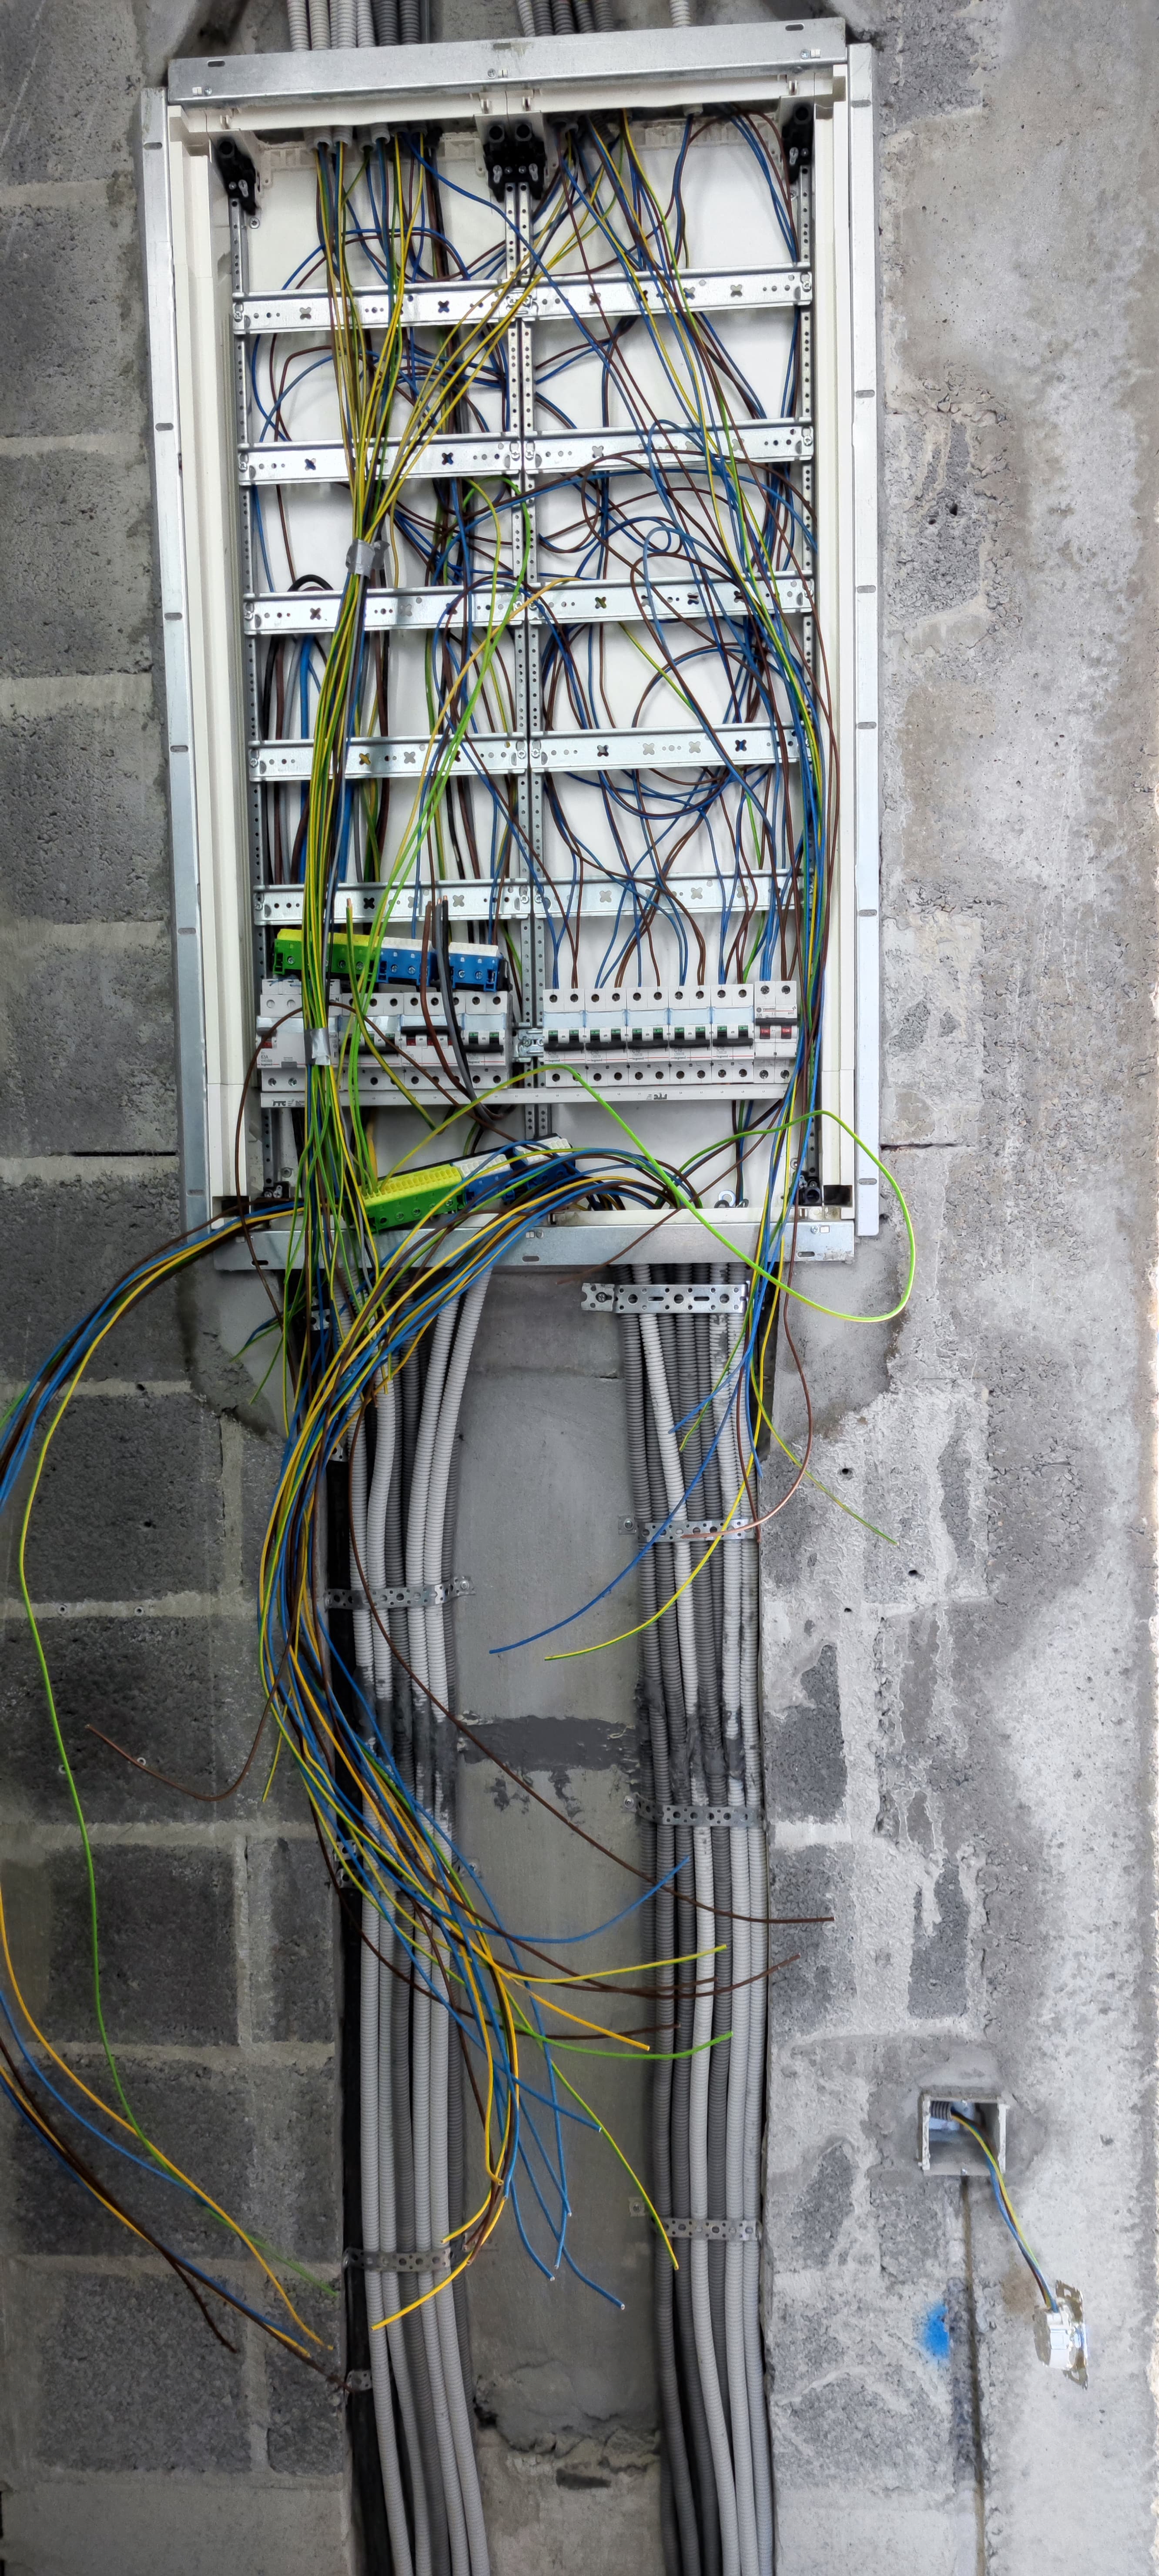
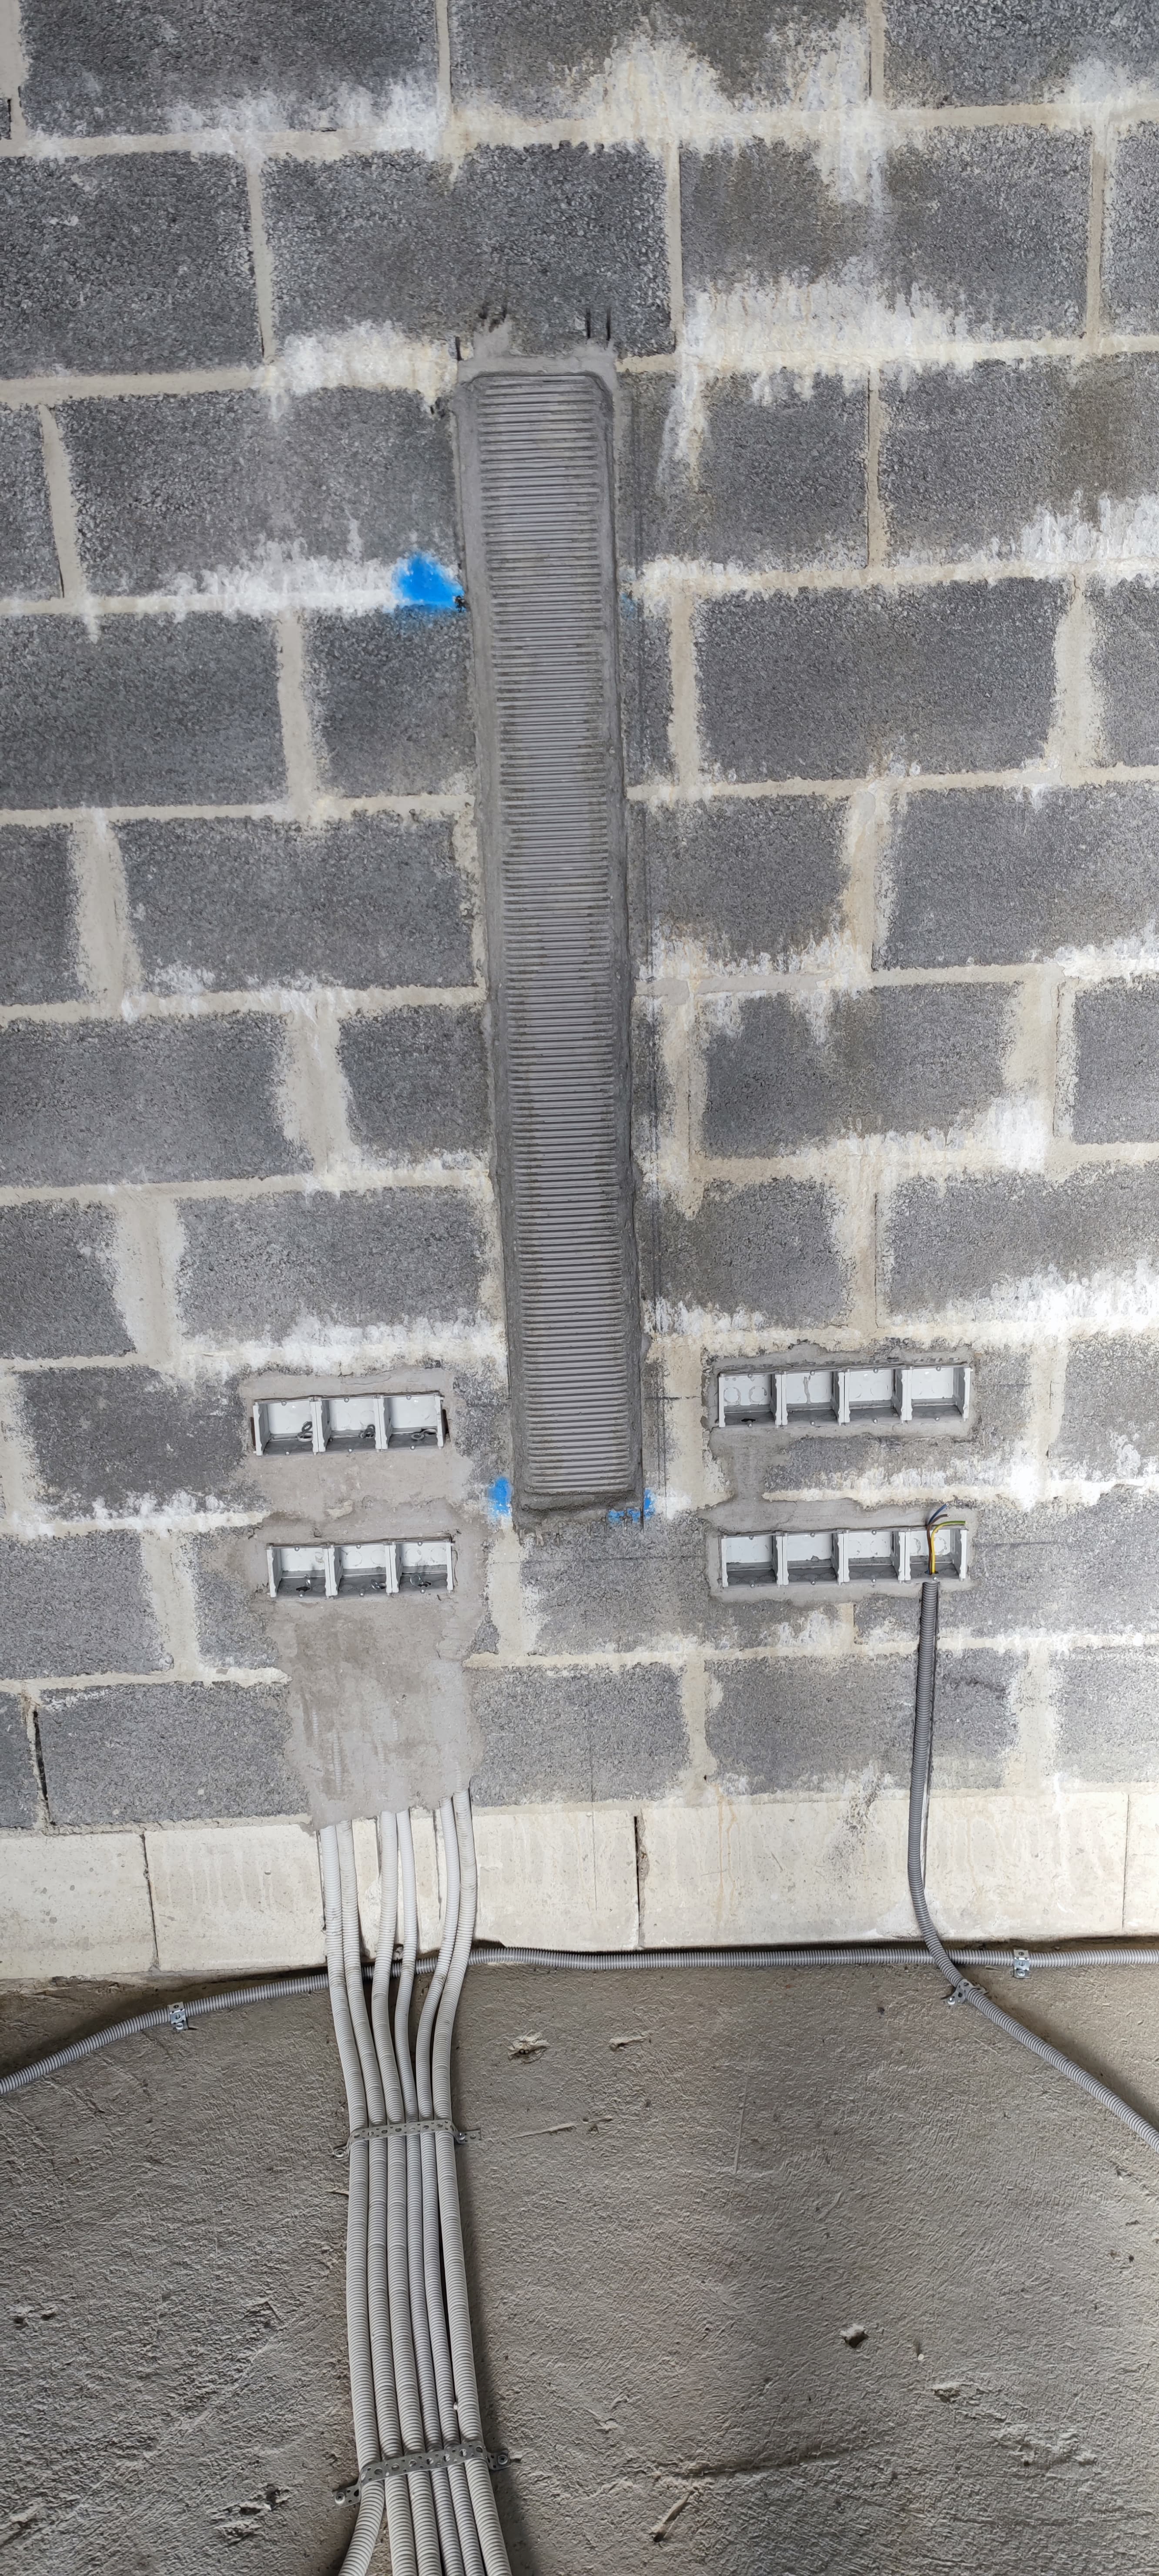
Then working inside, electricity, pipes, ventilation, smaller stuff.


Then smaller interesting stuff that may help, we installed empty pipes going from televisions to desk in my kids room and the sofa room, so that i can pull wires without seeing them from a place to another and the television can be suspended on the wall.


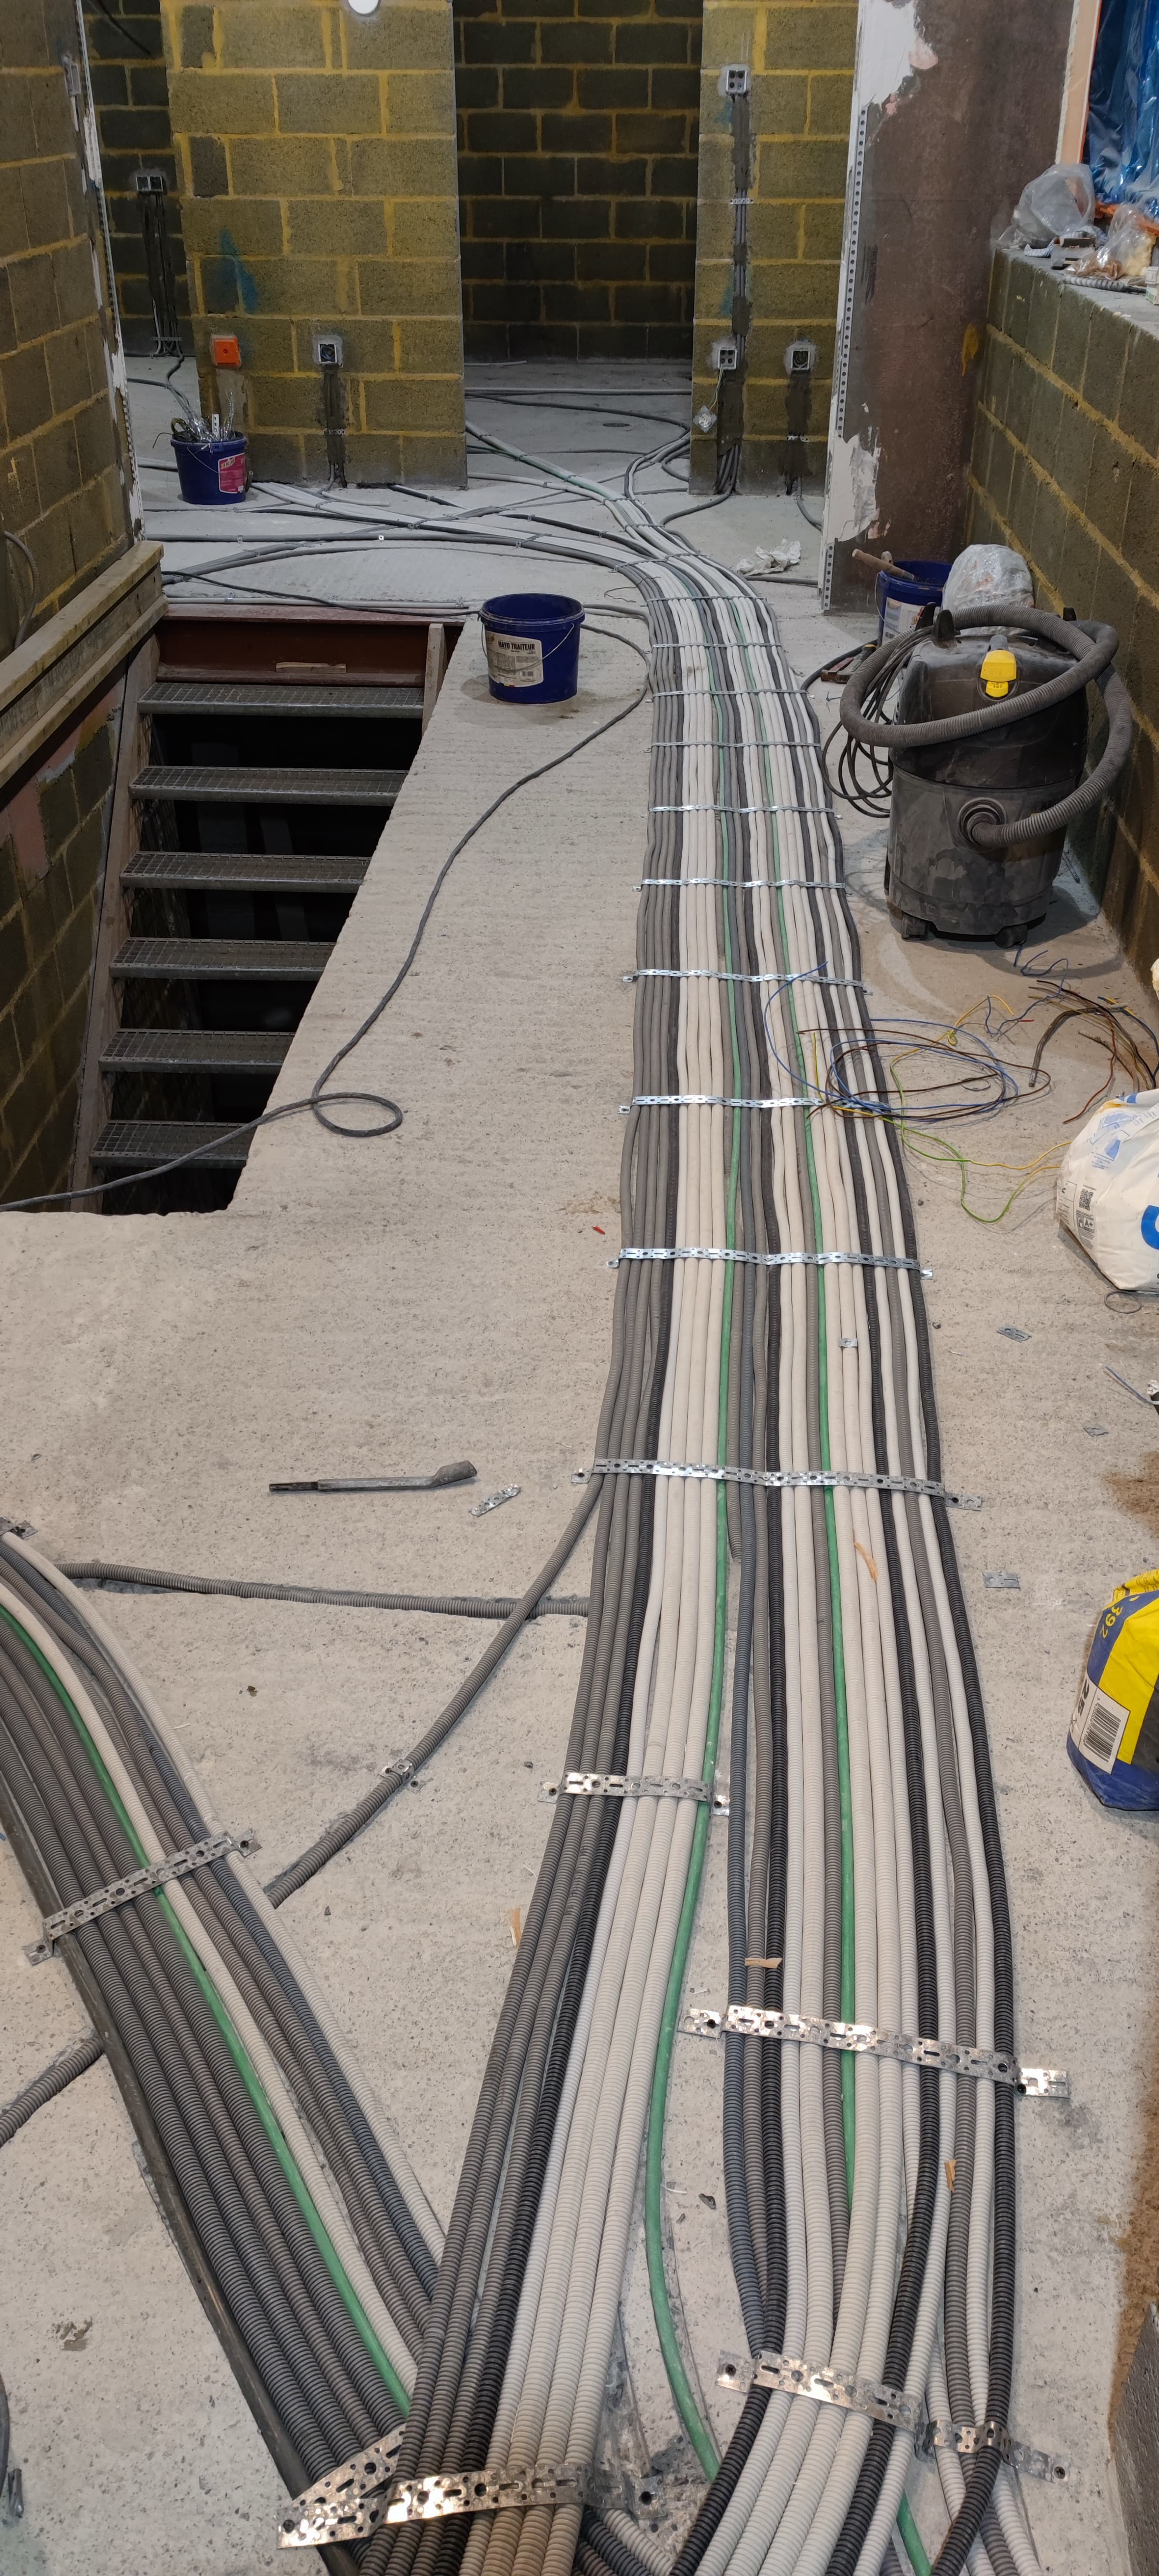
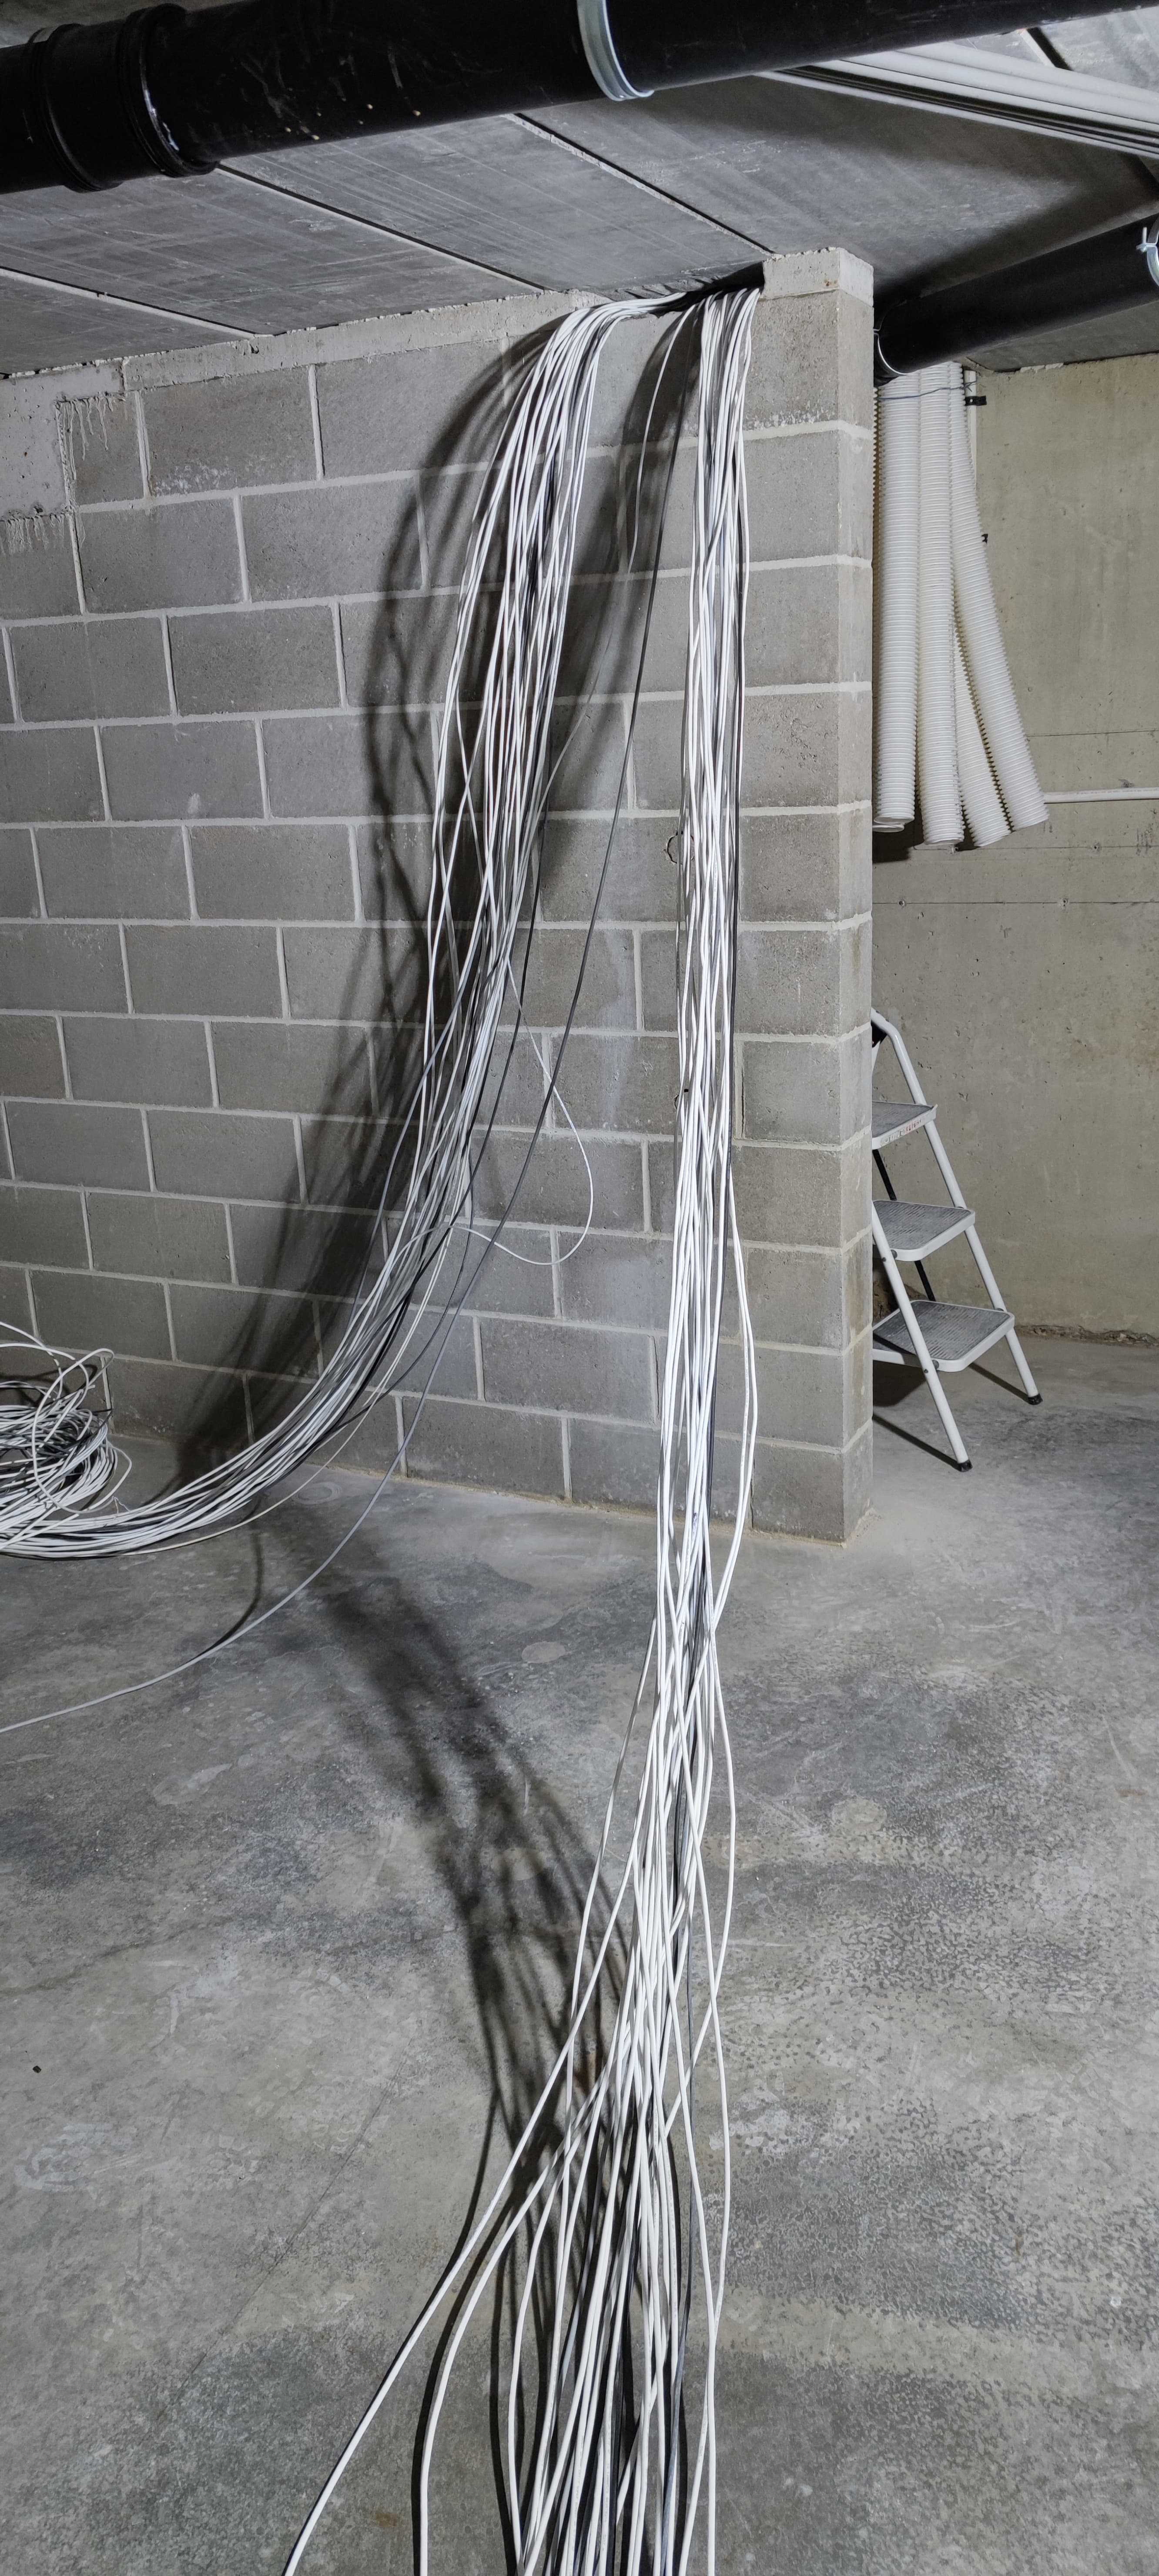
And the amount of network cable coming in the basement
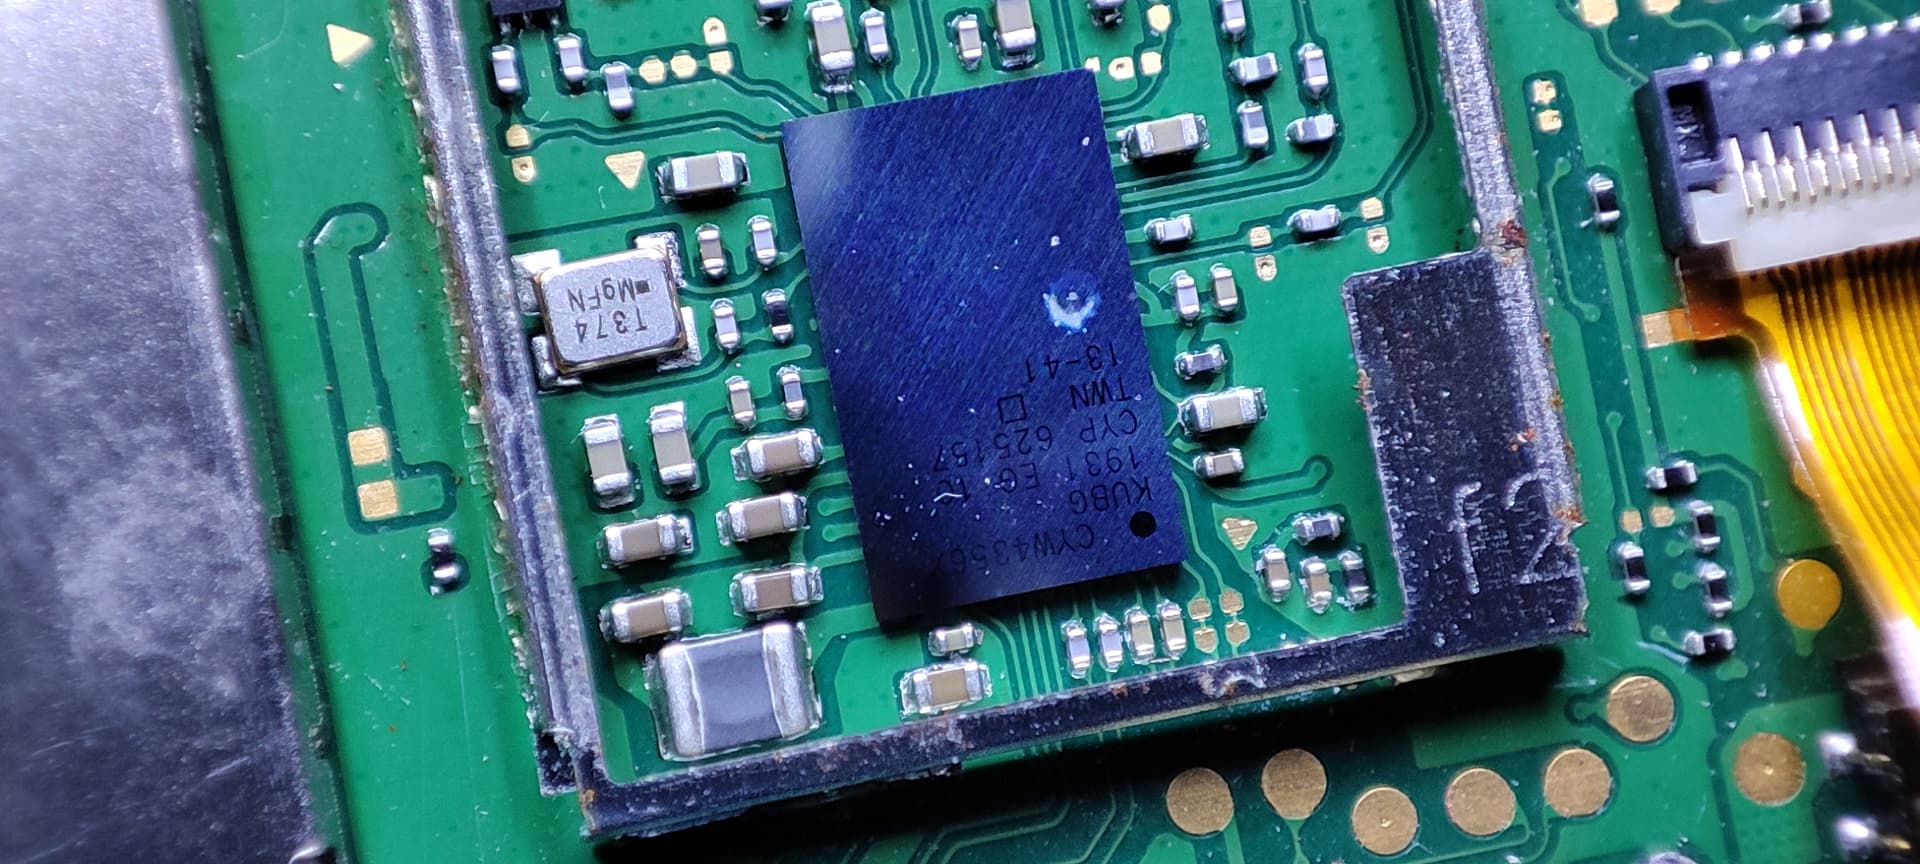
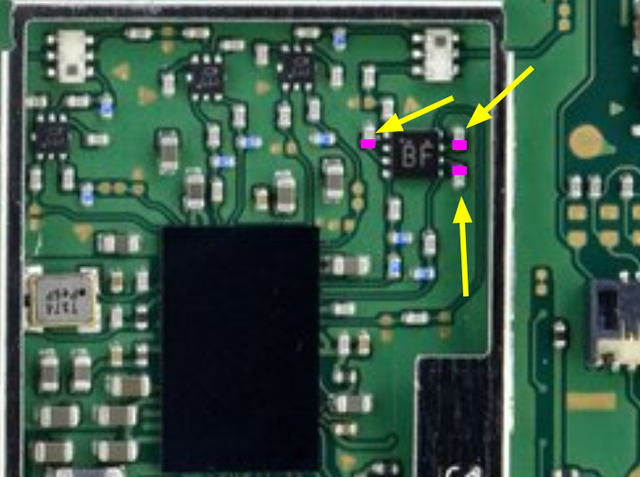
 :rofl:

Wow that looks really impressive bud, imagine it was a lot of fun up to this point but also imagine the insane amount of stress which comes with it :open_mouth:

Where the workshop going to be? :smiley:

1 Like

Basically more fun than stress, the only stress is more coming on the price level, which is going insanely high and forces us to higher the pace and therefore the chance to make mistakes. Up until now we were pretty lucky, we didn’t made any bad one from which we couldn’t recover.
And really i like to work with my father, we have pretty much the same approach to deal with problems and despite the huge amount of experience he’s got in his life about hand working and engineering stuff, he is open to listen my view and agree with ideas from my side when they are good enough to convince him.
The future workshop about soldering I am not sure, but I think I will place everything in the basement, I will have upstairs an office, but not sure I will have enough space on my desk for the whole equipment, as I am doing 100% home office (only employee in Belgium in my company) I need space for my daily working. Even in my current house I use the desk in my son’s room for that, as he is 5 years old he doesn’t need one yet :grin:

Hi, I decided to share my thoughts on the issue being discussed here. Apparently, the Switch (regular and Lite) used to share the same wifi/bluetooth chip, CYW4356XKUBG - but that was util Broadcom took over the company providing this chip. After that, newer switch lites are now coming with a Broadcom chip (BCM4356XKUBG), which I was told to be non-replaceable so I think the latter is bound to the APU.
Other than that, my wifi chip (which is a CYW4356XKUBG) has gone bad and all of the wireless networks it detects have the poorest signal, even mine, despite it being just a few centimeters from the AP, to which it never gets to connect to anymore.
Bluetooth works perfectly with my controller tho.

@Severence how could I tell this is an antenna problem and not the chip? Both antennas (top and bottom) have the pin, they click when plugged into the board connector. I even replaced them both with another set that I removed from a previously repaired switch lite, same results. Should I just go for a reflow or replace the wifi/BT chip anyway?

The chips are the same, one works for one and works for the other - provided it has the switch “FW” on it or it came off a Nintendo Switch to begin with (not sure where all this stuff has came from about them being different or being tied to the SoC)

That being said, I don’t think you have an IC problem based on your symptoms. Sounds antenna or antenna circuitry related to me.

Not initially. Search the forum, I’ve talked briefly before about the first component which has a direct connection to the board connectpr… off the the top of my head it was a 6-pin component… maybe an opamp… not sure tbh so you might wanna start there.

Usual stuff following that, the coax antenna is only two conductors, meaning it’s pretty easy to verify it using point to point continuity tests. You can even strip a phone antenna if the connector is a fit) and use that buzzing out from the stripped wires to the point of interest, then, the point of interest to XYZ and so on. Hope tha makes sense

Thanks for asking, I’ll do as you suggest.
Also, comparing some readouts from a spare board with my working switch lite, and I’ve got some caps next to a mosfet-looking chip. On the spare board, they output 3V on the purple spots (image below) but mine does 0.1V, dead short.
Image:

Would that still be because of a faulty chip or related to the smaller chip?

I’d just quickly pop that smaller IC off and see if it resolves your short. tbh I haven’t really went into full depth in this area so couldn’t even tell you what this chips purpose is. If pulling it doesn’t resolve your short I’ll take a look tomow and see where it’s connecting to the wifi IC and see what is the most probable cause might be

Thanks for your help, Severence. I finally found the time to do it. Just as a quick FYI, my original issue was that my Switch Lite wouldn’t connect to any network (2.4Ghz or 5Ghz) but Bluetooth was fine. I went for that chip replacement and performed it successfully - I know that because those surrounding caps now output 3V (previously they all did 0V) on those spots I highlighted previously. But in reality, things are different. Now the Switch Lite will connect to 5Ghz Access point, but not 2.4Ghz. Also, Bluetooth no longer works. :frowning:

QUICK Edit: You suggested to pull the chip off the board initially. I did, and those caps didn’t change, still outputting 0V, so I proceeded to replace the chip.

So if these are the symptoms since swapping the wifi IC then it most likely points to an issue with your replacment chip or install - that is - if bluetooth was working before but not since.

Did you get the IC preballed somehwere or did you pull it off a donor and reball it yourself with stencil and solder paste?